<img height="1" width="1" style="display:none" src="https://www.facebook.com/tr?id=424649934352787&amp;ev=PageView&amp;noscript=1">

NIFS Healthy Living Blog

NIFS April Group Fitness Class of the Month: TRX

IMG_8764.jpg
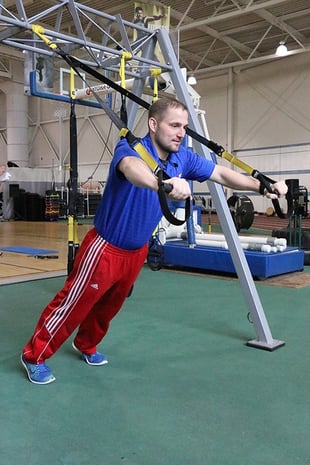
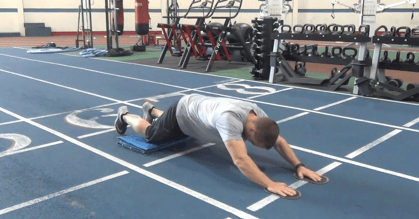
Continuing with our Group Fitness Class of the Month series, for April we are highlighting TRX. TRX suspension training is definitely one of my favorites both to teach and to participate in! If you have not tried a class yet or ever incorporated it into your personal workout plan, you are for sure missing out!You can complete an entire workout on the TRX system or simply use it to supplement any workout plan that you have going. No matter what your current level of fitness is, this minimal piece of equipment will enhance your overall health and fitness!

The Many Benefits of TRX Workouts

Let’s look at why you should incorporate the TRX into your workout regimen.

  • It’s versatile: One of the best things about the TRX system is that you can literally take it anywhere. Use it at home, at the gym, or outside around a tree branch. You can even strap it to the back of a hotel door when you are traveling. This small piece of equipment fits into any suitcase and is about the size of a toiletry bag.
  • Focuses on your core: No matter the exercise, the TRX is great because it utilizes your core in everything you do. Because you have to balance often, the core gets worked no matter what.
  • If you’re tight on time, NO PROBLEM!: This is the answer for those who have minimal time to squeeze in a workout. In even 20 minutes, you can get a full-body workout—and a pretty good one, in my opinion!
  • All workout types are possible: Using the TRX, you can do any workout you want. With the simple TRX straps, you can hit mobility, flexibility, strength, cardio, and balance workouts.
  • Anyone can do it: No matter your age, height, weight, or current fitness level, the TRX can be done by anyone. Each exercise is adjustable to meet all the levels from the first-time exerciser to the daily gym rat.
  • The combinations are endless: There is one thing that I can assure you: when working out on the TRX, you will never get bored. There are so many different combinations of exercises; no two workouts ever have to be the same. I have been a certified TRX instructor for 5 years now and can say I don’t know that I have ever repeated a workout twice.
  • It’s hard!: Don’t knock it if you haven’t tried it. For all those who look over at the black and yellow straps hanging down and think, “That workout is for sissies,” I challenge you to try it! Even the most elite athletes who get on the TRX and really hit some of the challenging exercises will walk away exhausted and satisfied.
  • It’s customizable: Whatever you’re looking for in a workout, the exercises done on the TRX can be customized to meet your needs. You can even begin to incorporate additional pieces of equipment, like kettlebells or dumbbells, into workouts to really up the ante.

Try It at NIFS

If these things don’t sell you on the TRX, you are just going to have to get into the gym and try it out for yourself. With TRX being the class of the month, the staff at NIFS would be happy to have you join us! To get a free class pass for guests to NIFS, click here. Check out the group fitness schedule for when classes are offered.

Like what you've just read? Click here to subscribe to our blog!

This blog was written by Amanda Bireline, BS. To read more about the NIFS bloggers, click here.

Topics: NIFS equipment core TRX Group Fitness Class of the Month

Water Fitness: How to Get Better at Swimming

ThinkstockPhotos-103584574.jpgIn my previous blog on swimming, I talked about the vast benefits that can come from adding lap swimming into your off-season workout regimen. But maybe you are already comfortable in the pool and swim on a regular basis; wouldn’t you like to get better and become more efficient in your stroke? By taking small steps to improve the different components that make up the specific strokes, you can become a better swimmer in a decently short amount of time.

Focus on Form

As other sports, form tends to be one of the key players in overall success. Each stroke has a certain form that will allow the swimmer to be more efficient. Take some time to research the different strokes that you like to do and learn the correct form. Whatever swim stroke you happen to choose, the different pieces will consist of breathing, kicking, arm movement, location of chest and hips in the water, and what you do with your hands, feet, and ankles. I know it seems like a lot to think about, but you may really benefit by simply understanding what the stroke should look like.

Breathe More Efficiently

Breathing tends to be one of the hardest elements of a swimmer’s performance. Getting the breathing technique down right takes time, practice, and patience. Master breathing by using a kickboard or holding onto the side of the pool before combining it with the actual stroke and movement in the water. You also will need to learn your breathing cycle—for example, if I am swimming freestyle, do I need to take a breath every three or four strokes? You may need to learn to breathe on both sides and be able to turn your head to the left and right to get air.

Learn the Body Roll

This movement is used specifically in freestyle. Have you ever seen someone swimming freestyle (on their stomach) and when it’s time to take a breath, they pick their entire head up out of the water? The body roll will allow you to efficiently roll your upper body (and partially through the hips) to get air so that only part of your head is not in the water. This movement can be learned easily using different pool equipment like a pull buoy.

Slow Down

We all have the tendency, when getting into the pool to do some laps, to go a million miles an hour. Whether or not you mean to do it, you will quickly be made aware that you need to slow down because your breathing will remind you! Take your time, be patient, and learn the proper technique in every stroke by putting your foot on the break. You will be amazed, when you slow down the pace a little bit, at how long you can actually swim!

Develop an Efficient Kick

Another great way to improve your overall swimming skills is to learn the different kicks that go along with the various strokes. Each kick has specifics in how far to pull your heel back, how big of a splash you should be making, how far below the surface you want your hips and legs to be, etc. Utilize a kickboard or the wall, as you do in learning to breathe right, to master the different kicks.

Utilize Equipment

There are so many great tools out there to help you learn to swim better. Utilize things like kickboards to improve your breathing and kicking, pull buoys to work on your stroke, and fins to work through power kicks and master the body roll. At most pools you will usually see hand paddles to work on power in the pulling motion to propel you through the water faster, and maybe even gloves that have webbed fingers. All of these things will allow you to work on certain pieces of form one at a time.

Learn the Turns

When I was younger, I spent hours in the pool trying to learn how to do the flip turn. And while many think it’s simply “cool,” the flip turn happens to make your swim efficiency shoot through the roof. This move will also take some time to learn, but if you are patient and work on the timing of the flip turn, your lap swimming will soon be quicker.

Watch and Evaluate

Do not be afraid to have someone watch you and evaluate the different strokes you are working on. Often someone outside the water can easily tell if you are kicking too hard, slapping the water during your stroke, or not efficiently breathing. Take some time to have someone watch and give you tips to work on.

***

While this can seem like an overwhelmingly large list of things to work on, just choose one thing at a time. Each small tweak will make a huge impact on your overall swimming performance.

Remember Natatorium lap swimming is now free with your NIFS Membership! Learn More.

Like what you've just read? Click here to subscribe to our blog!

This blog was written by Amanda Bireline, Fitness Center Manager. To find out more about the NIFS bloggers, click here.

Topics: fitness equipment swimming workout sports

10 Winter Fitness and Wellness Tips

ThinkstockPhotos-619079130-1.jpg Even though I grew up in a northern snow belt along the Great Lakes, cold weather is not my thing. In fact, I really don’t like anything about it. And often along with the winter blues comes a decrease in health and fitness due to the lack of motivation. To counteract that feeling, let’s look at ten tips that can help you be healthier this winter.

  1. Work out. I know it’s easy to lose motivation to keep working out when it’s cold out, it’s dark by 5, and you have to put on your snow boots and warm up the car before going to the gym. But working out actually helps to build your immune system and keep you healthy. So make sure that you build those workouts into your schedule.
  2. Eat well. It’s important to make sure that you stick to clean eating, especially through the holidays. All the additional sweets, snacks, drinks, and other goodies that come with the holidays are sometimes hard to resist; do your best to stay focused on your goals.
  3. Drink lots of water. Being sure that you have proper hydration is always important regardless of the time of year. Carry around a water bottle everywhere you go and make sure you keep drinking.
  4. Cover your head in outdoor workouts. If you do decide to work out outdoors, be sure to wear a hat or something to cover your ears. Making sure you stay warm and don’t catch a cold will be vital to your winter wellness success. (Here are some more tips for dressing warmly for winter workouts.)
  5. Get some sun if possible. Studies show that getting your vitamin D is essential. If you can dress appropriately, try to get outside on a nice day or plan that beach vacation during the cold winter months.
  6. Wash your hands. I know this is the standard thing you see in every public bathroom or on the back of the stall doors. But for real, wash your hands to help prevent you from getting the flu or other illnesses going around. Catching something could really set you back in getting in your workouts and healthy eating.
  7. Set a goal for the spring. Have a goal in place as the winter months start so that you can keep it on the forefront as something to work toward.
  8. Get a trainer or workout buddy. There is no better time to treat yourself to some additional accountability. Hire a trainer for the winter months or find that accountability partner to keep you in check!
  9. Watch your intake. You must be mindful, especially around the holidays, of what you are taking into your body. Also, keep in mind that drinks add a lot of unwanted calories, so watch what enters the black hole!
  10. Join something. The options are endless…group exercise, HIT classes, group training, a training program of some sort, co-ed sports…the list can go on. Find something you like and sign up to keep you engaged.

Whatever emotions the winter months may bring you, use these tips to be successful with your winter fitness and wellness!

 Like what you've just read? Click here to subscribe to our blog!

This blog was written by Amanda Bireline, Fitness Center Manager. To find out more about the NIFS bloggers, click here.

Topics: NIFS winter fitness nutrition fitness center goal setting equipment group training accountability NIFS programs hydration HIT outdoors personal training wellness vitamin D

Max Results with Minimal Equipment, Part 3: TRX

trx-1.jpgIn the two previous installments of “Max Results with Minimal Equipment,” we took a look at sliders and superbands, definitely two of my top “go-to” pieces of gear for when I need big results with small equipment. Now it’s time to cover the big daddy of them all in the minimal gear, max results department: the TRX!

A great deal has been written about the TRX. The work done with the TRX has been huge in recent years, and it’s no surprise that it’s one of the top fitness purchases out there. I have been recommending the purchase of this system to anyone and everyone who will listen. I recommend that you add it to not only your at-home and travel programming, but also your everyday workouts. But considering we are discussing how to get results when traveling or when you can’t make it to the gym, I will keep the awesome attributes specific to that.

Silly Rabbit, TRX Are Made for Everybody and Everywhere!

Here are the top reasons why I recommend this system as a must-own piece of equipment:

  • Portable is an understatement! Coiled up properly in its handy carry cinch-bag, the TRX becomes a small pouch that fits into any suitcase or bag.
  • The setup for use of the TRX is just as simple as it is portable. The TRX can be attached to a tree if you prefer to be outside. It can be attached to a power rack or cable cross machine. Or it can even be hung from your hotel door with a handy door-mount accessory.
  • When using the TRX to perform any movement, you are really using the entire body as well. Changing vectors and bases of support will challenge the entire system, no matter whether you are doing a bicep curl or a jump squat. The system will target your ability to stabilize the trunk in all movements that you perform.
  • The TRX can train mobility, stability, strength, and metabolic resistance. There are not many, if any, pieces of equipment that can do it all, but the TRX can. What separates the TRX from all other pieces is how quickly you can increase or decrease the intensity of the exercise. Just by changing your vector (a fancy word for angle), you can load up an exercise or make it a little easier for timed sets. A single TRX system allows you to target all facets of a solid training program.
  • Countless movement options. I can confidently say that you could rotate through the multitude of exercise choices you can do with the TRX and not see the same exercise for days. There is just so much you can do with just a single system! And if you didn’t learn all you need to know from a NIFS health/fitness instructor on how to get the most out of this equipment, the great people of TRX have complied a mass of workouts and exercises you can use to get the results you are hunting.

My Favorite Movements

Here are few of my favorite movements with the TRX: 

TRX Outside Final

Top Workouts

Enjoy one of these workouts with the TRX:

TRX EMOM: Complete the following Every Minute On the Minute for 10 minutes.

  • 5x TRX Rows
  • 10x TRX Atomic Pushups
  • 15x TRX Squat Jumps

TRX :45/:15: Complete the movements highlighted on the video in order for :45 of work followed by :15 rest.

Like what you've just read? Click here to subscribe to our blog!

This blog was written by Tony Maloney, ACSM Certified Exercise Physiologist and Fitness Center Manager. To find out more about the NIFS bloggers, click here.

Topics: equipment workouts TRX traveling

Weightlifting Gear: Equipment to Enhance Training—or Ego?

lifting.jpg
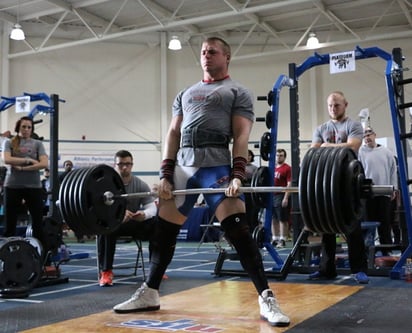
There are numerous different products on the market now that are supposed to help improve your strength training. From lifting belts to Mark Bell’s patented Slingshot, there is more gear available now than ever. For a novice lifter, the multitude of available products will probably just leave your head spinning. What is actually helpful and what is just a moneymaker? Here is my take on some of the most popular products out there.

Lifting Belts

There are some products that I will advise most lifters to stay away from, but this is not one of them! A lifting belt is imperative to a good strength training regimen. Any kind of substantial load for a squat or a deadlift is going to put a lot of pressure into your abdominal cavity, as well as onto your spine. A lifting belt acts as a brace when the lifter takes in a large breath and pushes their abdomen out into the belt. This ensures that the spine stays stable in place and has nowhere to go, resulting in a much-reduced risk of injury. This piece of equipment is the first that I would recommend purchasing for any new lifter, especially if you are thinking about competing in powerlifting.

Not sure if you want to compete? Try it out at the annual NIFS Powerlifting Competition! It is a great starter meet to get your feet wet and see what competition is all about.

Olympic Lifting Shoes

You have probably seen or heard of lifting shoes before. They have an elevated heel and make a nice, loud “SMACK” sound on the platforms at NIFS during a properly executed Olympic lift. These shoes can be helpful for more than just Olympic lifting, though. They can be very helpful for front and back squats (depending on your body type). If you have the right body type (usually tall and lanky), these shoes will create better leverage for you to squat more efficiently. The elevated heel actually shifts your center of gravity forward just a slight bit, which allows the squatter to sit backwards and reach “good depth” easier.

These shoes can be somewhat costly for students. Try to find a good deal on a pair of lifters if you are strapped for cash. The more expensive pairs (Nike Romaleos) can run up to $250 or $300, but Adidas makes a similar shoe that you can find for around $75. If you are not an Olympic competitor, there is not much need to spend a couple hundred dollars on these shoes.

Mark Bell’s Slingshot

So, we have looked at an “almost necessary” product and a “nice to have, but don’t totally need” product. Here is an example of a “don’t really need at all” product. Mark Bell’s Slingshot is a highly elastic band with two arm sleeves on the side, which, once you put the Slingshot on, causes the elastic band to stretch across your chest. Basically, this tool allows the lifter to handle heavier loads on the bench press than they normally could. The few advantages to this product are

  • Less shoulder pain for those with very severe shoulder issues
  • Overloading the bench press with above-maximal weight
  • Frankly, loading your ego by seeing how much you can bench when using it

If you’re thinking I am just hating on Mark Bell or his product without just cause, please reconsider. I am a big fan of Mark and his no-nonsense business style. He knows what his product is for and to whom he should market it. I even have a Slingshot of my own! That being said, I think there are too many young lifters who buy his products just because they see him as an idol and they want to be like him in any way possible. The Slingshot is a tool that can be utilized by experienced lifters, and it can be helpful. But, for the beginner lifter, this product will almost certainly do you more harm than good.

Start with the Basics

There is a time and place for most lifting products, but most of them are not needed until you are way down the road to being competitive. Start with the basic products that will benefit you, not confuse you. A lifting belt is a great product to start with, and possibly a pair of lifting shoes. Do your research about all lifting products and try to determine which ones will work the best for you. I urge you to not just buy any of these products on a whim, thinking that they have to help you because somebody famous said so.

Like what you've just read? Click here to subscribe to our blog!

This blog was written by Aaron Combs, NSCA CSCS. To find out more about the NIFS bloggers, click here.


Topics: NIFS equipment NIFS programs injury prevention weightlifting powerlifting strength training

Max Results with Minimal Equipment, Part 2: Superbands for Resistance

Screen_Shot_2016-08-23_at_1.59.16_PM.png
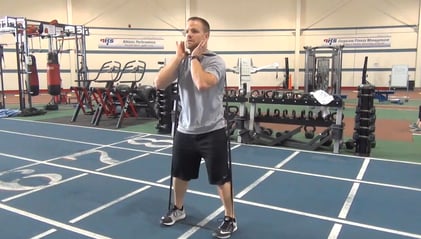
Next up on the minimal gear with max results list is truly one of my favorites, the superband. In part 1, we took a look the slider and all its versatility and ability to challenge the body in many different ways. The superband provides even more options with very little gear (mainly because we can perform more pulling movements with the band). So now we add “load” to a movement pattern on top of gravity. The superband is definitely next on the packing list when I travel, and I always have one available at home.

Favorite Portable Exercise Equipment: The Superband

The superband has been gaining in popularity over the last decade or so. With its easy-to-use and on-the-go capability, the superband has become a staple in many programs, from the weekend warrior (guys and gals like you and me) to elite-level athletes. Dave Schmitz, also known as “the Bandman,” has been teaching and promoting the use of superbands (resistance bands) since the mid-1990s. I have learned a great deal from Dave, not only about programming using bands, but also the motivation to reach as many people as I possibly can.

The band can be used anywhere, all by itself or attached to a stationary object or partner. This versatile tool uses tension as its load, and maintains resistance pretty much throughout a range of motion, which skyrockets its potential for strength gain and metabolic cost of the movement. The movement possibilities are endless, which can provide so much variety to your program either at home or away.

Best Superband Exercises and Workouts

Here are some of our favorite superband exercises:

Workouts:

M & M Bands Final

Circuit—:40/:20—3–5 Rounds

  • Front squats
  • Deadlifts
  • Bent-over rows
  • Jump press
Strength
  • A1 Chin-ups      4x5 (add load)
  • A2 Band push-ups      4x max reps
  • B1 2KB front squats      3x8-10
  • B2 Band hip press      3x8-10
  • C1 Band 1/2K lift      3x8
  • C2 Band bent-over rows      3x8
Give a few of these (or all of them) a try in your current program or on your next trip and you will find out what the band can do for you. Take along your sliders and you’ve just doubled the movement capabilities, and yet you are still only at two tools.

Stay tuned for the next installment, when we take a look at easily one of my favorite pieces, the TRX.

Like what you've just read? Click here to subscribe to our blog!

This blog was written by Tony Maloney, ACSM Certified Exercise Physiologist and Fitness Center Manager. To find out more about the NIFS bloggers, click here.

Topics: NIFS fitness center equipment workouts resistance

Max Results with Minimal Equipment, Part 1: Sliders

Screen_Shot_2016-08-10_at_11.21.07_AM.pngIn my eight years at NIFS, one major thing I am so lucky to have is a world-class fitness facility right outside my office door. Some of the greatest fitness equipment surrounded by some of the greatest fitness minds are at my fingertips every day. I love to move, and I love to move here, but many times I need to move outside of these walls, and of course I will have to leave the awesome gear where it lies.

But have no fear; there are some options that can maximize results with minimal gear. My first choice is my NIFS’ fitness floor, but in this four-part series, I will highlight my favorite tools to use when you can use only one.

Favorite Portable Exercise Equipment: The Slider

Today we take a look at the innocent-looking but brutal tool the slider, also known as a Valslide. You may have seen them used to move heavy furniture. This simple and versatile tool can challenge most movement patterns as well as create balance and stability needs. With movements ranging from beginner to advanced, there is really something for everybody when using sliders. They can act as a focal point of a metabolically driven circuit, or in a core-targeting segment, as well as super-setting with a heavy strength movement.

And one of the most appealing attributes of the slider is that you can take it anywhere without taking up any space. You will find that the four implements I will be highlighting all have this in common. The other thing these have in common is that they take away your excuses for not training while you are away.

Best Slider Exercises and Workouts

Here are 10 of my favorite slider exercises and some workouts that you can try out.

VIDEO WORKOUTS:

Circuit—:40/:20—3–5 rounds

  • Reverse lunges
  • Burpees
  • Hamstring curls
  • Pushup reaches

Strength

  • A1 barbell deadlift5x2

  •  A2 slider slideouts—3x10

  •  B1 DB flat bench press—3x8-10

  •  B2 slider eccentric hamstring curls —3x8-10

  •  C1 lat pull-downs—3x8

  •  C2 slider lateral lunges—3x8

M & M Sliders Final

There are far more movements and ways to use the versatile slider. For more ideas, flag down a NIFS instructor and they will be happy to help. Until next time when I cover the superband, add a few of these movements into your workout and start reaping the benefits of this simple tool.

Like what you've just read? Click here to subscribe to our blog!

This blog was written by Tony Maloney, ACSM Certified Exercise Physiologist and Fitness Center Manager. To find out more about the NIFS bloggers, click here.

Topics: NIFS cardio fitness center equipment workouts balance core exercises traveling

Triathlon Swimming Training: Tips from NIFS

tri.jpg
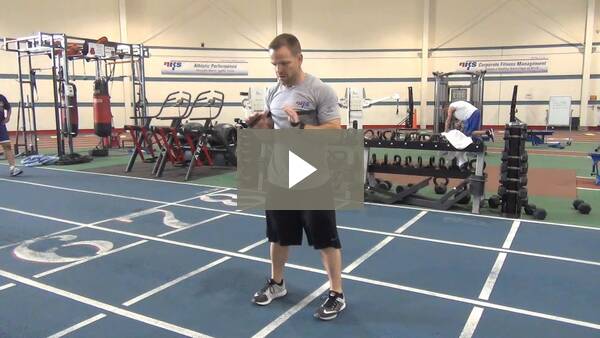
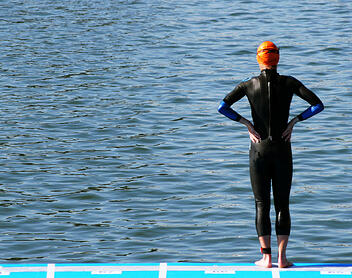
For many triathlon participants, the swim is the most difficult discipline. Open-water swimming is different than following the black line on the bottom of a pool. Here are some tips to help the swim portion of the race go more smoothly.

Get Good Equipment

Get a good suit and goggles (there are specific ones for different face shapes). Spend some extra money and get advice from a good swim shop.

Get Help with Form, Drills, and Workouts

You need to make sure your stroke is efficient and repeatable, so that you will be confident in the race. Here are a few drills to get you started. Most of your swim workouts will include a drill set. Pick from the variety of drills here:

  • Catch-up Freestyle: Promotes better rotation and arm-stroke mechanics.
    Start by kicking facedown with both arms extended in front of you. After 3-4 seconds, perform a complete pull with one arm and rotate fully to that side. Immediately rotate back on your belly and catch up to the forward arm with the arm that just pulled. Kick for 3-4 seconds and then pull with the other arm and rotate.
  • Count Stroke: Helps to improve overall stroke efficiency.
    Count the number of strokes you take while swimming one complete length of the pool with normal freestyle. Try to lower the number of strokes taken in each length. You will achieve this by taking longer, more powerful pulls, rotating more, and allowing yourself to glide a little bit. Feel free to exaggerate these elements in order to decrease the stroke count.
  • Fingertip Drag: Promotes complete arm extension and proper hand position in the release.
    Swim a normal freestyle stroke, except consciously drag your fingertips across the surface of the water during the recovery phase.
  • Fist: Helps with shoulder rotation and increases pull. 
    Swim with your fists clenched. This drill helps with rotation and working on the elbow bend in the catch portion of the arm cycle in order to create a powerful “paddle” for the pull.
  • Bilateral Breathing: Practice breathing on both sides.
    Most triathletes are only able to breathe to one side while swimming, but breathing on the non-dominant side is very important during a triathlon (and during training, too!). Swim your normal freestyle stroke while breathing on every third stroke (right-left-right) instead of every second or fourth (right or left only). Stick with it and you’ll steadily improve.
  • Sighting: Simulates race-day skills. 
    Sighting is an important skill when you swim in open water without lane lines to guide you. It consists of modifying your swim stroke to look ahead and spot a landmark to aim toward. In a normal freestyle stroke, you turn your head directly to one side to inhale and then turn your head back to a neutral position with your eyes looking toward the bottom. When you sight, you instead turn your head to look forward to spot a landmark, inhale, then put your face back in the water. When practicing, swim normally and sight every 4 to 6 strokes.

Practice in Open Water

This is important! The pool is great for getting in mileage and form work, but the dark water with no lane lines can add stress to race day. Try to find a open swim area to practice sighting and getting used to swimming in a straight line.

Do Plenty of Mileage

If your race is 500 meters, make sure you can do almost twice the distance. In the beginning that may seem like a lot, but you will be much more comfortable on race day if you are always doing extra work beforehand.

Train with Others in Your Lane (or in Your Way)

This is important if you cannot get to open water. During a race there are often fellow racers swimming by, over, or near you. Have someone swim next to you and occasionally hit you, splash you, or harass you. This will help you focus on your stroke, focus on breathing to the opposite side, and get you ready for all challenges on race day.


TRI-HEADER-pink.jpgRegister_Button_Icon_for_client_website.jpg

This blog was written by Kris Simpson BS, ACSM-PT, HFS, personal trainer at NIFS. To read more about Kris and NIFS bloggers click here.

Topics: NIFS fitness equipment workouts group training swimming triathlon NIFS programs training women

Safe Workouts in the Dog Days of Summer

ThinkstockPhotos-497566061.jpg
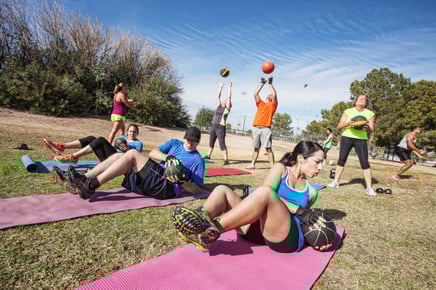
So many people have been expectantly waiting for this hot summer weather to be able to get outside for their workouts. And I can tell you that I am also one of those people; but there are some dangers behind the dog days of summer that we all need to be aware of.

Taking your exercise outside is an awesome idea, but I wouldn’t cancel that gym membership so fast. Let’s take a look at both the dangers of the steamy outdoor workouts and ideas on how to stay cool.

Why Outdoor Exercise Can Be Dangerous in Hot Weather

When the temperatures and humidity rise, working out outside can become dangerous, and it can happen very quickly without anyone even realizing it. The hotter and more humid it becomes, the more you sweat, and the sweat cannot evaporate as quickly as it should. Because of this, your internal body temperature rises and can become deadly.

Some warning signs and symptoms of reaching that dangerous and potentially deadly state are weakness, dizziness, muscle cramps, confusion, headache, increased heart rate, and vomiting.

How to Keep Cool for Summer Workouts

But there are some ways that we can help ourselves during the dog days of summer if you do choose to work out outside. Take a close look at this list and consider taking these steps:

  • Hydrate, Hydrate, Hydrate. Drink as much water as possible for proper hydration.
  • Wear sunscreen. Lather up with sunscreen to protect your skin.
  • Wear sunglasses. This important piece of equipment protects your eyes and conserves energy.
  • Get the proper clothing. You want to wear light and loose, moisture-wicking clothing.
  • Consume the proper nutrition. Eat a well-balanced diet, and make sure to eat something small before you head out for a long run or Bootcamp class.
  • Check the air quality. This is important because it affects how you breathe. The higher the level of AQ, the harder it will be to breathe; the lower, the better. According to EPA standards, if the air quality number is over 100, it’s not good. If it’s below 100, it’s considered satisfactory air level.
  • Stay out of the sun. Look for shade to work out in.
  • Monitor your heart rate. If it gets too high, take a break.
  • Listen to your body. If your body is telling you stop or it’s too hot, listen to it!
  • Stay inside if it’s above 90. It’s better to hit the gym than to put yourself in danger.
  • Bring water to your workout. Try to keep hydrating yourself as you work out; don’t wait until you are thirsty.
  • Cool towels help. Take a cool, damp towel and put it over your head or around your neck.
  • Wear a loose-fitting hat. Wearing a tight hat holds the heat to your head, so in order to protect yourself from the sun, wear a loose-fitting hat that allows your head to breathe.

If you do decide to work out outside in the dog days of summer, do the best you can to take the proper precautions and protect yourself from harm. Listen to your body and be sure not to over-do it!

Like what you've just read? Click here to subscribe to our blog!

This blog was written by Amanda Bireline, Fitness Center Manager. To find out more about the NIFS bloggers, click here.

Topics: fitness center equipment injury prevention summer hydration sunscreen

Proud Chest: Hacking the Squat Pattern for Weightlifting

squat-patternnew.jpgSquats, really any variation, are easily one of the most popular exercises out there today. The squat pattern is a fundamental and big-bang movement when done correctly. But before you throw a bunch of weight on a bar and step underneath it, it’s important to focus on some details to help minimize some minimums that will ultimately lead to a cleaner and safer squat.

Getting the Foundation Right

I love the phrase from Gray Cook that goes, “More is not better; better is better,” when it comes to progressing a particular movement. As a society and fitness community we are eager to jump waist-deep into something without considering the notion that you can drown in only 2 inches of water. It is so important that you mind a solid performance pyramid where movement is the foundation before jumping right to performance or skill. Doing so will ensure proper patterning, leading to even bigger lifts (if that’s your thing) and, more importantly, keeping you safe.

Assessing Your Squat Pattern

So how do you know whether your squat pattern is at an optimal level? Get assessed! If you are not assessing, you are guessing (I can’t remember who I stole that from), so know your minimums before jumping into some maximums. The upper-body/chest area falling forward while squatting is a common issue we see on the fitness center floor. Maintaining a “proud chest” (I adopted that phrase from Gym Jones), or keeping the chest up, is a key squat pattern component.

Two Ways to Maintain a Proud Chest

Here are two simple and effective ways to develop and maintain a proud chest in your weightlifting squat pattern:

Like what you've just read? Click here to subscribe to our blog!

This blog was written by Tony Maloney, ACSM Certified Exercise Physiologist. To find out more about the NIFS bloggers, click here.

Topics: NIFS fitness center equipment weightlifting powerlifting squat pattern assessments fms