<img height="1" width="1" style="display:none" src="https://www.facebook.com/tr?id=424649934352787&amp;ev=PageView&amp;noscript=1">

NIFS Healthy Living Blog

Flight School: Training to Improve Your Vertical Jump for Sports

GettyImages-1291852744When watching elite athletes during competition, there are many athletic traits and features that we novices or amateurs marvel at. We think to ourselves, “If I did something like that, I wouldn’t walk for a week!” Seeing an NFL running back or wide receiver make a cut at full speed, a baseball player hitting a 400-foot home run, or a powerlifter deadlifting the weight of a Volkswagen Beetle are feats that just leave you in awe.

One of my favorites is to watch the jumping ability that is on display in countless basketball, football, and many other sporting events. Nothing seems to get fans and folks like myself more fired up than to watch an NBA player effortlessly float in the air and dunk on an opponent, or an NFL receiver jump up over two or three defensive players and come down with the football. No doubt, the combination of high-level athletic ability and hard work has paid off for many of these professional athletes with what seems like superhuman abilities. There is a reason that we see these men and women on TV and pay to see them during competition. The capabilities of the human body are crazy!

Improve Your Jump to Improve Your Sport

So, many of you reading this are probably not professional athletes. You might be former high school or college student athletes who have since “retired” from your respective sport. Like many of us, the “athlete” in us never really goes away. We find other sports or competition to feed that drive that we had as we grew up by playing recreational-league sports like basketball, flag football, or soccer, or have picked up new sports such as golf (like this guy) or tennis. And if you’re anything like me, you want to try and continue to improve in your new sport as much as possible.

Regardless of where you are in the timeline of your athletic journey, the vertical jump and vertical power will always play an integral role in your performance. Basketball and volleyball are the most obvious sports that are reliant on these abilities, but golfers, tennis players, and athletes in any other sport that utilizes rotational aspects would benefit highly by increasing their vertical jump. I mean, who wouldn’t want to hit the golf ball farther or add a few more miles per hour on their tennis serve?

When it all comes down to it, the amount of force we can put into the ground will dictate a lot of the athletic actions that happen with our bodies.

Three Jump Training Styles

Below I break down three different types of jump training styles that will put you on your way to soaring above the competition.

Body Weight

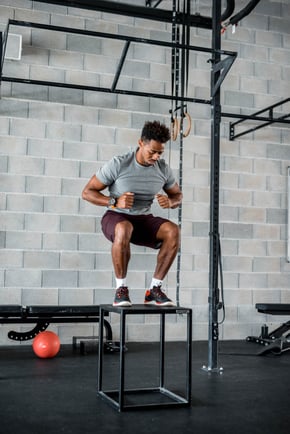
This is the most common type of jump training that you will see. Utilizing only the weight of your body, you perform these plyometric jump movements with little or no equipment. In the video below, you will see three movements starting from easiest to most advanced. These include the following:

  • Wall Touches
  • Box Jumps
  • Depth Jumps


Resisted Jumps

Now we get into some of the less common vertical jump training options. Resisted jumps add some type of downward-pulling resistance that will make your jump seem more difficult and hopefully help you generate more effort into the movement. The movements in the video below include the following:

  • Medball Powerball
  • DB Resisted Jumps
  • Band Resisted Jumps


Assisted Jumps

The third variation is assisted jumps. In my opinion, these are the most enjoyable. The goal here is to feel like there is a trampoline-effect going on where you just seem to spring up into the air. Most (if not all) variations will utilize a band. The three movements I have chosen for you are the following:

  • Banded “Belt” Jumps
  • Band Rack Pogos
  • Band Rack Squat Jump


All in all, the vertical jump is a very important skill to improve and master with regard to overall athletic ability. When it all boils down, the amount of effort you put into the training will dictate the results you get. Doing the majority of your jumps at 50 percent effort will yield an improvement in just that: jumping at 50 percent. Try to maximize your effort with each set and repetition where you are working at or above 90 percent effort, whether that be because of doing lower repetition ranges (1–5 reps) and/or making sure that you are fully recovered between sets (about 1–3 minutes’ rest).

Give great effort, get great results!

Like what you've just read? Click here to subscribe to our blog!

This blog was written by Alex Soller, Athletic Performance Coach and NIFS trainer. To find out more about the NIFS bloggers, click here.

Topics: resistance videos sports body weight athletes athletic performance lifetime sports exercise bands vertical jump vertical power jumping jump training

King of the Gym, Part 3: Bodyweight Squats

Heavy weights can get exhausting, but don’t give up on squats just because of that. Instead, give bodyweight squats a try. In part three of the “King of the Gym” series, I focus on bodyweight-only variations on barbell back squats. Sometimes you need a break from all the heavy barbell training. That’s when bodyweight squats become useful by keeping you strong and well-conditioned.

The Air Squat

To start off, you must master the classic bodyweight squat, also known as the air squat. Keep your feet shoulder width apart, toes pointed forward, and the weight centered over your feet. Go down as deep as possible. At the bottom, push through your heels and the balls of your feet to begin ascent. All the while, keep your chest up and push into the ground until you are back up straight again. One rep completed!


Air Squat Variations

All the variations below are for the air squat and can be used for different purposes. Some can be used for mobility, while others used to build strength. Add them to your training program as you see fit.


Pick at least one variation from this list and start practicing it within your fitness routines. Drill down the different techniques of these alternatives to help strengthen areas of weakness within your barbell squats and become more extremely efficient when you do get back to barbell squats again.

Next in the Series

In part 4 of the series, I focus on bodyweight again, but set up some conditioning routines you can do at home, outside in the park, or in a hotel when on the road. As I have reiterated in each of the previous installments of this series, regardless of your fitness goals, some form or fashion of squats can and should be added to your fitness routines.

Like what you've just read? Click here to subscribe to our blog!

This blog was written by Michael Blume, MS, SCCC; Athletic Performance Coach. To learn more about the NIFS bloggers, click here.

Topics: exercise at home fitness center core strength bodyweight squat

Keeping Your Food Safe This Summer

GettyImages-459911339It is estimated that there are almost 48 million cases of foodborne illness/food poisoning in the United States each year (source: https://www.foodsafety.gov/food-poisoning). Of these cases, around 128,000 individuals are hospitalized and about 3,000 deaths occur. Rates of foodborne illness are higher during the summer months, as they are often warmer and more humid—the ideal environment for bacterial growth. In addition, many people participate in outdoor food-related activities, such as picnics, barbeques, and campsites, where the typical safety controls of a kitchen, such as refrigeration, cooling, and running water, are not always available

Keep reading to learn about the common causes of food poisoning, their symptoms, and steps you can take to protect your food this summer.

Common Food Poisoning Culprits and Their Symptoms

The onset time of the signs and symptoms of food poisoning depend on the type of virus, bacteria, or other pathogen you were exposed to and the symptoms can range from mild to severe. Some of the most common food borne illness causing pathogens and their symptoms include the following.

Salmonella

Symptom onset: 6 hours to 6 days after exposure.

Signs and symptoms: Diarrhea, fever, stomach cramps, vomiting.

Food sources: Raw or undercooked poultry and meat; eggs, unpasteurized (raw) milk and juices; raw fruits and vegetables.

Staphylococcous aureus (Staph)

Symptom onset: 30 minutes to 8 hours after exposure.

Signs and symptoms: nausea, vomiting, stomach cramping.

Food sources: Foods that are not cooked after handling (sliced meats, pudding, sandwiches, etc.).

Clostridium Perfringens

Symptom onset: 6 to 24 hours after exposure.

Signs and symptoms: Diarrhea and stomach cramps (vomiting and fever are uncommon).

Food sources: Beef, poultry, gravies, dried and/or precooked foods.

Norovirus

Symptom onset: 12 to 48 hours after exposure.

Signs and symptoms: Diarrhea, nausea, stomach pain, vomiting.

Food sources: Leafy greens, fresh fruit, shellfish, unsafe water.

Clostridium Botulism

Symptom onset: 18 to 36 hours after exposure.

Signs and symptoms: Double/blurry vision, drooping eyelids, slurred speech, muscle weakness.

Food sources: improperly canned or fermented foods.

Escherichia Coli (E Coli)

Symptom onset: 3 to 4 days after exposure.

Signs and symptoms: Severe stomach cramping, vomiting, diarrhea (sometimes bloody).

Food sources: Raw or undercooked ground beef, unpasteurized (raw) milk and juices, raw vegetables (sprouts, lettuce), unsafe water.

Listeria

Symptom onset: 1 to 4 weeks after exposure.

Signs and symptoms: headache, stiff neck, fever, muscle aches.

Food sources: Soft cheeses, raw sprouts, fresh melon, hot dogs, and other deli meats.


Individuals at Increased Risk for Foodborne Illness

People who are most at risk include the following:

  • Pregnant women and infants.
  • Children younger than 5 years old.
  • Elderly (> 65 years of age).
  • Immunocompromised (cancer, HIV/AIDS, autoimmune diseases, etc.)


6 Steps for Practicing Food Safety This Summer

Follow these tips to avoid food poisoning at your summer gatherings.

Wash Your Hands

Always wash your hands with warm, soapy water for at least 20 seconds before, during, and after food preparation and handling. Be sure to dry your hands completely after washing using a clean towel. If you don’t have running water or access to safe water, be sure to bring wet disposable wipes, paper towels, and surface disinfectant for cleaning hands, cooking surfaces, and utensils.

Keep Cutting Boards and Utensils Clean

Use separate cutting boards, serving dishes and other utensils (tongs, spatulas, etc) for cooked and raw foods. Be sure to thoroughly wash all items that come into contact with raw food with warm soapy water prior to reuse.

Get a New Plate After Handling Raw Meats

Never serve cooked foods on the same plate or platter that once held raw meat, poultry, or fish to avoid cross-contamination.

Thaw in the Refrigerator

Thaw food in the refrigerator rather than at room temperature or on the counter.

Cook to Safe Internal Temperatures

Use a food thermometer to ensure the food reaches safe internal temperatures:

  • Beef, pork, lamb, veal (steaks, roasts, chops, etc.): 145F
  • Ground meats (hamburgers, etc.): 160F
  • Whole and ground poultry (chicken, turkey): 165F

Don't Leave Food Out

Refrigerate leftovers within 2 hours after cooking. If outdoor temperatures exceed 90F, refrigerate perishable foods within 1 hour. Keep your refrigerator below 40F.

Like what you've just read? Click here to subscribe to our blog!

This blog was written by Lindsey Recker, MS, RD, NIFS Registered Dietitian. To learn more about the NIFS bloggers, click here.

Topics: summer picnics food safety illness prevention viruses bacteria food poisoning

Have You Gained Weight Since the Start of the COVID-19 Pandemic?

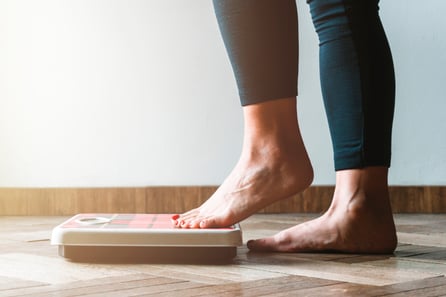
GettyImages-1286893989According to the American Psychological Association’s latest Stress in America™ survey conducted in late February 2021, 42% of adults reported undesirable weight gain since the beginning of the pandemic, with an average weight gain of 29 pounds. This shouldn’t come as a surprise to many, since almost everyone was stuck at home, the gyms were closed, and people turned to food for comfort.

Six Tips for Losing Pandemic Weight

If you’re struggling to manage your weight following the stress of the COVID-19 pandemic, lockdown, and restrictions, try some of the following suggestions for getting back on track.

1. Establish a healthy eating routine.

Aim to eat three well-rounded meals each day. Meals don’t have to be complicated: the easier and quicker, the better. Try pairing a protein source (such as chicken, salmon, or ground turkey or lean beef) with various grilled, roasted, or steamed vegetables and seasonings and sauces of your choice for a quick, inexpensive, and easy meal.

2. Count calories.

The only tried-and-true method for losing weight is to eat fewer calories than you expend each day. Often when people eat healthy but don’t count calories, they tend to overestimate the number of calories they expend and underestimate the number of calories they eat, leading to weight gain/maintenance and frustration. To determine your individualized caloric needs, speak with a registered dietitian or get an estimate from the USDA’S DRI Calculator for Healthcare Professionals.

3. Stay active.

Fifty-three percent of adults reported that they have been less physically active than they would prefer since the beginning of the COVID-19 pandemic, according to the Stress in America™ survey. Physical activity is a great method for managing weight and stress, and has even been shown to improve sleep. If you don’t feel comfortable going to the gym, take a walk outside. If you’re not able to safely walk outside, create your own walking route inside your home or apartment and take several brief walks throughout the day to keep moving. Try to incorporate at least 30 minutes of physical activity into your routine every day.

4. Limit alcohol consumption.

According to the Stress in America™ survey, 23 percent of adults reported drinking more alcohol during the pandemic as a coping mechanism for stress. The calories in alcohol tend to add up quickly, and too much alcohol can lead to unhealthy habits like overeating. To prevent alcohol-associated weight gain, be sure to drink in moderation, which is defined as no more than two drinks per day for men and one drink per day for women.

5. Manage stress.

There is evidence to suggest that increased cortisol, the hormone released during stress, may result in an increased appetite, leading to overeating and potential weight gain. Instead of turning to food for comfort, be sure to control stress through mindfulness and meditation, exercise, and social support.

6. Get enough sleep.

The Stress in America™ poll also found that 35 percent of adults noted getting less sleep since the start of the pandemic. Sleep plays an important role in losing weight, as inadequate or poor-quality sleep can affect the hormones that control hunger and satiety, may result in less energy for exercise, and could make you more susceptible to making poor food choices. The National Sleep Foundation recommends between 7 and 9 hours of sleep each night for most adults.

Weight-loss Help from NIFS

NIFS can guide you in your weight-loss journey. Our popular Ramp Up to Weight Loss program has been adapted so that you can participate virtually from home  or at NIFS.

Find out more about Ramp Up to Weight Loss. Contact us today!

This blog was written by Lindsey Recker, MS, RD, NIFS Registered Dietitian. To learn more about the NIFS bloggers, click here.

Topics: stress weight loss calories alcohol covid-19 lockdown pandemic

King of the Gym, Part 2: Lower-Body Training with Simple Equipment

If we had learned anything during our time during COVID, we’ve found creative ways we can train to get fit and stay strong in our living rooms, garages, basements, and backyards with our favorite squat racks. In part 2 of my blog series, you’ll learn how to use something simple like a dumbbell, kettlebell, med-ball, or light equipment like resistance bands to functionally train your lower body in place of the “king of the gym” back squats. 


Videos: No-barbell Exercises

If you don’t have a squat rack and barbell at the ready, there are a variety of different worthy alternatives to back squats—with no barbell required. Here are seven “king of the gym” alternatives that can use a kettlebell, dumbbell, med-ball, or bands.

The exercises in the preceding videos are great alternatives for anyone, especially if you can’t make it into the gym but you do have some light equipment at your disposal.

Functional Training for the Lower Body

Even if you are in the gym, but you don’t quite like the idea of doing a heavy-loaded barbell lift, you can still create resistance for your lower body. Resistance doesn’t mean loaded barbells; instead, these alternative exercises are loaded differently to functionally train the lower body. 

In part 3 of the series, I focus on body weight only, and in part 4 I set up some different routines you can do in a hotel when you’re on the road. Regardless of your fitness goals, you can and should add some form or fashion of squats to your fitness routines. 

Like what you've just read? Click here to subscribe to our blog!

This blog was written by Michael Blume, MS, SCCC; Athletic Performance Coach. To learn more about the NIFS bloggers, click here.

Topics: exercise at home equipment videos lower body squat pandemic