<img height="1" width="1" style="display:none" src="https://www.facebook.com/tr?id=424649934352787&amp;ev=PageView&amp;noscript=1">

NIFS Healthy Living Blog

Is Your Weight Belt Really Helping You?

GettyImages-993462726If you are like most people who enjoy lifting weights, you probably have worn a weight belt or own a cool one that helped you get that new squat max deadlift PR, But did you really NEED it? Most of the time we follow what we see others do, which is fine, but remember: everyone is different, and you could be slowing down your own progress by cinching that belt on extra tight every time you feel the need to go heavy.

What Exactly Is That Weight Belt for, Anyway?

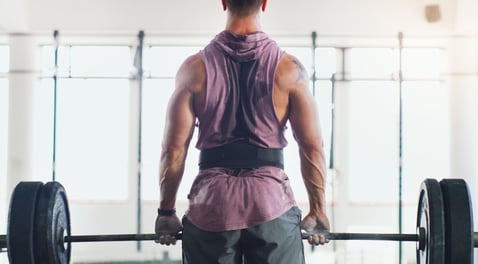
A weightlifting belt serves to assist in creating more intra-abdominal pressure. The belt provides the lifter reinforcement when they breathe-brace or create pressure in the torso by exhaling and contracting the abdominal wall before externally loading the spine (picking up the weight). However, if the lifter does not breathe-brace, and instead tries to create pressure by tightening the belt too much and or bulges the abdominal wall out to touch the inner ring of the belt to feel secure, the abdominal pressure is significantly less, stability of the truck and spine is decreased, and now that weight belt is more of corset (a fashion statement) than a lifting tool.

Am I Saying You Should Stop Using a Weight Belt?

No. If you do not have trouble bracing and lifting without a belt up to 80 percent of your 1-rep max, you can stop reading. However, try testing your ability to breathe-brace first, before you determine your need for a weight belt. You can even put this breathe-brace activity into your warm-up to make sure everything is good to go.

The Breathe-Brace Test

Supine

  1. Lay flat on your back with legs bent and feet flat on the floor. Place one hand on your belly, and the other on your chest. Take about four deep breaths. The air can be inhaled through the nose and exhaled through the nose, or in through the nose and out the mouth through pursed lips. On each inhale, use your belly to make the hand on it rise as high as you can (hopefully higher than the hand on your chest). When you exhale, blow out as much air as you can while pulling your belly in tight (the belly hand should sink toward the floor).
  2. Once you have done four deep breaths, take one more, and this time when you exhale, as you blow the air out and the belly hand sinks toward the floor, contract your abdominals (you may even notice a tilting of your rib cage down toward your belly button) as you use your belly to push the air out. If you can stiffen your abs without bulging your belly out, you’ve got it!

Prone

  1. Lay flat on your belly with legs straight. You will need something soft to place under your belly (an ABMAT or folded towel) because it will replace your hand in this method.
  2. You can place your hands down at your sides, long above your head, or use them as a rest for your forehead.
  3. Similar to the supine method, take about four deep breaths. While inhaling, push your belly out to feel the mat underneath you. When you exhale, blow as much air out as you can by pulling your belly in tight away from the floor.
  4. Finally, take one more breath in. This time, as you blow out and pull your belly away from the mat, contract your abs. You may again notice your rib cage tilting down slightly toward your belly button.

This breathing method is encouraged by yoga enthusiasts, but is very effective in the weightlifting realm as well.

Once you have mastered the method on the ground, try doing it while standing. Then take it to the lifting platform or rack. You will notice over time you have more stability, and less spinal flexion and extension throughout heavy lifting, and you are now strengthening the muscles you need to brace and stabilize your spine before using a weight belt. Mastering your breathing and core control will make it easier to find the correct tightness on your weight belt when the time comes.

Don’t Use a Belt to Work Around a Problem

Lastly, we all should have the goal to move without assistance from any sort of crutch or brace, and a weight belt should not be used to work around a problem simply to lift heavy. Work on your breathe-brace skill, and you may only need your weight belt for those big-time lifts, and of course to show off occasionally!

Like what you've just read? Click here to subscribe to our blog!

This blog was written by Keith Hopkins, MS, MA, CSCS, USAW. To read more about the NIFS bloggers, click here.

Topics: equipment weight lifting weightlifting breathing heavy lifting

Build a Bigger Engine with Aerobic Training (Part 2 of 2)

GettyImages-1217027916-1Last time, I covered a few of the benefits of building your aerobic base:

  • Ability to recover more quickly between bouts of high-intensity exercise
  • Ability to sustain higher-threshold movements for longer (think being able to hit more heavy singles on bench or deadlift with the same rest)
  • Ability to handle more acute rises in training volume
  • More efficiency, as you’re able to remain in an aerobic state for energy for longer periods (before resorting to another system like anaerobic/glycolytic)

Cool, Lauren! Now, how the heck do I train my aerobic system? How do I start to build that base? Here are a few examples of ways to incorporate aerobic training into your fitness plan.

Contralateral Circuits

As the name implies, a contralateral circuit involves working opposite sides of the body while performing a two-part, compound movement—for example, a step-up with the right leg followed by an overhead press with the left arm. Each movement is performed for time, typically 20–30 seconds, followed by a short period of rest while you switch to the opposite side to perform the movement.

By cycling between exercises that work opposite limbs and opposite sides of the body (think diagonally across), we are taxing the cardiovascular system in a relatively novel way. Specifically, as blood is pumped and pools in working limbs for 20–30 seconds (right leg/left arm), the heart has to work slightly harder to then switch to pumping blood to ensure that the next group of contralateral limbs is adequately supplied (left leg/right arm). Heavy weights aren’t involved; typically it’s a combination of bodyweight exercises, bands, or light weights. But after 20–30 minutes of near continuous movement, chances are you’ll see that some sweat has appeared!

Here’s a quick example of exercises that can be linked together for a contralateral circuit:

  • Reverse Lunge Right + Band Row Left x 0:25/0:30 rest and transition
  • Reverse Lunge Left + Band Row Right x 0:25/0:30 rest and transition
  • Step-Up Right + DB Overhead Press Left x 0:25/0:30 rest and transition
  • Step-Up Left + DB Overhead Press Right x 0:25/0:30 rest and transition
  • Single-leg RDL Left + DB Row Left (Right stance leg) x 0:25/0:30 rest and transition
  • Single-leg RDL Right + DB Row Right (Left stance leg) x 0:25/0:30 rest and start over

Escalating Density Training (EDT)

This type of training not only trains your aerobic system, but also allows you to gradually build up volume on particular lifts. So if you in any way resemble me and aren’t the number-one fan of running, this might be for you! Escalating Density Training involves working for 5-minute blocks continuously. You alternate between two lifts, usually opposite in nature (upper vs. lower body), and complete only 1–2 reps of each before returning to the other movement.

For example, you can pair a Kettlebell Goblet Squat with a DB Bench Press. So, for 5 minutes you complete one rep of a Goblet Squat, followed by one rep of DB Bench Press. You can keep a tally of how many rounds you complete in 5 minutes and compare for future sessions to see whether you’re able to do more work in the same period of time. Typically, you can complete three blocks of EDT in one training session, separated by 3–4 minutes of rest. All in all, you’re completing 15 minutes of high-quality work.

Here’s an example of an EDT session:

  • Block 1: KB RDL/DB Overhead Press x 5:00 --> 3:00 rest post round
  • Block 2: Sandbag Clean & Squat/TRX Row x 5:00 --> 3:00 rest post round
  • Block 3: DB Incline Press/Goblet Reverse Lunge x 5:00 --> cooldown

A Long Walk or Hike, Focusing on Nasal Breathing

This one is pretty simple, but surprisingly effective. Getting used to nasal breathing, as opposed to mouth breathing, has more than a few benefits. One of them is that it allows our body to become better adapted to handling CO2 as we produce it during exercise and movement in general. Why does this matter? This has been shown to lower resting heart rate, improve pH regulation, and improve our body’s ability to cycle and filter out metabolites.

So, the next time you head out for a hike at a state park or a stroll through your neighborhood, see if you can maintain a moderate pace while only nasal breathing. If you feel the need to breathe out of your mouth, that’s fine! Each time you go out, simply see how much you can do with nasal breathing, trying to push that time or distance bit by bit each session. Bonus? You get to enjoy the great outdoors.

Low-intensity Modalities + Breath Holds

I came across this method after listening to Cal Dietz, Strength & Conditioning Coach at the University of Minnesota, at multiple conferences and clinics. He’s worked with numerous Big Ten Champions, NCAA National Champions, and Olympians throughout his career. When working with athletes as they return from a hiatus in training (i.e. post summer semester), he has employed a 2-week period focusing primarily on aerobic training.

One method he’s used is 10-second exhalation and breath holds while performing light aerobic exercise. For example, while on a Concept2 Rower, he’ll have his athletes find an easy, maintainable pace for 1–2 minutes. For the next 10–15 minutes while maintaining that pace, athletes will exhale at the beginning of every minute and hold their breath following that exhale. They will attempt to hold their breath until the 10-second mark of that minute. So, if it takes 4 seconds to exhale, they’ll then try to hold their breath for 6 more seconds. Once you start breathing again, the goal is to stabilize the breath as quickly as possible.

After trying this myself, it was surprisingly difficult. There was a sense of being uncomfortable, obviously the urge to breathe, some slight tinging, followed by immense relief after the 10-second mark. I’m listing this last because it’s something I would work up to. Can you try it right off the bat? Absolutely. But don’t feel that you need to continue the breath hold for the full 10 seconds. Maybe its only for 5–6 seconds while you acclimate to the training.

***

All in all, there are various ways to train the aerobic system, and there isn’t one that fits all. But if you’re looking to sprinkle some variety into your routine, one of these modalities might be for you. As always, the goal with these workouts isn’t to leave you running for the trash can. If it does, take it down a notch.

Like what you've just read? Click here to subscribe to our blog!

This blog was written by Lauren Zakrajsek, NIFS Health Fitness Instructor, Personal Trainer, and Internship Coordinator. To learn more about the NIFS bloggers, click here.

Topics: walking workouts training weight lifting high intensity aerobic breathing