<img height="1" width="1" style="display:none" src="https://www.facebook.com/tr?id=424649934352787&amp;ev=PageView&amp;noscript=1">

NIFS Healthy Living Blog

Conjugate Training: What It Is and How to Implement It

GettyImages-1448297445Conjugate training is a term coined and expanded upon by the late, great Louie Simmons, a well-known strength coach at Westside Barbell. Conjugate means to bring together, so conjugate training is literally joining together different training styles into one micro or meso training cycle. Conjugate training is bringing together training styles such as power, strength, agility, and hypertrophy into one training cycle.

Balancing Across Different Days

The key to conjugate training is to balance the volume across the different days. It’s common to have a setup as follows (but this is only an example):

  • Day 1: Upper-body pull—hypertrophy
  • Day 2: lower-body push—strength
  • Day 3: Upper-body push—power
  • Day 4: lower-body pull—speed

With these days an athlete or coach will need to make sure to balance out the loads and not have too much volume across the days. So if the hypertrophy day has a high level of volume, the power day needs to be lower to not apply too much load to the upper body, which can increase the risk of injury. The athlete or coach will also need to know the recommended rep ranges, set ranges, and percentages of max for each of the different training styles in order to find that necessary balance to push the body but not hurt it.

Pushing the Body to Adapt to Change

This approach is a great way to keep the body guessing what your next move is and pushing the body to adapt and change to reach your goals. So, if you find yourself plateauing and your maxes are not moving, maybe the conjugate method is for you.

New call-to-action

This blog was written by Grant Lamkin, Health Fitness Specialist. To learn more about the NIFS bloggers, click here.

Topics: strength power speed lower body hypertrophy upper body plateaus adaptations agility conjugate training

Upper-body and Lower-body Warm-up Routines

GettyImages-641796518I am often asked what is a good warm-up routine, and my answer typically consists of, “it depends.” A warm-up is typically done at the beginning of a training session and involves low-intensity movements to help get your body ready. The reason I tend to say “it depends” is that your goals, limitations, and what kind of training you have planned for a specific day will dictate your optimal warm-up.

Tailoring Your Warm-up

Now, a warmup does not have to be something innovative, but you do want to perform movements that will mirror your actual workout session. For example, if you have a lower-body day, I would recommend warming up with lower-body movements (and the same for the upper body).

How Long Should a Warm-up Be?

The time a warmup should last can range from 5 minutes to 10 minutes depending on how you are feeling that specific day. If you feel ready to go or have a time limitation, staying closer to that 5-minute limit would be best. If you are feeling a little tired and have no time restriction, then closer to 10 minutes would work better.

Sample Warm-ups

Here I provide a quick sample warmup for a lower-body day and an upper-body day. I do want to emphasize that this is a very basic warmup and it is not meant to fix any compensation that you may have.

Lower-body Warm-up

Perform 2 rounds for 10 repetitions for each exercise. If an exercise is unilateral, perform 10 repetitions for each side.

  1. Glute Bridge x 10
  2. Glute Bridge with Marches x 10e
  3. Downward Dog x 10
  4. Shoulder Taps x 10e
  5. ½-Kneeling Hip Stretch x 10e

Miniband Series: Perform 10 repetitions for each exercise. If an exercise is unilateral, perform 10 repetitions for each side.

  1. Squat (miniband around top of knees)
  2. Standing Marches (miniband goes around shoes)
  3. Standing Hip Circles (miniband goes around ankles)
  4. Lateral Walks (miniband goes around ankles)
  5. Monster Walks (miniband goes around ankles)

Upper-body Warm-up

Perform 2 rounds for 10 repetitions for each exercise. If an exercise is unilateral, perform 10 repetitions for each side. You will need a Superband for this as well.

  1. Sidelying Thoracic Rotation
  2. Downward Dog
  3. Superband Chest Press
  4. Superband Chest Fly
  5. Superband Pull Apart

As you can see, you do not have to reinvent the wheel when it comes to the warm-up, but you do want to make sure that the warm-up will get you ready for your workout.

This blog was written by Pedro Mendez, CSCS, FMS, Health Fitness Instructor and Strength Coach at NIFS. To learn more about the NIFS bloggers, click here.

Topics: workouts warmups lower body upper body low-intensity warm-up

Pre-heat the Oven: Your Warm-up Guide to Maximizing Your Workout

GettyImages-629588986The “perfect” workout rarely happens. Every so often, you may have one of those training sessions where every block flows smoothly and programmed repetitions and sets are executed flawlessly. But for most days, there will be missed reps, you may feel more fatigued than you think you should, or the workout may not come together as you hoped it would. That is fine. Your goal should be to strive to be as close to perfect as possible, with the understanding that it may not always happen.

Prepare for the “Perfect” Workout

A ”perfect” workout cannot happen without preparing your body to perform in the correct way. Preparation in this instance is in reference to your warm-up and what you are doing to get your body ready to do what is on your program. Always remember the 5 P’s:

Proper Preparation Prevents Poor Performance.

Without a good warm-up, you can’t strive for the perfect workout and you are further set up for underachieving in the movements you will do for the day.

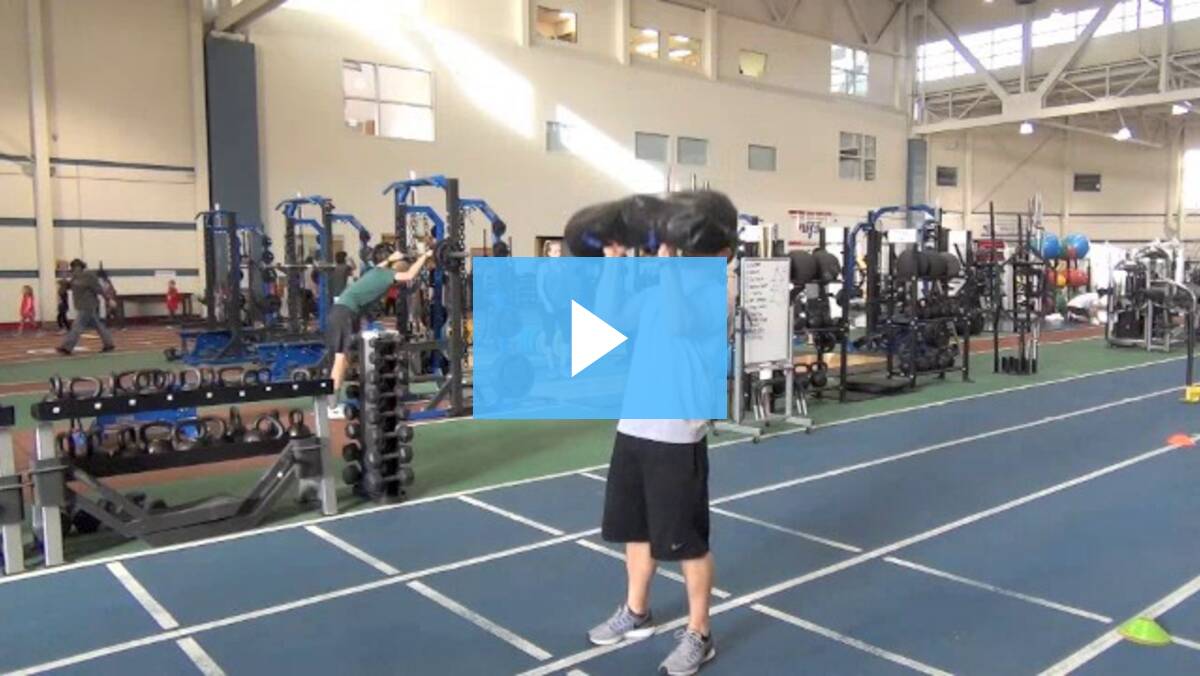
What Should Your Warm-up Look Like?

About five years ago as a younger strength coach, the dynamic warm-up was always my go-to. Plyometric day? Dynamic warm-up. Squat day? Dynamic warm-up. Bench day? Dynamic warm-up. Speed/agility day? You guessed it, dynamic warm-up. The dynamic warm-up has its place, obviously, when you are going to sports practices or training sessions that will require multidirectional movement, but as I grew in my knowledge base I asked myself one question: Shouldn’t your warm-up get you ready for what you or your athletes are actually going to do for their workout?

A Guide to Common Training Sessions

Below is a quick guide on some points to think about for common training sessions as you approach and build what might be one of the most important aspects of your workout day.

Plyometric Day

Mobility: Ankle and Hip (could add T-Spine if doing upper-body plyometrics)

Warm-up: Core, Jump Rope, Line Skaters, Lateral Line Hops, Small Box Jumps

Speed and Agility Day

Mobility: Ankle and Hip

Warm-up: Core, Dynamic Warm-up (Hi, old friend!), low-intensity plyometrics (i.e. skips, hops, bounds), agility ladders

Upper-body Day

Mobility: Thoracic Spine

Warm-up: Core, Rotator Cuff/Shoulders, lower-intensity exercises that mimic the bigger lifts for the day

Lower-body Day

Mobility: Full Body (ankles, hips, t-spine)

Warm-up: Hips (band/monster walks), Goblet Squats (squat/quad dominant day), Hinge Work (good mornings, hip thrusts, etc.) for deadlift day

The Staples of an Efficient Warm-up

As you can see, an efficient warm-up really consists of three staples: mobility of the joints you will be using that day, core (you are always stabilizing), and smaller, low-intensity movements that will mirror the bigger movements you are going to perform. An old coach from my college football days used to preach at us on the regular that, “You practice how you want to play.” Well, Coach Alex is offering the same sentiment: “You warm up with the same intent as how you want your training session to go.”

When you bake a cake, you don’t mix the batter, put it in the oven, and then turn it on. That gets you crappy cake. You pre-heat the oven. Always preheat the oven.

New call-to-action

This blog was written by Alex Soller, Athletic Performance Coach and NIFS trainer. To find out more about the NIFS bloggers, click here.

Topics: workouts plyometric speed warming up lower body upper body movement agility warm-up

King of the Gym, Part 4: Bodyweight Squat Exercises on the Go

In part 4 of this series on squats, I focus on body weight again, setting up lower-body conditioning routines you can do at home, outside in the park, or in the hotel when you’re on the road. These are some of my favorite go-to workouts when I’m on the road or don’t have time to get in a quick leg workout. As I have reiterated throughout this blog series (part 1, part 2, and part 3), regardless of your fitness goals, you can and should add some form or fashion of squats to your fitness routines.

A Quick Workout: AMRAP Challenge

This video is a 6-minute lower-body AMRAP challenge. Your goal is to follow the routine and complete the series for as many rounds as possible (AMRAP) in the 6 minutes. Keep in mind, if you’re a beginner, start with less time (start with 4 minutes) or fewer reps of the combination. I love doing this quick workout when time is limited and I need to get in a quick lower-body workout.


Follow order:

  • Reverse Lunge
  • BW Squat
  • Reverse Lunge
  • BW Squat
  • Box Jump
  • BW Squat (on Box)
  • Step-down
  • BW Squat

A Tougher Lower-body Workout

When I’m on the road but do have time to get a tough lower-body workout completed, I like completing the following six series combined for a workout. Start with the first video and work your way through all six challenges. This has a variety of work to be completed, from EMOMs (Every Minute on the Minute) to Ladders (x1–10 Reps). Again, keep in mind, if you’re a beginner, start with less time, fewer reps, or a combination of the six challenges. As you advance, add more time or complete more than one challenge together if time allows. Also, if time is short, just like the 6-minute lower body challenge, complete one of the challenges instead of all six.

CHALLENGE 1: 10 minutes EMOM (Every Minute on the Minute) x15 Bodyweight Squats

CHALLENGE 2: 3 rounds x15 R/L—Rear Foot Elevated Split Squats

CHALLENGE 3: 5 rounds x5 Reps—Squat Jumps w/Floor Taps

CHALLENGE 4: x10min EMOM (Every Minute on the Minute) x10 Single-leg Bridges (R/L)

CHALLENGE 5: Burpee Ladder x1–10 x1 Rep x2 Reps x3 Reps... x8 Reps x9 Reps x10 Reps—Finished


CHALLENGE 6: Alternating Split Squat Lunge Jumps—Ladder x1–10 x1 Rep x2 Reps x3 Reps... x8 Reps x9 Reps x10 Reps—Finished


Get “King of the Gym” Results Outside the Gym

Whether you’re taking a break from heavy back squats or just need variety, or possibly you’re on the road traveling, you have ways to focus on your lower-body strength without a barbell and rack. Throughout the four posts in this series, Instead of adding more weight to your back squats, you’re changing up the exercises to make it more difficult and challenging. Your squats can progress in a similar way if you’re not barbell back squatting: You can start by doing air squats with both legs, then progress to split squats, and eventually one-legged pistol squats, which are a lot more challenging. On the road, focus on body weight again and set-up lower-body conditioning routines.

As I have reiterated in each of the preceding posts, regardless of your fitness goals, some form or fashion of squats can and should be added to your fitness routines. The end result for your lower body is similar to what you can get from working out with “king of the gym” back squats.

Like what you've just read? Click here to subscribe to our blog!

This blog was written by Michael Blume, MS, SCCC; Athletic Performance Coach. To learn more about the NIFS bloggers, click here.

Topics: fitness center workouts videos body weight bodyweight lower body outdoor exercise squat

King of the Gym, Part 2: Lower-Body Training with Simple Equipment

If we had learned anything during our time during COVID, we’ve found creative ways we can train to get fit and stay strong in our living rooms, garages, basements, and backyards with our favorite squat racks. In part 2 of my blog series, you’ll learn how to use something simple like a dumbbell, kettlebell, med-ball, or light equipment like resistance bands to functionally train your lower body in place of the “king of the gym” back squats. 


Videos: No-barbell Exercises

If you don’t have a squat rack and barbell at the ready, there are a variety of different worthy alternatives to back squats—with no barbell required. Here are seven “king of the gym” alternatives that can use a kettlebell, dumbbell, med-ball, or bands.

The exercises in the preceding videos are great alternatives for anyone, especially if you can’t make it into the gym but you do have some light equipment at your disposal.

Functional Training for the Lower Body

Even if you are in the gym, but you don’t quite like the idea of doing a heavy-loaded barbell lift, you can still create resistance for your lower body. Resistance doesn’t mean loaded barbells; instead, these alternative exercises are loaded differently to functionally train the lower body. 

In part 3 of the series, I focus on body weight only, and in part 4 I set up some different routines you can do in a hotel when you’re on the road. Regardless of your fitness goals, you can and should add some form or fashion of squats to your fitness routines. 

Like what you've just read? Click here to subscribe to our blog!

This blog was written by Michael Blume, MS, SCCC; Athletic Performance Coach. To learn more about the NIFS bloggers, click here.

Topics: exercise at home equipment videos lower body squat pandemic

Push and Pull: The Ideal Workout Program for Restarting Training

GettyImages-1267535453Let’s face it: building your own workouts isn’t always the easiest thing to do. Sure, you probably strike gold a few times a year and the exercises you choose seem to be flawless, from the balance of muscle groups worked to the flow of the routine that you get into. There is nothing better than having that program that just seems to get the job done.


What Workout Program Should You Use When You’ve Taken Time Off from Training?

But let’s say that life happens and you took an extended time off from training due to school, work, or some other important reason (pandemic maybe?). So what now? Where do you go from here? The go-to for many individuals would be to jump right back into the same program they were doing before their long layoff. It worked great for them before their break, so it must be the best way to resume activity, right? More than likely, this might not be the most ideal situation to set yourself up for future success. When your body has become detrained from a long layoff, you run the risk of overtraining—which could possibly lead to those nagging injuries that linger throughout your rebuild process.

Find a Program That Balances Pushing and Pulling

To me, a GREAT training program is a delicate balance of “pushing” and “pulling” exercises. The general consensus of the “push-pull” method is that you alternate (or superset) upper-body push movements (for example, bench press, shoulder press) with upper-body pull movements (for example, bent-over rows, pull-ups). Even the great Arnold Schwarzenegger used this method to pack on loads of muscle when he was at the apex of bodybuilding. Now, are you Arnold? No. Are you trying to look like Arnold? Also no (more than likely). Below you will find another interpretation of the “Push-Pull” method that may better fit those who are restarting their exercise routine, or those who are looking to switch up their programming.

Benefits of Full-Body Workouts

As I mentioned before, the push-pull method often refers to two upper-body exercises from opposite muscle groups (for example, chest and back). The superior version (in my opinion) of this would be to couple either an upper-body push exercise with a lower-body pull exercise, or an upper-body pull exercise with a lower-body push exercise (see table below). This type of full-body workout allows for two main benefits:

  1. Ample rest time is allowed: While the upper body works, the lower body rests (and vice versa).
  2. There is potential for reduced soreness: Instead of hammering one muscle group for a ton of exercises, a more gradual stress is applied to the muscles over multiple workouts. It could also be a great option for returning to exercise or resistance training.

Movement Examples

If you think this type of workout might be what you are looking for, give it a shot. Choose one exercise from column 1 and one exercise from column 2. Alternate those two exercises for the desired number of reps and sets. When finished, either choose one exercise from the same two columns OR switch it up and choose one exercise from column 3 and one exercise from column 4. Remember, the ultimate goal is to match each push movement you perform with an opposite pulling motion.

Column 1 Column 2 Column 3 Column 4

Upper-body Push (chest/
shoulders)

Lower-body Pull (hips/
hamstrings)

Upper-body Pull (back)

Lower-body Push (quads)

Bench Press

Trap Bar Deadlift

Pull-Ups

Front Squat

Strict Shoulder Press

Slider Hamstring Curl

TRX Inverted Row

Step-ups

Half-kneeling Shoulder Press

Single-leg RDL

Band Face Pull

Lunges

Push-up Variations

Lateral Lunge

Seated Row

Split Squat

“Jammer” Press

Reverse Hyper

Dumbbell Reverse Fly

Wall Sit


Adjust Your Program Periodically

As with most workout structures, adding wrinkles into the program every so often will allow you to continue the muscular adaptations that are occurring and keep you engaged. That could mean an adjustment to the number of reps, sets, or rest periods you are currently using, or simply choosing different exercises. The ways that you can tweak this kind of program are endless, and I believe that with great effort, you will see positive changes in whatever physical adaptation or change you are after.

Like what you've just read? Click here to subscribe to our blog!

This blog was written by Alex Soller, Athletic Performance Coach and NIFS trainer. To find out more about the NIFS bloggers, click here.

Topics: injury prevention muscles training lower body upper body workout programs adaptations pandemic full-body pull push restarting workouts

More Workout in Less Time: Incorporating the Squat and Press

Screen Shot 2017-05-25 at 11.26.57 AM.pngBurning more calories, developing more strength, and building the ultimate body in less time is an equation I think we can all get behind. In our world of “on-the-go” fitness—and, well, pretty much everything—finding ways to get more done in less time is a priority in many of our lives. But being effective and getting things done are two different things, in my opinion, and movement does not always result in progress. Being efficient and getting results at the same time in your fitness programming takes planning and choosing the best exercises for your desired outcomes.

Two Steps to More Efficient Workouts

Scheduling your weekly workouts and determining the amount of time you can dedicate to each session is an important first step. Writing those workout sessions in your scheduler, as opposed to simply telling yourself when you will train, will make those sessions a priority and aid in accountability. So write it down!

What you are doing during those sessions to get the most out of the time you’ve allotted to yourself is the next step. If you are just getting started in this new year, I highly suggest you schedule some time with one of our fitness professionals to help you develop that efficient and effective program.

The Squat and Press

One of my favorite Big Bang exercises I highlighted in a previous post is the squat and press. Combining both upper body and lower body, squat and pressing patterns, and loading the anterior core, the squat and press exercise provides a whole lot of BANG! This exercise can develop power and strength in multiple movement patterns such as the front squat, overhead press, and trunk stability. By combining these patterns, the squat and press also has a rather high metabolic cost on the body. In layman’s terms, this exercise will get you breathing hard fast! That equates to multiple fitness aspects being challenged in a single movement. Now that is efficiency!

Variations on the Exercise

Here are a few variations on the squat and press you can implement in your program. Remember, you cannot put on a tie before the shirt, so choose the progression that makes the most sense to you and your fitness level.

SQUAT PRESS TONY


BONUS Workout: Metabolic Burn

  • 1A sandbag squat & press (sub any variation) 3 x 10
  • 1B TRX rows 3 x 10
  • 1C mountain climber 3 x 10/leg
  • Rest 3 minutes
  • 2A kettlebell swings 3 x 15
  • 2B pushups 3 x 10–12
  • 2C side plank 3 x :30/side

Like what you've just read? Click here to subscribe to our blog!

This blog was written by Tony Maloney, ACSM Certified Exercise Physiologist. To find out more about the NIFS bloggers, click here.

Topics: exercise workouts strength power video lower body scheduling metabolic cost squat and press upper body