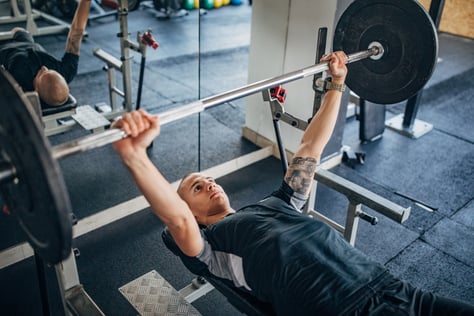
<img height="1" width="1" style="display:none" src="https://www.facebook.com/tr?id=424649934352787&amp;ev=PageView&amp;noscript=1">

NIFS Healthy Living Blog

The Difference Between Compound and Isolation Exercises When Lifting

GettyImages-1368579391In a previous blog I discussed the importance of training within the movement categories. Those categories are upper body push and pull, squat, and hinge. To break it down even further within the categories, there are exercises that give you more bang for the buck than others. In this blog I differentiate between compound and isolation exercises. For those of you who are on a time crunch when you are in the gym, these exercises are crucial to get the most out of your training.

What Is the Difference?

A compound exercise is also known as a multi-joint exercise. This is an exercise in which more than one joint is required to move through the exercise. An example of a compound exercise would be a squat. To complete the squat pattern, three joints must move: the ankle, knee, and hip. Examples of compound exercises for the upper body are the bench press and overhead press. Both movements require the function of the shoulder and elbow. The reason that compound lifts have more payoff is that they work multiple muscle groups as well. A bench press uses the pectoralis muscles, deltoids, and triceps. This requires more energy to be expended than if you used only one of those muscle groups on a single joint exercise. Exercises that isolate a single muscle group are called isolation exercises. Examples of an isolation movement would be a bicep curl, triceps extension, leg extension, or a leg curl. The difference between a compound exercise and an isolation exercise is the number of joints that move.

Which Type of Exercise Should You Do?

Compound lifts are more challenging but less time consuming than performing multiple different isolation exercises. If you short on time while in the gym, a full-body workout full of compound movements will give you the most from your workout. I have written blogs about how to structure those types of workouts. If you want to sculpt your body in a particular way, and are focused on correcting muscle imbalances or injury rehabilitation, each may require the use of specific isolation movements to build up specific muscle groups. So, the question is, what are your goals? Once you define your goals, you can design your workout program.

Structuring a Workout

The most efficient way to structure a workout utilizing both methods is to perform a compound movement first in your workout followed by isolation movements to complement the muscles used in the compound movement. A quick example using the bench press would be bench pressing first, followed by isolation movements to isolate the chest and triceps. You want to save the most amount of energy for your compound exercises, which is why you should perform this one first. Fatiguing the triceps before a heavy bench workout will not yield the best results for bench press. This is why isolation exercises are best performed at the end of your workout.

For more information or guidance on how to structure your workouts, visit our training staff at the track desk in the fitness center. For nonmembers looking for help on your fitness journey, feel free to give us a call to set up a guest fitness assessment.

New call-to-action

This blog was written by Evan James, NIFS Exercise Physiologist EP-C, Health Fitness Instructor, and Personal Trainer. To learn more about the NIFS bloggers, click here.

Topics: fitness center muscles weight lifting weightlifting muscle building joints gym isolation exercises compound exercises structuring workouts

Five Benefits to Olympic Weightlifting for the General Population

GettyImages-1281363470The first thought that comes into most people’s heads when they hear the word weightlifting is, more times than not, “bulky.” The perception is that heavy weightlifting will cause an undesired large gain of muscle mass. This is true; weightlifting will cause you to put on muscle mass, but it will take a lot more than just lifting weights to be “bulky.” Please do not let your goals steer you away from certain exercises.

What Is Olympic Weightlifting?

The sport of Olympic weightlifting is comprised of the snatch, and clean and jerk. The snatch is a lift in which you take the bar from the floor to overhead in one swift movement. The clean and jerk is a lift in which you take the bar from the bar to the shoulder in one swift movement, and then take it from the shoulder to overhead in a second movement. The Olympic lifts are full-body, explosive movements that require the use of every muscle group in the body.

Take a look at any high-level athlete who competes in events such as track or wrestling. They have to get as strong as they can without putting on extra weight. They achieve this by lifting heavy loads for lower rep schemes as fast as they can. This is one reason why you will see athletes in these sports utilizing the Olympic lifts in the weight room. In the off season if they need to put on size, they will move to the higher rep ranges.

Benefits of Olympic Weightlifting

There are many benefits to learning and performing the Olympic lifts within your exercise routine. The lifts can be programmed in many different ways depending on your specific goals. These are my top five benefits of learning the lifts from a certified coach:

  1. Body composition: The snatch and clean and jerk are full-body lifts that use the legs, glutes, back, abs, shoulders, and arms. Performing the lifts burns more calories in a shorter period of time compared to performing isolation/single-joint movements. The lifts and accessory lifts can be used to put on lean tissue, increase strength, and ultimately decrease body fat.
  2. Muscular power and strength: Muscular power is how fast you can move a load. Decrease in muscular power over time is the main cause of falls in older adults. In Olympic weightlifting, nothing is done slowly. All loads are moved at max velocity, therefore increasing power. If your goal is to run faster and jump higher, power is the key ingredient.
  3. Coordination: The Olympic lifts require precise coordination, rhythm, and timing. Improving body awareness and coordination is great for the activities of daily living. Learning new things also increases cognitive abilities in old age.
  4. Range of motion: Most people associate heavy lifting with being stiff and bulky. The Olympic lifts, however, require the lifter to control a load through a full range of motion in the knees, ankles, hips, and shoulders. If the range of motion is not there now, or at the start of your lifting journey, over time training through a full range of motion will increase flexibility more effectively than static stretching one time per week.
  5. Work capacity: Depending on how the lifts are programmed, they can be used to cause a range of positive changes to your body. One way to increase work capacity is by limiting the amount of rest time in between sets. Over time you will be able to recover faster from higher-intensity training.

The Olympic lifts should be performed under the eyes of a certified, experienced coach. Learning the lifts on your own can be done, but will take much longer and will not produce the results you are seeking. If you are interested in learning the Olympic lifts, visit our Master Class here at NIFS, which is free to members. If you are looking for one-on-one or more personal coaching, you can visit us at the track desk and one of our staff will get you going in the right direction.

Like what you've just read? Click here to subscribe to our blog!

This blog was written by Evan James, NIFS Exercise Physiologist EP-C, Health Fitness Instructor, and Personal Trainer. To learn more about the NIFS bloggers, click here.

Topics: muscles range of motion weight lifting weightlifting strength muscle building body composition building muscle strength and conditioning coordination work capacity

Is Your Weight Belt Really Helping You?

GettyImages-993462726If you are like most people who enjoy lifting weights, you probably have worn a weight belt or own a cool one that helped you get that new squat max deadlift PR, But did you really NEED it? Most of the time we follow what we see others do, which is fine, but remember: everyone is different, and you could be slowing down your own progress by cinching that belt on extra tight every time you feel the need to go heavy.

What Exactly Is That Weight Belt for, Anyway?

A weightlifting belt serves to assist in creating more intra-abdominal pressure. The belt provides the lifter reinforcement when they breathe-brace or create pressure in the torso by exhaling and contracting the abdominal wall before externally loading the spine (picking up the weight). However, if the lifter does not breathe-brace, and instead tries to create pressure by tightening the belt too much and or bulges the abdominal wall out to touch the inner ring of the belt to feel secure, the abdominal pressure is significantly less, stability of the truck and spine is decreased, and now that weight belt is more of corset (a fashion statement) than a lifting tool.

Am I Saying You Should Stop Using a Weight Belt?

No. If you do not have trouble bracing and lifting without a belt up to 80 percent of your 1-rep max, you can stop reading. However, try testing your ability to breathe-brace first, before you determine your need for a weight belt. You can even put this breathe-brace activity into your warm-up to make sure everything is good to go.

The Breathe-Brace Test

Supine

  1. Lay flat on your back with legs bent and feet flat on the floor. Place one hand on your belly, and the other on your chest. Take about four deep breaths. The air can be inhaled through the nose and exhaled through the nose, or in through the nose and out the mouth through pursed lips. On each inhale, use your belly to make the hand on it rise as high as you can (hopefully higher than the hand on your chest). When you exhale, blow out as much air as you can while pulling your belly in tight (the belly hand should sink toward the floor).
  2. Once you have done four deep breaths, take one more, and this time when you exhale, as you blow the air out and the belly hand sinks toward the floor, contract your abdominals (you may even notice a tilting of your rib cage down toward your belly button) as you use your belly to push the air out. If you can stiffen your abs without bulging your belly out, you’ve got it!

Prone

  1. Lay flat on your belly with legs straight. You will need something soft to place under your belly (an ABMAT or folded towel) because it will replace your hand in this method.
  2. You can place your hands down at your sides, long above your head, or use them as a rest for your forehead.
  3. Similar to the supine method, take about four deep breaths. While inhaling, push your belly out to feel the mat underneath you. When you exhale, blow as much air out as you can by pulling your belly in tight away from the floor.
  4. Finally, take one more breath in. This time, as you blow out and pull your belly away from the mat, contract your abs. You may again notice your rib cage tilting down slightly toward your belly button.

This breathing method is encouraged by yoga enthusiasts, but is very effective in the weightlifting realm as well.

Once you have mastered the method on the ground, try doing it while standing. Then take it to the lifting platform or rack. You will notice over time you have more stability, and less spinal flexion and extension throughout heavy lifting, and you are now strengthening the muscles you need to brace and stabilize your spine before using a weight belt. Mastering your breathing and core control will make it easier to find the correct tightness on your weight belt when the time comes.

Don’t Use a Belt to Work Around a Problem

Lastly, we all should have the goal to move without assistance from any sort of crutch or brace, and a weight belt should not be used to work around a problem simply to lift heavy. Work on your breathe-brace skill, and you may only need your weight belt for those big-time lifts, and of course to show off occasionally!

Like what you've just read? Click here to subscribe to our blog!

This blog was written by Keith Hopkins, MS, MA, CSCS, USAW. To read more about the NIFS bloggers, click here.

Topics: equipment weight lifting weightlifting breathing heavy lifting

Get the Perfect Deadlift Setup Every Time

GettyImages-579405946
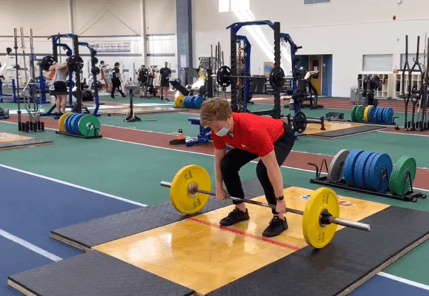
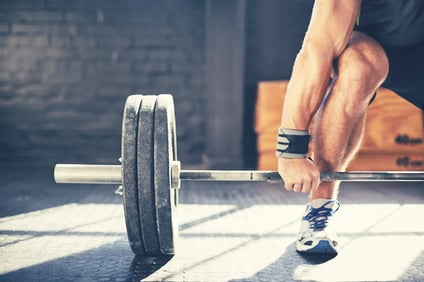
With the sport of powerlifting taking off in the last couple of years, more and more people are taking up the sport as a hobby and to improve their overall fitness levels. Training to improve strength in the squat, bench, and deadlift is a great way to improve total body strength and improve body composition.

Some may argue that lifting heavy is unsafe and should be saved for the athletes. The common myth is that lifting heavy may lead to injuries. The movement most argued against is the deadlift. When performed too heavy with poor form, this may be true. However, when performed with the proper progressions, and the proper technique, the deadlift is the best total-body movement to improve strength, power, and body composition.

Why the Deadlift?

There are three main benefits to performing the barbell deadlift:

  • First off, it is a whole-body movement. The deadlift works multiple muscle groups at the same time, offering more bang for your buck compared to isolation exercises.
  • Secondly, the deadlift improves strength and stability. Because it is a compound exercise, working more than one joint, this lift can be performed with heavier loads, leading to greater increases in strength.
  • Lastly, deadlifts can help improve posture. The muscles used while maintaining a flat back in the deadlift are the same muscles that help with sitting and standing up straight. The deadlift strengthens these muscles, leading to improved posture over time.

Now that we have gone over the benefits, let’s talk technique.

The Deadlift Setup

Follow these steps:

  1. Foot position: With your feet hip-width apart, the barbell should be placed over the center of your foot. An easy way to get the best foot placement is to look down, and move forward and backward until your shoelaces are directly under the bar.
  2. Grip: Without bending your knees or moving the barbell, bend over and grip the bar right outside of your legs. It is important that you do not move the barbell.
  3. Shins to the bar: Once you have your grip established, bend your knees and bring your shins to the bar. Do not over-bend them and push the bar away from you.
  4. Chest up and back flat: Without dropping your hips any further, puff up your chest and squeeze your shoulder blades together. By doing this, you will naturally flatten out your back.
  5. Drag: Take a big belly breath, hold it, and drag the bar up your shins. Keep your back muscles engaged and keep the bar close to your body the entire movement. When you let the bar get away from you, you have to compensate with your lower back, and this can lead to injury.

Keys to Success

Now that you have a safe setup, here are a couple of things to think about while performing the movement.

  1. On the last step of your setup, look out ahead of you. You do not want to overextend your neck, and you also do not want to be staring at the ground the entire time. Keeping your head in line with your spine will allow you to keep a neutral spine throughout the whole movement.
  2. When standing up with the barbell, your hips and shoulders should rise at the same time. If you allow your hips to come up first, the bar will get out in front of you, and like I mentioned earlier, you will have to compensate by pulling with your low back.
  3. Lastly, take a deep belly breath. A belly breath does not mean air all the way in your stomach, but what it does mean is filling your lungs all the way to the bottom to pressurize your core. A pressurized core equals engaged abdominals. When performing any lift, you want to create a solid core to help stay upright.
Watch the video below for the proper deadlift technique in action.

Screen Shot 2021-01-19 at 11.23.53 AMIf you are new to lifting and don’t know where to get started, come visit us at the Track Desk in the Fitness Center.

Like what you've just read? Click here to subscribe to our blog!

This blog was written by Evan James, NIFS Exercise Physiologist EP-C, Health Fitness Instructor, and Personal Trainer. To learn more about the NIFS bloggers, click here.

Topics: NIFS injury prevention weight lifting strength powerlifting deadlift total-body workouts heavy lifting

Optimal Movement Patterns for Building Muscle

Screen Shot 2021-01-14 at 1.10.19 PMThe traditional bodybuilding split of working one muscle group per day might work for the dedicated, high-level competitive bodybuilder who makes their living in the gym. But for the general population only looking to shed some unwanted pounds and improve their overall health, the traditional bodybuilding split is not ideal. Working multiple muscle groups in the same session is much more ideal because it ramps up the body’s metabolism more than working a single muscle group each day. To achieve this, we train the movement, not the muscles.

The Four Movement Patterns

There are four main categories in which we categorize the movement patterns: push, pull, squat, and hinge. Each category works a movement while working multiple muscle groups.

Push

This upper-body movement pattern uses all of your “pushing” muscles. The pushing muscles of the upper body include the chest, shoulders, and triceps. Common movements within this category include the following:

Read my full blog on the Push movement.

Pull

This upper-body movement pattern uses the “pulling” muscles. The pulling muscles of the upper body include the lats and the biceps. There are two different pulling variations, the horizontal pull and the vertical pull. The horizontal pull targets the lower lats and the vertical pull targets the upper portion of the lats. It is important to include both variations in your program. Common movements within this category include the following:

Read my full blog on the Pull movement.

Squat

The squat movement pattern is the pushing movements pattern for the lower body. The squat pattern mainly works the quadriceps and the glutes. This category also includes all single-leg movements. The squat pattern is a large compound movement that should be progressed properly. Common movements in this category include the following:

Hinge

The hinge movement pattern is the pulling movement pattern for the lower body. The hinge pattern is better known as the deadlift. The primary muscles worked during the hinge movement are the hips, hamstrings, and lower back. The deadlift is another exercise that should be progressed properly for safe lifting. On days that you work the hinge pattern, you should do some additional hamstring isolation movements. Common movements for the hinge pattern include the following:

Using the Movement Patterns

Knowing that there are four movement patterns, and which movement pattern works which muscle group, you can build your exercise routines. In a future blog, I will discuss why the full-body program is superior, and how to schedule your week using the movement patterns. In short, you can build your exercise routine by putting together two or more of the movement patterns in one day. After working a muscle group, you don’t want to work that same muscle group for at least 48 hours.

***

If you need any help building an exercise program, or want a health professional or personal trainer to put one together for you, come visit us at the Track Desk at any time.

Like what you've just read? Click here to subscribe to our blog!

This blog was written by Evan James, NIFS Exercise Physiologist EP-C, Health Fitness Instructor, and Personal Trainer. To learn more about the NIFS bloggers, click here.

Topics: weight loss muscles weight lifting weightlifting exercises building muscle movement squat leg day movement patterns pull hinge push

CON-ISO-ECC: Muscle Contractions for Weightlifting Variations

GettyImages-1401137761_edited low res

If you have taken an extended break from your workout routine, your return to the gym will likely mean a return to the program that you were originally doing before your hiatus. Exercise selection, reps, and rest periods may be altered slightly after time off; however, eventually you will be back to your pre-break strength and power, among other athletic traits. When you think about that program and how it got you to the point you are at or will be in the near future, do you also think about the steps you will take to further advance your abilities? I’m here to break down a few ways specifically within the muscle that may help give you the variety to your program you are looking for.

There are three main types of muscular contractions that can happen, each of which serves a specific purpose for muscular growth, strength, and power. They are

  • Concentric
  • Isometric
  • Eccentric

Concentric

Concentric muscular contractions are generally the most common type that individuals focus on during their training sessions. Concentric contractions involve the shortening of the muscle during an exercise. If you imagine a lift, say the bench press, the act of pushing the weight up from your chest actively shortens the muscle. The pulling of a bent-over row or the ascent of the barbell back squat all utilize this contraction. An uncommon variation would be to slow down the movement, for example slowing the pulling movement of the bar during a Lat Pulldown. If it normally takes you 1–2 seconds to pull down the bar, try a 5-count with the same weight. The intensity will greatly increase.

Isometric

Isometric contractions are an underrated variation that people most often forget about during workout planning. Instead of a shortening movement like the concentric contraction, the isometric contraction actually involves the muscle staying at the same length during the work period. A simple variation of this contraction is a wall sit. The muscle never changes length, but the tension and effort build over time.GettyImages-1219375851 

But the quality of this contraction is found in much more than just wall sits. Almost any exercise can utilize this method. Here are a few of my favorite variations using isometric contractions. The intensity of the holds in these lifts can be dictated by either the amount of weight or the time you hold it for.

  • Split Squat Holds (hold split squat in down position with knee off the ground)
  • Push-Up Holds (hold push-up in the “down” position; try at different heights!)
  • Pull-Up Holds (either chin over bar or with arms hanging straight)

Eccentric

The last contraction variation in this trio is the eccentric contraction. This is commonly thought of as the lowering or lengthening of the muscle during an exercise. Going back to the bench press example earlier, the bar lowering to the chest would be the eccentric contraction. Where this method is most useful is during time-under-tension exercises where you increase the amount of time that you lengthen the muscle during the lift. These are all about control and can get quite intense.

Similar to the isometric contractions, time is everything. For example, when you do a step-up and are coming down off of the box, try to control for 3–5 seconds before your foot hits the ground instead of coming down right away. Here are a few of my favorite variations on eccentric contraction exercises:

  • Incline Dumbbell Press (lowering the weight slowly and raising it at a normal pace)
  • Slider Leg Curls (pushing feet out in a slow and controlled motion)
  • Glute Ham Raises (slow on the way down)

***

The variations are not limited to this list. Feel free to get creative with any of your favorite exercises when trying out the different muscular contractions. Remember, time is your friend with any method you choose and can match any intensity you are trying to achieve.

This blog was written by Alex Soller, Athletic Performance Coach and NIFS trainer. To find out more about the NIFS bloggers, click here.

Topics: workouts muscles weight lifting weightlifting exercises power muscle building strength training variety workout programs

Make Training Less Complex with More Complexes

Screen Shot 2020-10-13 at 12.56.26 PMIf you are like me, with a busy, on-the-go lifestyle, you probably don't have more than an hour to get inside the gym and train. Lucky for you, that’s okay!

By training with a full-body routine utilizing complexes, you can spend less time in the gym and still see the results. This not only saves you time in the gym, but it also allows for more time with family and friends, all while seeing the results you want. One way to accomplish this is through a barbell or kettlebell complex.

What Is a Complex?

A complex is a series of movements that are performed back to back in which the set number of reps is done for a movement before moving to the next. A complex can be performed with a barbell or one or two kettlebells/dumbbells. Each movement within the complex should flow into the next one. A good way to achieve this is to start from the ground and work your way up.

How to Build a Complex

Any number of reps can be done for each movement. The more movements within the complex, the fewer reps you will want to complete for each one. A complex consisting of four to six movements should be kept at one to five reps per movement. If your complex is only two to three movements, you can use higher reps. Some examples of complexes include the following:

Barbell 1

  • Row x 1–5 reps
  • Deadlift x 1–5 reps
  • Hang Power Clean x 1–5 reps
  • Front Squat x 1–5 reps
  • Push Press 1–5 reps

Barbell 2

  • Deadlift x 3–6 reps
  • Clean x 3–6 reps
  • Press x 3–6 reps

Kettlebell or Dumbbell 1

  • Pushup x 1–5 reps
  • Row x 1–5 reps
  • DL x 1–5 reps
  • Clean or Snatch x 1–5 reps
  • Squat x 1–5 reps
  • Press x 1–5 reps

Kettlebell or Dumbbell 2

  • Pushup x 3–10 reps
  • Row x 3–10 reps
  • Swing x 3–10 reps
  • Squat x 3–10 reps

I recommend completing two to three rounds, but you can also work up to as many rounds as possible with good technique. Within each complex there will be a movement that limits the weight for the entire complex, and it is better to start the first round with a weight you think will be too light.

For example, the movement that will decide your weight in Barbell 1 above is the push press. The deadlift might feel easy, but that is okay. By the end of the complex you will be happy you did not go as heavy as possible. Try to do the entire complex without setting down the weight to rest, and remember to complete all of the reps for one movement before moving on to the next movement.


Why Should I Implement Complexes?

These complexes are an amazing full-body tool that you can use if you are running low on time for your session, or if you have limited days per week you can come in and train. They are also a great way to add additional volume to your workouts, or can even be used as a finisher at the end to build resilience and touch up your conditioning. If your goal is to be better conditioned, adding a sprint or jog component at the end using pieces such as the echo bike, rower, ski-erg, or SPARC trainer can provide a nice cherry on top of an already stellar total-body workout.

Give these complexes a try to get your blood pumping, and let us know how they go! If you need any technique tips or complete workout programs, come visit us at the track desk for more information on what we offer and how to get that set up!

Like what you've just read? Click here to subscribe to our blog!

This blog was written by Evan James, NIFS Exercise Physiologist EP-C, Health Fitness Instructor, and Personal Trainer. To learn more about the NIFS bloggers, click here.

Topics: workouts weight lifting weightlifting kettlebell weights strength and conditioning workout programs full-body complexes efficiency

Shouldering the Load: Safe Alternatives to the Overhead Press Pattern

_68R6419In my experience over the years working with folks from all walks of life to help improve their strength, mobility, performance, and overall fitness I have found that so many suffer from immobility in two major joints: the ankle and the shoulder, which is the focus of this piece. Lifestyle, occupation, inactivity, and overtraining are all culprits robbing so many of healthy range of motion in the shoulder and shoulder girdle.

Throughout the history of fitness and muscle, one of the sexiest exercises is the overhead press (OHP). The overhead press is used as an assessment of one’s strength, it’s involved in the popular Olympic lifts and many activities of daily living, and it feels pretty darn good to lift something heavy up over your head. With so many variations that can develop strength and stability in the upper body, the overhead press can be a phenomenal tool in a training toolbox.

Questions to Ask Yourself

There are many benefits to the overhead press exercise, but what if you suffer from immobility in the shoulder or have suffered an injury that has made the vertical press pattern difficult or painful? There are some options for you that can keep you safe while reaping the many benefits of the vertical press movement pattern. Before we get to those, however, I’ll ask a couple of questions.

What are your desired fitness outcomes and goals?

“If you think it, INK IT!” is a practice I learned long ago from a great coach, and for years I have been insisting clients write down what they hope to accomplish along their fitness journey. If you don’t know where you want to go, it will be difficult to formulate the map to get you there. Take the time to reflect, develop, and write your fitness goals before starting any fitness program.

How will the overhead press exercise help you get there?

Pretty straightforward question: how will the overhead press exercise help get you to where you want to go? Depending on your goals, the OHP may play a major role, or it might play a minor role in your success.

How do you know whether you should be including the overhead press in your training?

Once you have established your fitness outcomes and how the overhead press can assist in obtaining those outcomes, it is important to determine whether the overhead press is a safe exercise to include in your training. Your best first step is to complete a Functional Movement Screen (FMS) that will provide some crucial information to your fitness programming. First and foremost, the FMS, specifically the Shoulder Mobility Screen, will determine whether there is pain involved with the overhead position. If there is pain, you will need to see a medical professional to tackle that before anything else should happen.

A score of 1 on the Shoulder Mobility Screen signifies that, among other things, you should exclude overhead pressing from your training until the pattern is cleaned up and you are no longer scoring a 1 on the screen. A score of 2 or 3 means the vertical pressing motion can be included in your training safely. Schedule your FMS with one of NIFS instructors today to ensure you are able and safe to include the overhead press exercise in your programming.

Overhead/Vertical Press Options

Once you have your screen from your NIFS certified pro, you now know where you stand to shoulder the load. If you are cleared to press overhead, I say have at it and press on! But if you are directed to stay away from strict overhead pressing, here are a few options that can provide many of the same benefits from the overhead press while working in a safer shoulder space.

  • Landmine Press: 1/2K and Standing
  • Landmine Arc press: 1/2K and standing
  • Incline DB press: SA and double arm
  • Jammer Press

Screen Shot 2020-10-01 at 11.52.08 AM

Shoulder health, strength, and stability are so important in training and, more importantly, everyday living. The vertical press options here are great ways to continue to bulletproof your shoulders, and the best first step is to get screened and take care of your shoulders prior to heavy loading. One simple and highly effective way to tackle shoulder health is to add the “dead hang” into your training program. Learn more in Lauren’s recent post covering this effective drill. Stay shoulder safe!

Like what you've just read? Click here to subscribe to our blog!

This blog was written by Tony Maloney, ACSM Certified Exercise Physiologist and Health/Fitness Instructor. To find out more about the NIFS bloggers, click here

Topics: shoulders injury prevention muscles weight lifting strength exercises videos mobility upper body stability overhead press shoulder mobility

Returning to Play and Activity Safely After Quarantine

GettyImages-1014940186
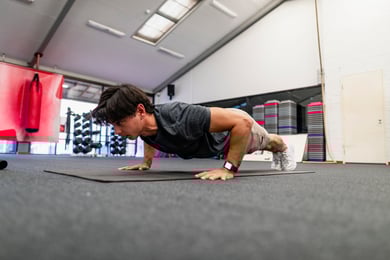
The uncertainty of the last few months has taken a toll both mentally and physically on everyone. Many people did not have access to gyms and instead did at-home bodyweight workouts or virtual workouts—or did nothing at all. As time has passed, we are now returning to gyms and everyday normal lives. Returning to play and activity must be done in a strategic way. Going all out upon return can lead to many detrimental effects on the body. Making sure to take proper steps back into working out is vital to your body and your overall health. Sleep paired with hydration and a balanced diet will aid in the process of coming back stronger and more efficient. Taking a slow approach will also allow your body to get acclimated much more easily and quickly.

Safely Returning to Activities

You should return to play and activity with moderation. Jumping right back into the gym 5-6 times a week will lead to overtraining and other soft-tissue injuries. Trying to max out upon return after not lifting heavy weights is another challenge that will lead to injury or worse. Gradually getting back into the swing of things is the way to go, and will lead to the safest and most effective return.

Starting with bodyweight exercises and lighter weight is a great way to return. Focusing on form and taking the time to relearn movement patterns is another safe, effective tool to use. This is a great time to identify other imbalances you might have neglected before, or things that were brought about by the pandemic. Giving you the best possible options will not only help with longevity, but will also help with overall quality of life. 

There Is No Rush to the Finish Line

During lockdown, your focus should have been on trying to maintain a healthy, balanced diet and staying as physically active as you possibly could. I know times were hard and days were long, but it shouldn’t have derailed all the hard work you put in before the pandemic hit. That is why it is essential to take proper steps to gradually get back and acclimated to the weight room. Continue to set goals. Keep them within reason. There is no rush in achieving them. Staying healthy and creating longevity is the name of the game.

If your numbers are way down since the pandemic, trust that the process will lead you right back where you were and beyond. Find alternatives and alternative exercises that will gradually get you back into the swing of things. For example, if you love the squat, find other squat variations that will keep you healthy as you gradually work your way back to heavy squatting. Goblet squats are a great alternative. Cyclist squats are another great tool for developing the quadriceps. Utilize the TRX; it is a great functional piece that will aid in your return to play and activity.

Enjoy Being Back Outdoors and at the Gym

Staying healthy during this time is the ultimate goal. Doing it safely and properly is the way to go. Utilize your trainers and dietitians to help you on your journey. Never hesitate to ask professionals for advice on returning to the gym. We love seeing you back as much as you love being back. Continuing to practice safe and effective training methods with proper sleep and nutrition will make for a great rest of the year!

Like what you've just read? Click here to subscribe to our blog!

This blog was written by Jason Quarles, IUPUI Athletic Performance Coach. To learn more about the NIFS bloggers, click here.

Topics: exercise at home injury prevention weight lifting overtraining bodyweight quarantine covid-19 lockdown

Build a Bigger Engine with Aerobic Training (Part 2 of 2)

GettyImages-1217027916-1Last time, I covered a few of the benefits of building your aerobic base:

  • Ability to recover more quickly between bouts of high-intensity exercise
  • Ability to sustain higher-threshold movements for longer (think being able to hit more heavy singles on bench or deadlift with the same rest)
  • Ability to handle more acute rises in training volume
  • More efficiency, as you’re able to remain in an aerobic state for energy for longer periods (before resorting to another system like anaerobic/glycolytic)

Cool, Lauren! Now, how the heck do I train my aerobic system? How do I start to build that base? Here are a few examples of ways to incorporate aerobic training into your fitness plan.

Contralateral Circuits

As the name implies, a contralateral circuit involves working opposite sides of the body while performing a two-part, compound movement—for example, a step-up with the right leg followed by an overhead press with the left arm. Each movement is performed for time, typically 20–30 seconds, followed by a short period of rest while you switch to the opposite side to perform the movement.

By cycling between exercises that work opposite limbs and opposite sides of the body (think diagonally across), we are taxing the cardiovascular system in a relatively novel way. Specifically, as blood is pumped and pools in working limbs for 20–30 seconds (right leg/left arm), the heart has to work slightly harder to then switch to pumping blood to ensure that the next group of contralateral limbs is adequately supplied (left leg/right arm). Heavy weights aren’t involved; typically it’s a combination of bodyweight exercises, bands, or light weights. But after 20–30 minutes of near continuous movement, chances are you’ll see that some sweat has appeared!

Here’s a quick example of exercises that can be linked together for a contralateral circuit:

  • Reverse Lunge Right + Band Row Left x 0:25/0:30 rest and transition
  • Reverse Lunge Left + Band Row Right x 0:25/0:30 rest and transition
  • Step-Up Right + DB Overhead Press Left x 0:25/0:30 rest and transition
  • Step-Up Left + DB Overhead Press Right x 0:25/0:30 rest and transition
  • Single-leg RDL Left + DB Row Left (Right stance leg) x 0:25/0:30 rest and transition
  • Single-leg RDL Right + DB Row Right (Left stance leg) x 0:25/0:30 rest and start over

Escalating Density Training (EDT)

This type of training not only trains your aerobic system, but also allows you to gradually build up volume on particular lifts. So if you in any way resemble me and aren’t the number-one fan of running, this might be for you! Escalating Density Training involves working for 5-minute blocks continuously. You alternate between two lifts, usually opposite in nature (upper vs. lower body), and complete only 1–2 reps of each before returning to the other movement.

For example, you can pair a Kettlebell Goblet Squat with a DB Bench Press. So, for 5 minutes you complete one rep of a Goblet Squat, followed by one rep of DB Bench Press. You can keep a tally of how many rounds you complete in 5 minutes and compare for future sessions to see whether you’re able to do more work in the same period of time. Typically, you can complete three blocks of EDT in one training session, separated by 3–4 minutes of rest. All in all, you’re completing 15 minutes of high-quality work.

Here’s an example of an EDT session:

  • Block 1: KB RDL/DB Overhead Press x 5:00 --> 3:00 rest post round
  • Block 2: Sandbag Clean & Squat/TRX Row x 5:00 --> 3:00 rest post round
  • Block 3: DB Incline Press/Goblet Reverse Lunge x 5:00 --> cooldown

A Long Walk or Hike, Focusing on Nasal Breathing

This one is pretty simple, but surprisingly effective. Getting used to nasal breathing, as opposed to mouth breathing, has more than a few benefits. One of them is that it allows our body to become better adapted to handling CO2 as we produce it during exercise and movement in general. Why does this matter? This has been shown to lower resting heart rate, improve pH regulation, and improve our body’s ability to cycle and filter out metabolites.

So, the next time you head out for a hike at a state park or a stroll through your neighborhood, see if you can maintain a moderate pace while only nasal breathing. If you feel the need to breathe out of your mouth, that’s fine! Each time you go out, simply see how much you can do with nasal breathing, trying to push that time or distance bit by bit each session. Bonus? You get to enjoy the great outdoors.

Low-intensity Modalities + Breath Holds

I came across this method after listening to Cal Dietz, Strength & Conditioning Coach at the University of Minnesota, at multiple conferences and clinics. He’s worked with numerous Big Ten Champions, NCAA National Champions, and Olympians throughout his career. When working with athletes as they return from a hiatus in training (i.e. post summer semester), he has employed a 2-week period focusing primarily on aerobic training.

One method he’s used is 10-second exhalation and breath holds while performing light aerobic exercise. For example, while on a Concept2 Rower, he’ll have his athletes find an easy, maintainable pace for 1–2 minutes. For the next 10–15 minutes while maintaining that pace, athletes will exhale at the beginning of every minute and hold their breath following that exhale. They will attempt to hold their breath until the 10-second mark of that minute. So, if it takes 4 seconds to exhale, they’ll then try to hold their breath for 6 more seconds. Once you start breathing again, the goal is to stabilize the breath as quickly as possible.

After trying this myself, it was surprisingly difficult. There was a sense of being uncomfortable, obviously the urge to breathe, some slight tinging, followed by immense relief after the 10-second mark. I’m listing this last because it’s something I would work up to. Can you try it right off the bat? Absolutely. But don’t feel that you need to continue the breath hold for the full 10 seconds. Maybe its only for 5–6 seconds while you acclimate to the training.

***

All in all, there are various ways to train the aerobic system, and there isn’t one that fits all. But if you’re looking to sprinkle some variety into your routine, one of these modalities might be for you. As always, the goal with these workouts isn’t to leave you running for the trash can. If it does, take it down a notch.

Like what you've just read? Click here to subscribe to our blog!

This blog was written by Lauren Zakrajsek, NIFS Health Fitness Instructor, Personal Trainer, and Internship Coordinator. To learn more about the NIFS bloggers, click here.

Topics: walking workouts training weight lifting high intensity aerobic breathing