<img height="1" width="1" style="display:none" src="https://www.facebook.com/tr?id=424649934352787&amp;ev=PageView&amp;noscript=1">

NIFS Healthy Living Blog

The Pros and Cons of Listening to Music While Working Out

GettyImages-611063522
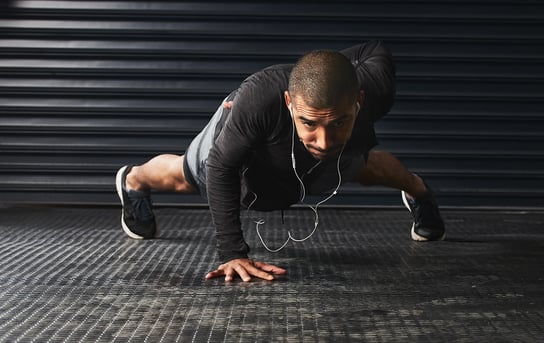
If you’re like me and absolutely love listening to music and discovering new artists, genres, etc., then I could bet that you most likely listen to music while you exercise. Combining music and workouts has become a common practice among fitness enthusiasts because it can provide a boost of motivation and energy for when you’re testing your one-rep max or just taking a brisk walk outdoors. However, in this blog I will discuss the potential drawbacks of listening to music during a workout/training session and, hopefully, it will make you think about how music (or no music) plays a role in your training.

Pros

Improved Athletic Performance

Music can help get you through some of your toughest workouts by improving your endurance and mentality and reducing perceived exertion. Finding the right playlist or song that fits with the intensity and tempo you plan to conquer will increase your chances of completing the exercise. (See some songs that NIFS trainers recommend here).

Mood Booster/Motivation

There’s nothing wrong with listening to your favorite workout jams to boost your mood and prep for a successful lift, run, or walk. In fact, listening to your favorite song(s) or playlist will improve your mentality going into the workout by significantly boosting both your motivation and confidence. Before I work out, I ALWAYS play my favorite songs to boost my mood and let my body know, “Hey, it’s almost time to work out and it’s time to get motivated!”

Decreased Chance of Fatigue

Listening to music improves your physical and mental endurance. Essentially, with music, you’ll most likely be able to lift more, run faster, and work harder. For example, say you’re doing a tempo run at a steady but challenging pace. Finding a playlist that matches your pace or cadence (steps per minute) will help you keep that mental toughness and complete the run.

Cons

Dependency

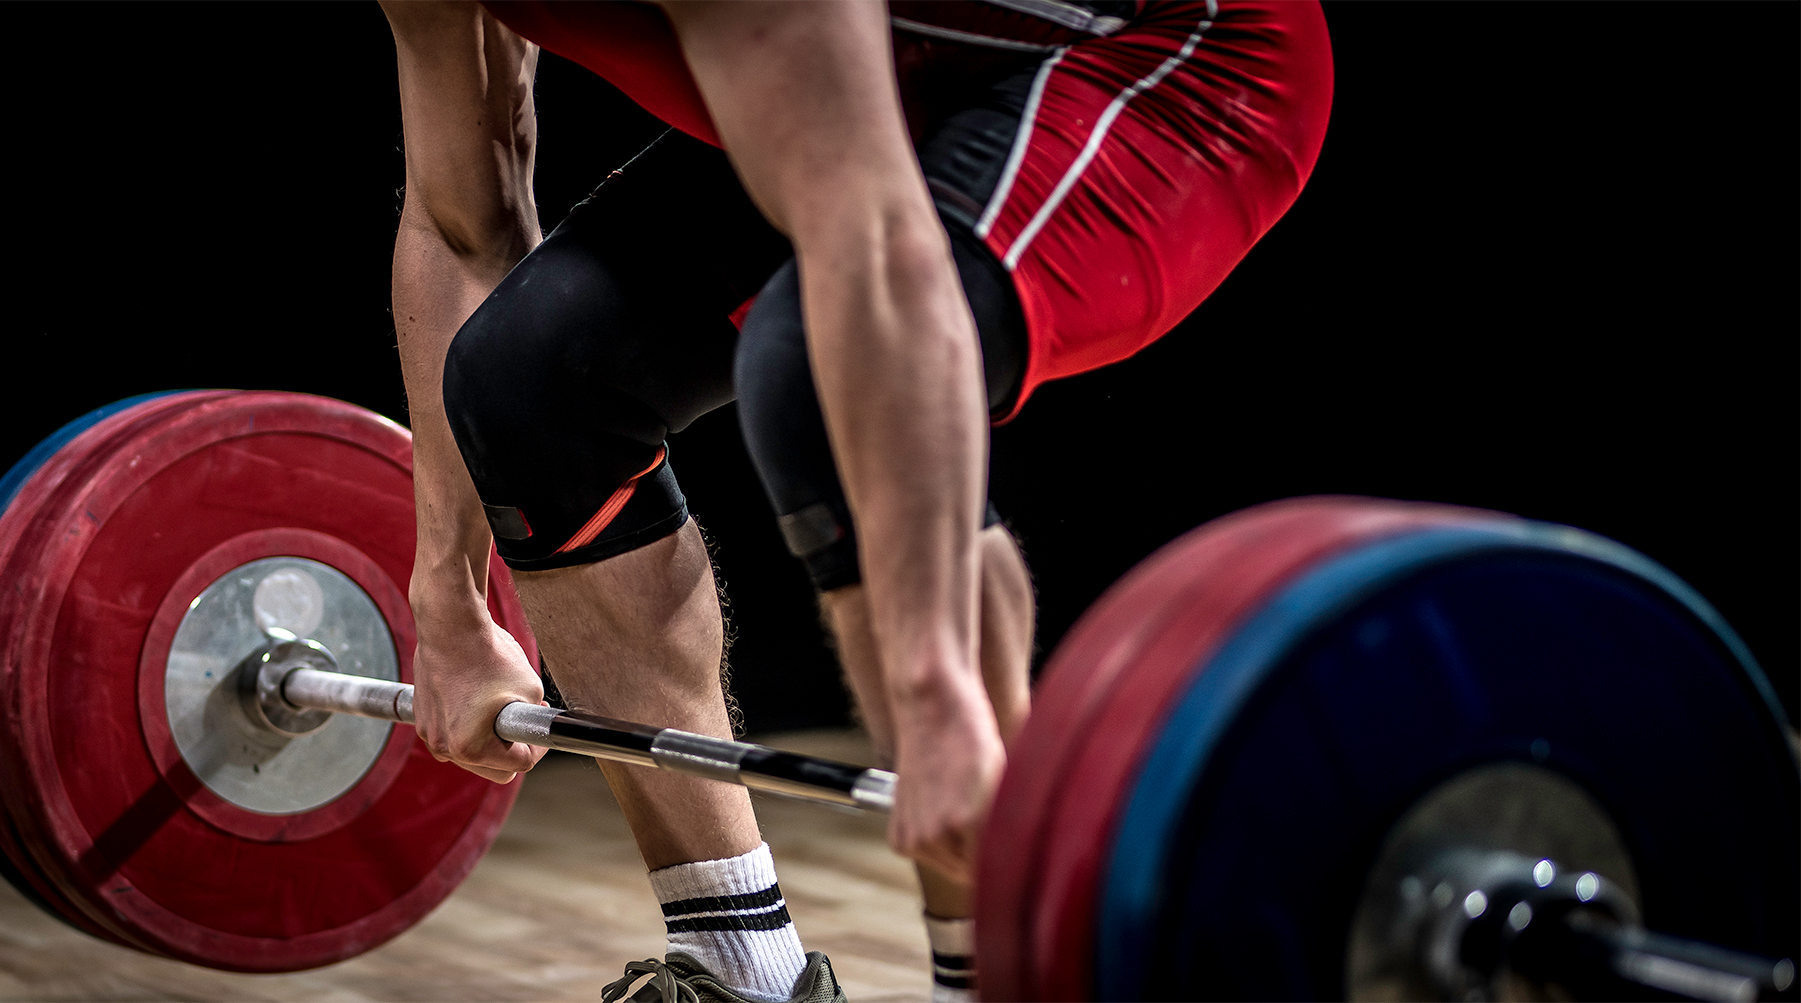
For some athletes (powerlifters, for example), listening to music during their big lifts may be beneficial for successfully completing the weight. However, if those athletes are training for a specific powerlifting meet that doesn’t allow the use of personal music or playlists, those athletes will most likely have a disadvantage. On the other hand, as a runner who completed a half marathon in May, I was able to use and rely on music to get me somewhat (still can’t believe I finished…wow) to the finish line. Overall, it depends on what you’re training for and the expectations of your game, meet, race, etc.

Decreased Athletic Performance

I know, yes, I did say music can aid in improving one’s athletic performance, but we must think about what kind of athlete we’re dealing with. For an Olympic lifter, powerlifter, or endurance athlete (runner, cyclist, etc.), music can be used without significantly disrupting their athletic performance. However, a gymnast or athlete training in calisthenics listening to fast-paced and upbeat music wouldn’t be ideal since their training relies on coordination, stability, focus, and balance.

Distraction (Technique, Safety, Form, etc.)

Music, especially if it's immersive, can divert your attention from maintaining proper form or technique. This distraction is risky when performing exercises that require precise movement patterns. It's essential to remain mindful of your body's alignment and ensure that music does not compromise your workout effectiveness or increase the risk of injury.

Overall Boredom

While music can be entertaining, it may not always be sufficient to combat boredom or monotony during long workout sessions. Relying solely on music for stimulation might not provide the variety and mental engagement needed to stay motivated over time. It's important to incorporate a mix of exercise routines and seek other sources of motivation to keep your workouts interesting.

The Bottom Line

Listening to music while working out can have numerous benefits, including increased motivation, enhanced performance, and improved mood. However, it's crucial to be mindful of potential safety concerns and avoid dependency on music. Finding a balance that suits your preferences, exercise goals, and safety considerations is key. Experiment with different approaches and find what works best for you to optimize your workout experience!

New call-to-action

This blog was written by Deveon Martin, NIFS Health Fitness Specialist. To read more about the NIFS blogger, click here.

Topics: motivation running walking workouts powerlifting music mindset olympic weightlifting cadence

To Strongman Train or Not to Strongman Train? Here Are the Benefits

You may have seen the crazy events where men and women lift giant stones, carry logs, and pull vehicles. Did you ever think that this type of training might be exactly what you need to do to have better fitness results? Strongman workouts aren’t as intimidating as they seem. Let’s look at the benefits of Strongman training, and why you should start incorporating it into your training program.

Strongman liftingMuscle Mass Gains

There are two important factors in muscle mass building. First, you want to apply the strategic tearing down of the muscle tissue and the subsequent rebuilding via nutrition and rest. Strongman workouts provide the right amount of wear and tear on the muscle tissue to safely tear it down so that it can be rebuilt bigger and stronger than before. Second, growth hormone levels in your body enable a better recovery state and directly influence muscle growth. Heavy lifting, which is what Strongman workouts are all about, has been shown to result in a higher release of growth hormone, which can support muscle mass growth.

Increased Strength

When these athletes are carrying giant logs and moving Atlas stones, it almost goes without saying that they will notice changes in their strength levels. Strongman workouts are based on compound and functional movement patterns, which use several major muscle groups at the same time. Include this with a heavy weight load, lower repetitions, and higher sets, and you are likely to see strength gains. Studies show that Strongman workouts are just as effective as traditional resistance-based workouts at improving your strength levels. However, it’s not just your major muscle groups that will see the benefit; your grip strength will also improve a lot.

Improvement on Functional Movement Capacity

With a powerlifting workout, you are focusing on three exercises that begin at Point A and end at Point B. Many Strongman exercises take place in different planes of movement, which can help your day-to-day functional movement patterns. For example, when performing the Farmer’s Walk, you are holding heavy dumbbells or kettlebells and walking across the floor for a prescribed distance. Another example is carrying an Atlas stone; again, you are holding a heavy weight with proper posture and moving that weight. This translates into real-world benefits such as when you are carrying groceries, playing with the kids, or doing chores. Improving your functional movement capacity will result in a higher quality of life and a lower risk of injury.

Accelerated Fat Burning

As mentioned above, Strongman exercises activate several major muscle groups simultaneously. For example, the sled drag involves the quadriceps, hamstrings, calves, glutes, hip flexors, chest, arms, and core. That is a lot of muscle groups for one movement. The more muscles you use and the greater the intensity during the exercise, the more calories you will burn. Strongman workouts allow you to build muscle mass while helping you lean out. Studies show that compound movements, such as Strongman exercises, can help promote fat burning.

Smashing Through Plateaus

If you have been lifting for a while and you feel as if you are not progressing, consider Strongman workouts. The Strongman style of training pushes you outside of your box, challenges your muscles in a new way, and can potentially help you smash through your plateau. Incorporating a Strongman workout in place of your current traditional resistance training program will introduce a new set of stimuli for your muscles to adapt to. The heavy loads, unique movements, and overall demand on the body should be just what you need to see increases in strength, size, and power.

Preventing Injuries

Strongman workouts help build muscle mass that protects your internal organs. These workouts form strong connections between the muscular and central nervous systems. Most importantly, Strongman workouts strengthen the core, which is where all movement originates and where most injuries occur. A weak core is a recipe for bad news. Lower-back pain is the most common complaint in modern-day doctors’ offices. While the cause might be from a direct injury, most lower-back pain is the result of a weak core and overcompensating muscles. Strongman workouts strengthen the major muscle groups, improving your functional movement patterns and preventing injury.

Easy Transition to Other Sports

One of the benefits of Strongman is that this type of training is not limiting. You can use Strongman workouts as a foundation and then hop to other forms of training such as powerlifting, bodybuilding, or CrossFit. Everything you learn and do in Strongman will apply to many other forms of sports, training, or physical activity. With Strongman workouts, you are simultaneously building a lean and muscular physique, which makes it ideal for bodybuilding. You are also developing incredible raw power, which is ideal for powerlifting. Finally, the explosive strength you gain will be useful in a CrossFit WOD (workout of the day).

If you are a beginner, intermediate, or advanced in your fitness journey, consider starting to add Strongman training to your fitness program in some shape or form. You will be able to build a strong foundation for your fitness routine that will benefit you for years to come.

New call-to-action

This blog was written by David Behrmann, NIFS Health Fitness Instructor. To learn more about the NIFS bloggers, click here.

Topics: workouts injury prevention core CrossFit powerlifting muscle mass muscle building strength training functional movement building muscle plateaus fat loss strongman

Exploring the Versatile Landmine Attachment for Powerlifting

“How can I better utilize the landmine attachment?” This is a question we hear regularly, but are sometimes limited by our own fitness exercise library. The landmine is actually quite versatile and functional in nature. Here I explore the Landmine and some of the many exercises that link several facets of fitness into one unique experience. From functional movements to powerlifting accompaniment, the Landmine is sure to boost your workout with new approaches to old exercises.

What Is a Landmine Attachment? 

According to opexfit.com, “The landmine attachment is a piece of gym equipment invented by Bert Sorin of Sorinex. It’s an adapter that attaches to a weightlifting rack that holds a barbell in one end, leaving the other end free for loading and moving.”

Upper-body Exercises with the Landmine Attachment

For these exercises, you will need a 45lb Olympic bar, a Landmine attachment, and any additional weights to add (for increased difficulty). I suggest beginning with just a bar (remember, it does weigh 45lb!).

  1. Two-handed Shoulder Press: With two hands, press the bar overhead.
  2. One handed Bent-Over Row: With one hand, hinging at the waist, grab the bar and row upward.

Lower-body Exercises with the Landmine Attachment

  1. Sumo Squat: With a wider than normal foot placement, hold the bar in two hands with arms extended. Do a squat pattern.
  2. Single-leg RDL: While standing on one foot, bar in one hand, hinge at the waist, and then return to standing

Core Exercises with the Landmine Attachment

  1. Trunk Twist: Standing in athletic position, make a “windshield wiper” while holding the bar overhead.
  2. Half-kneeling Trunk Twist: This is the same as the trunk twist, except now you are in a half-kneeling position.
  3. Half-kneeling Press: From the half-kneeling position, press upward (not unlike a shoulder press), press the weight up and slightly past the top position, achieving anti-rotational stability.

As you can see, the Landmine is a great, multifaceted tool for us to enjoy not only functional fitness, but also massive muscle “gainz”. All kidding aside, please explore the Landmine and its numerous features. Be creative and try new exercises. If you are getting stumped and need a fresh routine, look no further than a NIFS Health Fitness Instructor. We can help with all of your fitness needs including setting goals, benchmark fitness testing, exercise programming, and more! See you at NIFS!

Like what you've just read? Click here to subscribe to our blog!

This blog was written by Thomas Livengood, NIFS Health Fitness Instructor and Personal Trainer. To learn more about the NIFS bloggers, click here.

Topics: Thomas' Corner equipment weightlifting exercises powerlifting fitness equipment

Get the Perfect Deadlift Setup Every Time

GettyImages-579405946With the sport of powerlifting taking off in the last couple of years, more and more people are taking up the sport as a hobby and to improve their overall fitness levels. Training to improve strength in the squat, bench, and deadlift is a great way to improve total body strength and improve body composition.

Some may argue that lifting heavy is unsafe and should be saved for the athletes. The common myth is that lifting heavy may lead to injuries. The movement most argued against is the deadlift. When performed too heavy with poor form, this may be true. However, when performed with the proper progressions, and the proper technique, the deadlift is the best total-body movement to improve strength, power, and body composition.

Why the Deadlift?

There are three main benefits to performing the barbell deadlift:

  • First off, it is a whole-body movement. The deadlift works multiple muscle groups at the same time, offering more bang for your buck compared to isolation exercises.
  • Secondly, the deadlift improves strength and stability. Because it is a compound exercise, working more than one joint, this lift can be performed with heavier loads, leading to greater increases in strength.
  • Lastly, deadlifts can help improve posture. The muscles used while maintaining a flat back in the deadlift are the same muscles that help with sitting and standing up straight. The deadlift strengthens these muscles, leading to improved posture over time.

Now that we have gone over the benefits, let’s talk technique.

The Deadlift Setup

Follow these steps:

  1. Foot position: With your feet hip-width apart, the barbell should be placed over the center of your foot. An easy way to get the best foot placement is to look down, and move forward and backward until your shoelaces are directly under the bar.
  2. Grip: Without bending your knees or moving the barbell, bend over and grip the bar right outside of your legs. It is important that you do not move the barbell.
  3. Shins to the bar: Once you have your grip established, bend your knees and bring your shins to the bar. Do not over-bend them and push the bar away from you.
  4. Chest up and back flat: Without dropping your hips any further, puff up your chest and squeeze your shoulder blades together. By doing this, you will naturally flatten out your back.
  5. Drag: Take a big belly breath, hold it, and drag the bar up your shins. Keep your back muscles engaged and keep the bar close to your body the entire movement. When you let the bar get away from you, you have to compensate with your lower back, and this can lead to injury.

Keys to Success

Now that you have a safe setup, here are a couple of things to think about while performing the movement.

  1. On the last step of your setup, look out ahead of you. You do not want to overextend your neck, and you also do not want to be staring at the ground the entire time. Keeping your head in line with your spine will allow you to keep a neutral spine throughout the whole movement.
  2. When standing up with the barbell, your hips and shoulders should rise at the same time. If you allow your hips to come up first, the bar will get out in front of you, and like I mentioned earlier, you will have to compensate by pulling with your low back.
  3. Lastly, take a deep belly breath. A belly breath does not mean air all the way in your stomach, but what it does mean is filling your lungs all the way to the bottom to pressurize your core. A pressurized core equals engaged abdominals. When performing any lift, you want to create a solid core to help stay upright.
Watch the video below for the proper deadlift technique in action.

Screen Shot 2021-01-19 at 11.23.53 AMIf you are new to lifting and don’t know where to get started, come visit us at the Track Desk in the Fitness Center.

Like what you've just read? Click here to subscribe to our blog!

This blog was written by Evan James, NIFS Exercise Physiologist EP-C, Health Fitness Instructor, and Personal Trainer. To learn more about the NIFS bloggers, click here.

Topics: NIFS injury prevention weight lifting strength powerlifting deadlift total-body workouts heavy lifting

STRENGTH: 6 Expert Weightlifting Tips to Be Stronger Than Ever

GettyImages-1152704907

Strength. We all want it, and many of us will go to great lengths to obtain it. Strength and the ability to be strong will find its way into all of our lives, from weightlifting in the gym to all the activities of daily living (ADLs). It was once explained to me that you should picture your absolute strength as a bucket; the bigger the bucket (the stronger you are), the more things you can put into the bucket. Aspects of health and fitness such as mobility, endurance, agility, and power can all be better developed and improved with the presence of strength. To put it simply: be strong—be better.

Of course you can google “how to get strong,” and you will find no shortage of philosophies and program theories to wade through to answer that question. Some may actually be safe and useful, but who can you trust these days? I tend to learn from those who have “been there and done that” and continue to do it because of a high success rate of most-wanted outcomes.

Get Strong Tips from Dan John

Dan John is one of the top fitness coaches, and I never miss a chance to hear him speak or read his weekly newsletters. I have learned so much from reading his materials and implementing his principles into my training and the training of others. Dan will be the first to tell you that he continues to learn from people like Pavel Tsatsouline and many others. Dan believes his tips are an “easy” way to get strong.

Following are six of his expert tips that I have integrated into my training (and the training of those I work with).

  • Lift heavy. This seems obvious, but it really is where it all begins. If you lift heavy weights to get strong, you have to challenge the system and force it to adapt. Without adaption, there will be no gain.
  • Perform the fundamental human movements. There are some variances in what is believed to be fundamental, depending on who you talk to. But I believe those movements are Squat, Hinge, Push, Pull, and Carry.
  • Keep sets and reps low. I love Dan’s “Power of 10” rule: never go over 10 total reps for any exercise. For example, 2x5, 5x2, 3x3, 6 singles, 5, 3 and 2.
  • Stop your set and workout before fatigue. Stay fresh and leave some energy for the next training session.
  • Don’t even struggle. Choose the proper load so that you can finish each rep with integrity, not sideways and crooked.
  • Never miss a rep. Choosing a load that you are 100% confident you can make can be hard for some. Most of us want to challenge the limits with every rep and set. Refrain from that for true gains.

A Challenge to Prepare for Powerlifting Competitions

Following these tips, from time to time I will cycle in my training what Dan refers to as the 40-Workout Strength Challenge. I wanted to share a program that I learned from Dan that added 10 pounds to my bench, 30 pounds to my squat, and 50 to my deadlift. Dan also has seen a few PRs fall in both throwing and weightlifting competitions. I am a big believer in the program’s concepts and simplicity. We are very good at overcomplicating things when it is not necessary. Here you work on fundamental movements all the time, and you make sure you hit every rep. This could be a great challenge for you leading into the competition; however, just like anything else, it might not work for everyone. Here’s the setup:

  1. Pick one exercise from the fundamental human movements described above. If competing is your goal, I would suggest a back squat, bench press, and deadlift. Add in a chinup and a farmer’s carry and you are good to go.
  2. Perform these exercises for the first 10 workouts every training session with varying sets and reps.
  3. Never miss a rep, and if the weight feels light, add more weight.
  4. After the first 10 workouts you can repeat them 3 additional times or make small changes to the movements every two weeks (for example, change to an incline bench, front squat, rack pulls, barbell bent-over rows, and racked carry). There are far too many examples of exercises and combinations to list here; I would suggest scheduling a personal program session with a NIFS instructor to help you out.

Here is how I set up my challenge that may help you develop yours. I can’t stress enough that this is what worked for me. It may not work for you, but it could be well worth the try.
Screen Shot 2017-10-03 at 3.00.04 PM.png

I found that after completing this 40-workout challenge, not only did I add pounds to my big lifts, but many of the other tasks in my life became easier. The other aspect of this challenge I really, really liked was that due to its simplicity, I can turn my brain down a bit and just lift. It provided that escape from our day-to-day tasks that I think we all need from time to time.

This blog was written by Tony Maloney, ACSM Certified Exercise Physiologist and Health Fitness Instructor. To find out more about the NIFS bloggers, click here.


Topics: NIFS weightlifting strength powerlifting

What’s In Your Gym Bag? Weight-Lifting Belts

IMG_7197
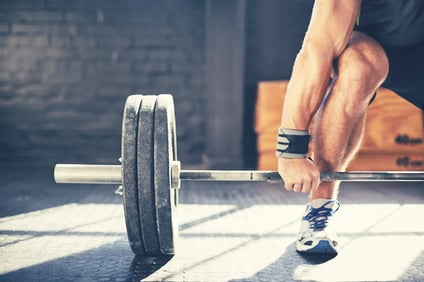
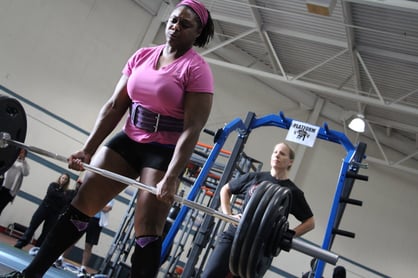
Weight-lifting belts have become a staple in many gym settings for powerlifting, Olympic lifting, bodybuilding, and strongman, and for anyone who wants to lift heavy loads. Whether you use them for training or on the competition platform, you need to know the ins and outs of weight belts so that you can make a smart decision.

How to Use a Belt the Right Way

Using a weightlifting belt is situational. It depends on several different factors, including the experience of the lifter, how heavy the load is in relation to 1RM (One Rep Maximum), as well as the number of repetitions in each set. Put on the belt as tight as possible with no room to slide your hand in, but enough room to allow a big breath and abdominal muscles to brace against it. It should be so tight that it’s uncomfortable if worn for several minutes. Placement of the belt is often by preference, but generally an inch or two above the pelvis.

According to studies from the American College of Sports Medicine (ACSM), a weight belt is used to help generate intra-abdominal pressure. This means tightening your natural stabilizers, such as abdominal muscles and erector spinae muscles in your back in order to brace the spine and stay safe. A belt can also be used as a proprioceptive tool to teach you how to breathe and brace because it allows proper response to occur and gives you something to brace against. This creates a constant feedback loop because now you can actually feel your muscles bracing and pushing up against the tight belt. In turn, this increases stability for the spine and core and adds support. For the record, a weight belt won’t protect against injuries caused by improper bracing and poor lifting technique. Not only is bracing an important skill to learn when lifting heavy loads at the gym; it can also keep you safe from back injuries even when you are just going through your daily life lifting objects here and there (ACSM).

Avoiding Over-reliance

Conversely, over-reliance on belts has been on the rise. It can lead to a weakened core and invoke ridicule if used when not necessary. Further research has shown that weight belts are known to spike blood pressure because of holding your breath, and have been linked to minor injuries such as hernias. Remember, the belt is needed only during the lift and only for exercises that mostly stress the lower back. It is not something to wear around the gym. A general rule of thumb from Barbend is to use the belt only for the lifts that are 85% or more of your 1RM. Lastly, investing in your own core strength by trusting yourself for lighter sets and saving the belt for heavy sets is a good way to improve core strength.

Types of Belts

There are several different types of weightlifting belts out there. Some use a single prong, a double prong, Velcro, or a lever to lock the belt tight throughout the lift. Organizations such as USA Weightlifting (USA-W) and USA Powerlifting (USAPL) have different specifications as to how wide and how thick the weight belt may be on the competition platform, thus creating a level playing field for all athletes.

NIFS provides a few options for weight belts, but don’t be shy about bringing your own if you have one!

Like what you've just read? Click here to subscribe to our blog!

This blog was written by Cara Hartman, NIFS Health Fitness Instructor. To find out more about the NIFS bloggers, click here.

Topics: equipment injury prevention weight lifting powerlifting NIFS Powerlifting Competition

Powerbuilding: The Middle Ground Between Powerlifting and Bodybuilding

Davin_lift1
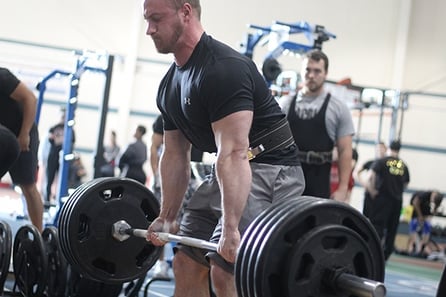
Over the last couple of years, I’ve noticed an increasing trend in bodybuilders and physique athletes migrating toward the sport of powerlifting. I’m no exception. I spent the first eight or so years of my lifting career focused almost exclusively on bodybuilding. Eventually, however, I got tired of the culture, the subjective judging criteria, and the politics involved in the sport. I decided that I’d rather be strong and functional rather than just big and muscular. Over the next couple of years, I began focusing more and more on strength-specific training. Eventually, this led me to my first NIFS Powerlifting Competition back in 2016.

How Are Bodybuilding and Powerlifting Different?

In case you’re wondering how the two sports differ, I’ll go ahead and give a brief overview of each of them. Bodybuilding is a sport that emphasizes muscle size, shape, symmetry, and definition. Competitors train specifically with the goal of inducing hypertrophy in their muscles. Much like a sculptor, they sculpt their own bodies with these specific goals in mind. On the competitive side of things, there’s absolutely zero emphasis on physical performance. It doesn’t matter how much weight you can lift, but rather, it matters how much weight you look like you can lift. The judges make their decisions based on the aforementioned criteria, of course, coupled with their own subjective bias.

Powerlifting, on the other hand, is sport in which athletes are ranked according to their combined strength on three specific barbell movements. They compete in a max squat, bench press, and deadlift. The total amount of weight lifted is added up and then usually a strength-to-weight ratio is calculated using what is called, the Wilks Coefficient.

The Rise of Powerbuilding

Powerbuilding has emerged as a sort of hybridization of the two sports. Bodybuilding and powerlifting each have their own respective training styles and dietary practices that ultimately lend themselves to the specific outcomes of maximizing strength or maximizing hypertrophy. Thus, powerbuilders are essentially bodybuilders who have decided that they want to be as strong as possible, or they are powerlifters who have decided to prioritize aesthetics as well as strength.

To the layperson, it would seem like these two goals should go hand in hand. I mean, it makes sense that a strong person would have big muscles, and a person with big muscles would be strong. Technically, this is true to some degree. Early on, hypertrophy will be the most predominant adaptation seen in response to any resistance training program. In accordance with the principle of “general adaptation syndrome,” as the muscle becomes more adapted to the presented stimulus, it will require greater intensities and more specific overloads to elicit a response. This is where the principle of specificity comes in to play.

Strength Training vs. Hypertrophy Training

According to the American College of Sports Medicine (ACSM), to most efficiently train for strength, a person should perform 1–3 sets of 8–12 repetitions using a load that is 60–70% of their one-rep maximum (1RM) for novice to intermediate lifters; and 2–6 sets of 1–8 repetitions at 80–100% of their 1RM for advanced lifters.

Inversely, to maximize hypertrophy, the ACSM recommends that a person perform 1–3 sets of 8–12 repetitions at 70–85% of their 1RM for novice to intermediate lifters; or 3–6 sets of 1–12 repetitions at 70–100% of their 1RM for advanced lifters.

The recommended rest periods range from 2–3 minutes when working at higher intensities to 1–2 minutes when using lighter loads. In some training programs you might even see rest periods of 3–5 minutes between sets to allow for optimal recovery and performance on each set.

For more information on resistance training guidelines, see https://www.acsm.org/docs/brochures/resistance-training.pdf.

As you can see from the above guidelines, the type of training required to maximize muscle size is different than the type of training to maximize muscle strength. According to a meta-analysis performed by Dr. Brad Schoenfeld in 2016, most of the research has demonstrated that there is a direct correlation between hypertrophy and volume (total sets and reps performed). Since strength-specific training usually consists of training with lower volume at higher intensities, it stands to reason that it is less hypertrophic overall. Even though there is a fair amount of overlap between the two training styles, optimizing muscle size ultimately means sacrificing some muscle strength. The same could be said about strength training. In order to train at higher intensities, the volume must be reduced to avoid injury and overuse.

Make Your Choice

So what does this all mean? Powerbuilding is a tradeoff of sorts. This is especially true when reaching beyond the levels of basic strength and fitness. Initially, the body will react to any sort of resistance training by developing larger and stronger muscles. When that adaptation stops, it starts to become a matter of prioritization. One must choose where they’d rather go. The same could be said about distance running and bodybuilding, or perhaps rock climbing and powerlifting. You can be moderately proficient at both endeavors, but in order to really excel at either, you’ll have to sacrifice the other.

This blog was written by Davin Greenwell, ACSM Certified Personal Trainer and Health Fitness Instructor. To find out more about the NIFS bloggers, click here.

Topics: muscles powerlifting strength training hypertrophy NIFS Powerlifting Competition bodybuilding powerbuilding

Bar Crawl: Specialty Bar Training for Powerlifting at NIFS

Screen Shot 2018-07-12 at 10.42.59 AM
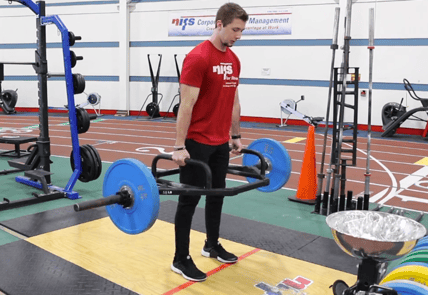
As a fitness professional I approach training and helping people from the direction that principles guide methods. The reason for this is that methods and fads will always change, but principles never do. It’s beneficial that the methods and variations of movements change from time to time, as long as the decision to change them is based on solid principles and reasoning. Variations are great, such as a change in foot position in a squat, adding load to a plank position, or varying the implement you are using during the exercise. One implement change that can pay heavy dividends (pun very much intended) is using a specialty lifting bar.

Specialty bars are not new by any means, but due to new waves of “strongman” training and the resurgence of powerlifting, the popularity of the specialty bar is constantly growing. Each different bar is designed to elicit a specific stimulus that will result in an increase in strength, stability, or performance. In fact, many bars were originally designed for the specificity of training certain sports. And although most are still widely used specifically for generating a particular training response for sports, the everyday fitness enthusiast can enjoy the benefits without having to be a pro athlete.

Bars with Benefits

Come with me as we journey through NIFS’s Bar Crawl and check out all the specialty bars that are at your disposal and some or our favorite exercises associated with each. Before we do, here’s a reminder that you need to master the basics with basic equipment before moving on to an advanced movement or piece of equipment.

Fat bar: A barbell that is thicker than a general-use bar. The typical bar has a thickness of approximately one inch, whereas a thick bar can be twice that or even more.

Benefits:

  • More muscle activation in the hands, forearms, and upper arms.
  • Harder contraction (experiment: flex your bicep without making a fist, then flex with a fist; notice the difference).
  • Grip training no matter what.
  • Greater focus on the lift/exercise.


  • Bench Press
  • Overhead Press
  • Deadlift

Safety bar: Also referred to as a “yoke” bar, it looks like what they put on oxen back in the day. There is a three-way pad that rests on your shoulders with handles, with a curved bar shape at both ends.

Benefits:

  • Great for lower-body and low-back strength and transfers nicely to the straight-bar variations.
  • Loads the anterior core.
  • Minimizes stress on the wrists and elbows.
  • Helps in maintaining proper spinal alignment.


  • Front Squat
  • Back Squat
  • Lunges

Log bar: Straight from the strongmen themselves, this bar simulates using a log for different movements. It looks like a log with bars on the end to add plate weight load.

Benefits:

  • Cumbersome and unusual shape increases the stability need in the trunk and entire body.
  • Neutral grip is safer on the wrists and shoulders and allows for a more natural movement.
  • Abbreviated range of motion due to its size is safer for the joints and allows for greater load.


  • Clean and Press
  • Overhead Press
  • Bent-over Row

Trap bar: Hexagonal in shape, this is a bar you stand in, and it is used mainly for deadlifts or floor-loaded squat motions. Top coaches like Mike Robertson and Mike Boyle almost exclusively use the trap bar for athletes for these benefits.

Benefits:

  • Combines the benefits of the deadlift and the squat.
  • Loaded closer to your center of gravity, making it great for beginners as well as seasoned athletes.
  • More natural body position for the deadlift.
  • High handles decrease the range of motion, minimizing the chance for lumbar flexion typically seen in the traditional deadlift due to the weight being out in front of the body.


  • Deadlift
  • Bent-over Rows
  • Farmer Carry

Swiss bar: A multi-grip bar ranging from neutral to wide-grip and mixed-grip options.

Benefits:

  • Lighter than a typical bar; great for beginners.
  • Easy on the shoulders.
  • Specific training for sports such as football.
  • Range of motion similar to using dumbbells but with more load capabilities.


  • Bench Press
  • Overhead Press
  • Bicep Curls
  • Makeshift pull-up bar

Get Help from NIFS

Be sure to stop by the track desk and ask one of your highly trained instructors how a specialty bar can be used in your programming. Train smart, and train safe!

Like what you've just read? Click here to subscribe to our blog!

This blog was written by Tony Maloney, ACSM Certified Exercise Physiologist and Fitness Center Manager. To find out more about the NIFS bloggers, click here.

Topics: NIFS equipment training powerlifting programs

You Got Shoe Game? Choosing the Right Athletic Shoes for Your Workout

GettyImages-905973914Believe it or not, shoes do serve a higher purpose than just to make a fashion statement—especially when you’re choosing shoes to wear to the gym. Now, my first example is rather obvious, but it gets the point across. Would you ever enter the gym for a workout wearing high heels? That’s for you to answer, but there are safety issues that arise from wearing stilettos to the gym. More specifically, footwear is of concern if any of the big lifts such as squatting, running, jumping, and weightlifting are programmed into your workout.

Let’s start by laying the ground rules. Given that your footwear is the avenue by which you gain momentum necessary for movement, it is extremely important to be conscious of your goals, your workout, and your footwear. After all, the only object in contact with the floor is your shoes! A wide variety of shoes are made for different surfaces and sports; however, they fall into three basic categories: performance footwear, running footwear, and cross-training footwear. Let’s take a deeper look at each specific type of athletic shoes.

Performance Footwear

First, the broadest category of shoes is performance footwear. This includes shoes engineered for nearly every specific sport, indoors or outdoors. Each shoe is carefully designed for specificity of sport as well as durability of surface, especially at the elite and professional level. A good example is basketball shoes, which are usually high-tops to help prevent ankle sprains. Soccer cleats, track spikes, football and softball cleats, and others all have spikes that can dig into the playing surface to make cuts sharper and aid in injury prevention.

Other specific shoes occasionally seen in a gym setting are powerlifting shoes and Olympic lifting shoes. Powerlifting shoes are low and flat, with a solid sole that is good for deadlifts because it puts you closer to the floor. It also allows you to push through the whole foot throughout the entire lift. Conversely, Olympic lifting shoes are made with a slight heel to allow athletes better mobility during lifts such as a squat and snatch, where lack of mobility would decrease performance drastically. They are also designed with a solid surface for the sole, tailored to the demands of the sport.

Running Footwear

The next type is the running shoe. Keep in mind that not one foot is the same size or shape, perhaps not even your other foot. Therefore, sizing can be difficult.

A standard running shoe tends to be manufactured with more cushion than other shoes, which in turn allows for less force on the hip and knee joints when running. The shoe design should offer sufficient traction needed to grip the surface and optimum weight distribution in order to ensure safety. They are ergonomically designed to absorb the ground-force reaction when the mid-foot strikes the ground, instead of sending the shockwave up the shin to the leg, commonly known to cause shinsplints.

Cross-training Footwear

Last is the training shoe, also known as the cross-trainer. This shoe is the most versatile of the three and can be used for small amounts of running, jumping, and lifting, but is mainly used to do lateral movement as well as plyometric workouts. Because the shoe is primarily a lower shoe with good support, it is made so you cannot easily roll your ankle or twist your knee when planting your foot into the ground to change direction as quickly as possible.

***

Choosing the right equipment for your workout is very important, so know the different types of shoes and choose the ones that are best for the activity that you will be doing.

Like what you've just read? Click here to subscribe to our blog!

This blog was written by Cara Hartman, NIFS Health Fitness Instructor. To find out more about the NIFS bloggers, click here.

Topics: running equipment workout sports powerlifting shoes cross-training footwear

Back to Exercise Basics: The Strong Squat

We here at NIFS are what you can call “pattern people”; meaning our team of instructors focuses on fundamental movement patterns and how we can enhance them to allow for better function and goal achievement. Of course we start this process by having our members complete a Functional Movement Screen (FMS). The first assessment takes a look at the Squat pattern. Second in our series focusing on exercise basics, the squat will be the topic here, including how you can build a better one.

The Keys to a Great Squat

As we continue our focus on movement competency prior to attempting the most challenging exercise known to man (I still see this happening every day, in the gym and all over Facebook), we begin by taking a look at the major keys to a great squat. Much like the push-up described in a previous post, the squat is a super-versatile movement with so many real-life and performance applications in which it plays a role. From sitting into a chair (and standing up from that chair) to setting a PR in the back squat in your next powerlifting competition, the squat is a very powerful and functional movement we should all be training. Quite a few things are going on in a great squat; it employs core joint mobility in the ankles and hips, core stability, and motor control. These far-reaching aspects of movement are challenged and improved when incorporating a properly performed squat into your routine.

Cara_squat

Squat Pattern Checklist

Refer to the following checklist to ensure that you get the most out of your squat pattern by performing it correctly. Just as you learned to squat, check it off from the ground up:

  1. Feet 1: Just beyond shoulder-width apart
  2. Feet 2: Slightly angle outward
  3. Feet 3: Weight over the heels and spread the floor
  4. Knees: Tracking over toes
  5. Hips 1: Hips push back to begin movement
  6. Hips 2: At or below parallel
  7. Hips 3: Hips and knees flexing at same time
  8. Spine 1: Angle of spine and tibia are the same
  9. Chest: Keep up, proud chest
  10. Arms: (top of press) Push-up to straight-arm position
  11. Head: Keep gaze straight ahead

Squat Variations

Here are just a few variations you can try after mastering the pattern. Remember, do the basic stuff really well before moving on to the really hard stuff.

Overhead w. Dowel IMG_1201

2KB Front Squat

IMG_1211

BB Back Squat

IMG_1217

Like what you've just read? Click here to subscribe to our blog!

This blog was written by Tony Maloney, ACSM Certified Exercise Physiologist and Fitness Center Manager. To find out more about the NIFS bloggers, click here.

Topics: exercises powerlifting squat pattern functional movement joints assessment squat functional movement screen