<img height="1" width="1" style="display:none" src="https://www.facebook.com/tr?id=424649934352787&amp;ev=PageView&amp;noscript=1">

NIFS Healthy Living Blog

King of the Gym, Part 4: Bodyweight Squat Exercises on the Go

In part 4 of this series on squats, I focus on body weight again, setting up lower-body conditioning routines you can do at home, outside in the park, or in the hotel when you’re on the road. These are some of my favorite go-to workouts when I’m on the road or don’t have time to get in a quick leg workout. As I have reiterated throughout this blog series (part 1, part 2, and part 3), regardless of your fitness goals, you can and should add some form or fashion of squats to your fitness routines.

A Quick Workout: AMRAP Challenge

This video is a 6-minute lower-body AMRAP challenge. Your goal is to follow the routine and complete the series for as many rounds as possible (AMRAP) in the 6 minutes. Keep in mind, if you’re a beginner, start with less time (start with 4 minutes) or fewer reps of the combination. I love doing this quick workout when time is limited and I need to get in a quick lower-body workout.


Follow order:

  • Reverse Lunge
  • BW Squat
  • Reverse Lunge
  • BW Squat
  • Box Jump
  • BW Squat (on Box)
  • Step-down
  • BW Squat

A Tougher Lower-body Workout

When I’m on the road but do have time to get a tough lower-body workout completed, I like completing the following six series combined for a workout. Start with the first video and work your way through all six challenges. This has a variety of work to be completed, from EMOMs (Every Minute on the Minute) to Ladders (x1–10 Reps). Again, keep in mind, if you’re a beginner, start with less time, fewer reps, or a combination of the six challenges. As you advance, add more time or complete more than one challenge together if time allows. Also, if time is short, just like the 6-minute lower body challenge, complete one of the challenges instead of all six.

CHALLENGE 1: 10 minutes EMOM (Every Minute on the Minute) x15 Bodyweight Squats

CHALLENGE 2: 3 rounds x15 R/L—Rear Foot Elevated Split Squats

CHALLENGE 3: 5 rounds x5 Reps—Squat Jumps w/Floor Taps

CHALLENGE 4: x10min EMOM (Every Minute on the Minute) x10 Single-leg Bridges (R/L)

CHALLENGE 5: Burpee Ladder x1–10 x1 Rep x2 Reps x3 Reps... x8 Reps x9 Reps x10 Reps—Finished


CHALLENGE 6: Alternating Split Squat Lunge Jumps—Ladder x1–10 x1 Rep x2 Reps x3 Reps... x8 Reps x9 Reps x10 Reps—Finished


Get “King of the Gym” Results Outside the Gym

Whether you’re taking a break from heavy back squats or just need variety, or possibly you’re on the road traveling, you have ways to focus on your lower-body strength without a barbell and rack. Throughout the four posts in this series, Instead of adding more weight to your back squats, you’re changing up the exercises to make it more difficult and challenging. Your squats can progress in a similar way if you’re not barbell back squatting: You can start by doing air squats with both legs, then progress to split squats, and eventually one-legged pistol squats, which are a lot more challenging. On the road, focus on body weight again and set-up lower-body conditioning routines.

As I have reiterated in each of the preceding posts, regardless of your fitness goals, some form or fashion of squats can and should be added to your fitness routines. The end result for your lower body is similar to what you can get from working out with “king of the gym” back squats.

Like what you've just read? Click here to subscribe to our blog!

This blog was written by Michael Blume, MS, SCCC; Athletic Performance Coach. To learn more about the NIFS bloggers, click here.

Topics: fitness center workouts videos body weight bodyweight lower body outdoor exercise squat

Skip the Abdominal Crunch and Try These Core Strength Exercises

Screen Shot 2021-09-07 at 4.16.27 PMWe all know that core stability and strength is an important factor in exercise, athletics, and even daily living. Being able to properly brace and stiffen the core is an important skill in preventing lower-back injuries when attempting certain movement patterns that occur every day. The abdominal crunch, which people often think of as a core exercise, is actually not a movement we see in our day-to-day lives. Try and think of a time you have had to mimic the abdominal crunch under a heavy load: it simply does not occur.

More often than not, we need to be stronger in the core in a more upright or natural standing posture. The abdominal crunch is now being found to stress the low-back area, can cause discomfort by compressing your back joints, and can even lead to injury after a while.

So you are probably wondering, how do I strengthen my core in an upright position? The answer is through anti-movement patterns. These could be anti-rotational, anti-flexion/extension, or anytime you are forcing your body to resist being moved from a normal posture. These patterns can be accomplished in an isometric hold or a dynamic pattern with bands, kettlebells, or weights.

Anti-rotational Exercise: The Paloff Press

An example of an anti-rotational exercise would be the Paloff press, shown here:

The goal is to press the handle from your belly button slowly and in a controlled manner so that the core has to work to not let your body turn.

Anti-Flexion or Extension Exercise: The Plank

An example of an anti-flexion or extension would be a plank, as shown here:

The goal is to keep your hips down and really engage the core area by pulling your belly button in. You can add weights to your back or increase the time you do these to make them more challenging!

Strengthening Exercise: The Kettlebell March

An example of strengthening the core in that normal standing position would be a kettlebell march, where you can either do two kettlebells in the front squat position or one held out in front. Both are shown here:

Marching slowly and controlled is the key for this exercise. While doing this, all the muscles in your core fire to prevent you from falling any direction while you balance on one leg.

See a NIFS Health Fitness Specialist to learn how you can start strengthening your core in a neutral position to assist with your exercises and your day-to-day life. See these links for more information:

ACSM core PowerPoint: http://forms.acsm.org/TPC/PDFs/23%20Best.pdf

PT Dr. Aaron Horschig: “The Big Three”: https://www.youtube.com/watch?v=2_e4I-brfqs

Like what you've just read? Click here to subscribe to our blog!

This blog was written by Grant Lamkin, NIFS Health Fitness Specialist. To learn more about the NIFS bloggers, click here.

Topics: injury prevention videos core strength core exercises lower back pain anti-rotational anti-flexion

Flight School: Training to Improve Your Vertical Jump for Sports

GettyImages-1291852744
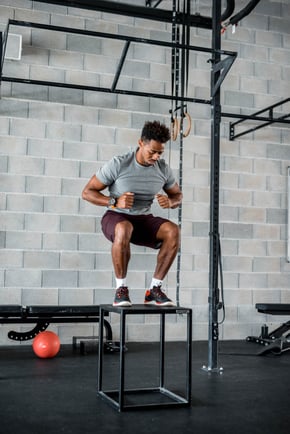
When watching elite athletes during competition, there are many athletic traits and features that we novices or amateurs marvel at. We think to ourselves, “If I did something like that, I wouldn’t walk for a week!” Seeing an NFL running back or wide receiver make a cut at full speed, a baseball player hitting a 400-foot home run, or a powerlifter deadlifting the weight of a Volkswagen Beetle are feats that just leave you in awe.

One of my favorites is to watch the jumping ability that is on display in countless basketball, football, and many other sporting events. Nothing seems to get fans and folks like myself more fired up than to watch an NBA player effortlessly float in the air and dunk on an opponent, or an NFL receiver jump up over two or three defensive players and come down with the football. No doubt, the combination of high-level athletic ability and hard work has paid off for many of these professional athletes with what seems like superhuman abilities. There is a reason that we see these men and women on TV and pay to see them during competition. The capabilities of the human body are crazy!

Improve Your Jump to Improve Your Sport

So, many of you reading this are probably not professional athletes. You might be former high school or college student athletes who have since “retired” from your respective sport. Like many of us, the “athlete” in us never really goes away. We find other sports or competition to feed that drive that we had as we grew up by playing recreational-league sports like basketball, flag football, or soccer, or have picked up new sports such as golf (like this guy) or tennis. And if you’re anything like me, you want to try and continue to improve in your new sport as much as possible.

Regardless of where you are in the timeline of your athletic journey, the vertical jump and vertical power will always play an integral role in your performance. Basketball and volleyball are the most obvious sports that are reliant on these abilities, but golfers, tennis players, and athletes in any other sport that utilizes rotational aspects would benefit highly by increasing their vertical jump. I mean, who wouldn’t want to hit the golf ball farther or add a few more miles per hour on their tennis serve?

When it all comes down to it, the amount of force we can put into the ground will dictate a lot of the athletic actions that happen with our bodies.

Three Jump Training Styles

Below I break down three different types of jump training styles that will put you on your way to soaring above the competition.

Body Weight

This is the most common type of jump training that you will see. Utilizing only the weight of your body, you perform these plyometric jump movements with little or no equipment. In the video below, you will see three movements starting from easiest to most advanced. These include the following:

  • Wall Touches
  • Box Jumps
  • Depth Jumps


Resisted Jumps

Now we get into some of the less common vertical jump training options. Resisted jumps add some type of downward-pulling resistance that will make your jump seem more difficult and hopefully help you generate more effort into the movement. The movements in the video below include the following:

  • Medball Powerball
  • DB Resisted Jumps
  • Band Resisted Jumps


Assisted Jumps

The third variation is assisted jumps. In my opinion, these are the most enjoyable. The goal here is to feel like there is a trampoline-effect going on where you just seem to spring up into the air. Most (if not all) variations will utilize a band. The three movements I have chosen for you are the following:

  • Banded “Belt” Jumps
  • Band Rack Pogos
  • Band Rack Squat Jump


All in all, the vertical jump is a very important skill to improve and master with regard to overall athletic ability. When it all boils down, the amount of effort you put into the training will dictate the results you get. Doing the majority of your jumps at 50 percent effort will yield an improvement in just that: jumping at 50 percent. Try to maximize your effort with each set and repetition where you are working at or above 90 percent effort, whether that be because of doing lower repetition ranges (1–5 reps) and/or making sure that you are fully recovered between sets (about 1–3 minutes’ rest).

Give great effort, get great results!

Like what you've just read? Click here to subscribe to our blog!

This blog was written by Alex Soller, Athletic Performance Coach and NIFS trainer. To find out more about the NIFS bloggers, click here.

Topics: resistance videos sports body weight athletes athletic performance lifetime sports exercise bands vertical jump vertical power jumping jump training

King of the Gym, Part 2: Lower-Body Training with Simple Equipment

If we had learned anything during our time during COVID, we’ve found creative ways we can train to get fit and stay strong in our living rooms, garages, basements, and backyards with our favorite squat racks. In part 2 of my blog series, you’ll learn how to use something simple like a dumbbell, kettlebell, med-ball, or light equipment like resistance bands to functionally train your lower body in place of the “king of the gym” back squats. 


Videos: No-barbell Exercises

If you don’t have a squat rack and barbell at the ready, there are a variety of different worthy alternatives to back squats—with no barbell required. Here are seven “king of the gym” alternatives that can use a kettlebell, dumbbell, med-ball, or bands.

The exercises in the preceding videos are great alternatives for anyone, especially if you can’t make it into the gym but you do have some light equipment at your disposal.

Functional Training for the Lower Body

Even if you are in the gym, but you don’t quite like the idea of doing a heavy-loaded barbell lift, you can still create resistance for your lower body. Resistance doesn’t mean loaded barbells; instead, these alternative exercises are loaded differently to functionally train the lower body. 

In part 3 of the series, I focus on body weight only, and in part 4 I set up some different routines you can do in a hotel when you’re on the road. Regardless of your fitness goals, you can and should add some form or fashion of squats to your fitness routines. 

Like what you've just read? Click here to subscribe to our blog!

This blog was written by Michael Blume, MS, SCCC; Athletic Performance Coach. To learn more about the NIFS bloggers, click here.

Topics: exercise at home equipment videos lower body squat pandemic

King of the Gym, Part 1: Squat Alternatives

I enjoy all forms of exercise, but like many, I want the most bang for my buck when I’m exercising. Sure, I am always on the lookout for the new and best exercises that would not only kick my behind, but also have benefits all around. However, I always trend back to the “king of the gym”: an exercise that I do without fail—SQUAT

The Squat Reigns Supreme

Squats are often referred to as the “king of the gym” exercise, and for a good reason. When done correctly, squats utilize essentially every muscle in the body. If you want to get stronger, get bigger, or lose weight, squats will help. Although they aren’t a must in order to build your lower body, they are probably the most efficient exercise. Whether it’s building a stronger core, back, and legs; increasing bone density; or burning fat, squats are the best bang for your buck due to the engagement of many muscle groups activated at once.


But this post isn’t about just about squatting. In fact, in this four-part series, I want to show you that there are plenty of different alternatives to the “king of the gym.” We don’t always have the luxury of a barbell and rack or endless equipment resources from the gym. Perhaps you train from home or are on the road at a hotel. Either way, No worries!

Squat Alternatives Using Other Gym Equipment

First up are five effective squat alternatives you can do with access to gym equipment other than the traditional barbell back squat. Are there more than five? Yes, but these are my favorites. When I have an injury, or I’m bored, or all the racks in the gym are being used, I like to substitute these five exercises in place of squats. These five moves show alternatives to squatting that you can do efficiently in the gym when a barbell and rack aren’t available and still achieve similar or better gains.

As you can see, an effective squatting workout doesn’t have to be limited to the “king of the gym.” If you don’t have a squat rack available, there are a variety of different squatting alternatives you can use instead.

More in the Series

In part 2 of this series, learn how to use bodyweight and light equipment like resistance bands to functionally train your lower body. In part 3 of the series, I focus on body weight only, and in part 4 I set up some different routines you can do in a hotel when you’re on the road. Regardless of your fitness goals, some form or fashion of squats can and should be added to your fitness routines.

Like what you've just read? Click here to subscribe to our blog!

This blog was written by Michael Blume, MS, SCCC; Athletic Performance Coach. To learn more about the NIFS bloggers, click here.

Topics: fitness center equipment weight loss strength core videos squat

Use Prehab Exercises to Improve Athletic Performance and Health

To potentially prevent future injuries, you can use prehab exercises to bomb-proof your body. The overall goal of prehab exercises is to increase durability in your physical activities with better-quality movements, which will improve your performance and overall health.

How Prefab Exercises Help

As a planned part of your exercise routine, prehab exercises will help with mobility, activation, and stabilization:

  • MOBILITY is the process of collectively improving your flexibility.
  • ACTIVATION is the process of causing controlled contractions or trying to “turn on” specific underactivated muscle groups to fire.
  • STABILIZATION is the process of generating coordination, or to control movement.

Videos of Prefab Exercises

The videos I’ve added are a few of my favorite routines to do with athletes before workouts begin. The goal is to strengthen and mobilize joints (such as shoulders, hips, knees, and elbows) as well as help practice movements you do during workouts and everyday life. Depending on your workout for the day, I’ve included samples of full-body, upper, and lower routines that I use with athletes regularly.

Full-Body Prehab Exercise Video


Upper-Body Prehab Exercise Video


Lower-Body Prehab Exercise Video


Practice is the key to all these prehab exercise movements. Work on the exercises that you find the most challenging and develop a body that will be mobile, strong, and stable for many workouts to come.

Like what you've just read? Click here to subscribe to our blog!

This blog was written by Michael Blume, MS, SCCC; Athletic Performance Coach. To learn more about the NIFS bloggers, click here.

Topics: exercises videos mobility joints movement stability prehab

Plyometric Push-up Variations to Spice Up Your Workout

Hello NIFS Friends! With a show of hands, who loves push-ups? Well if you are one of those people who just isn't into push-ups (or if you are someone who just wants to spice up your workout routine), there is a wide array of push-up variations that can not only make you better at push-ups, but will also keep your workouts fresh and exciting. For these exercises, we are using a plyometric theme throughout.

Plyometrics are generally done with the lower body (think box jumps) to develop power through rapid stretching and contracting of a muscle group. Developing this type of power is great for athletes looking to gain a little quickness for their sport, as well as older athletes looking to maintain strength and muscle functionality. 

Give these exercises a try in your next workout and let us know what you think! Enjoy. 

  • Standard Push-up on boxes
  • Bias Push-up
  • Depth Push-up
  • Incline Push-ups


Like what you've just read? Click here to subscribe to our blog!

This blog was written by Thomas Livengood, NIFS Health Fitness Instructor and Personal Trainer. To learn more about the NIFS bloggers, click here.

Topics: Thomas' Corner workouts exercises videos plyometric push-ups

Increasing Grip Strength Can Lead to Big Gains

Have you ever heard the saying, "You are only as strong as your weakest link?" This can apply to many facets of your fitness and wellness, but today we are going to look at Grip Strength as it pertains to overall upper-body strength and beyond.

Is Weak Grip Strength Holding You Back?

Thinking about some of the all-time classic upper-body exercises, such as bench press, pull-ups, and even bicep curls, we do not always associate grip strength as a reason we may have limitations or are unable to see quicker progress. Think about this: If your chest is strong enough to bench press 100lb dumbbells, but your grip strength is only strong enough to hold 50lb dumbbells, you probably are not going to be able to challenge your chest appropriately. You are only as strong as your weakest link.

How can you overcome this deficiency? One way is to start implementing grip strength training into your routine. Whether your goal is to open a jar of pickles or to tear a phonebook in half, improved grip strength has its benefits for nearly everyone.

Grip Strength Exercises

Try these creative exercises to spice up your routine and get the most out of your workout.

Exercise 1: Barbell Open/Close Hand

Holding a barbell (size can vary depending on your experience level), stand with good posture. Slowly open your hand, allowing the bar to roll toward your fingertips. As soon as the bar is at its farthest point, slowly close your hand, returning the bar to the starting position.

Exercise 2: Machine Wrist Rolls

Using a cable machine, first attach a straight bar attachment. Stand with knees bent and body in an athletic position, keeping the back flat. Using lighter weight, allow the attachment to spin in your hands while under control. Make sure you go both directions!

Exercise 3: Towel Kettlebell Farmer’s Carry

Using two Kettlebells (one if you are doing a Suitcase carry) and two towels, begin by wrapping the towel through the handle of the kettlebell, creating a "handle" with the remaining towel. Grip the towel and carry the kettlebell with the towel. Maintain good posture, chest up and eyes straight ahead. Walk forward, turn, and walk back to the starting point.

Exercise 4: Bosu and Bodybar Wrist Roll

Begin by standing on a Bosu ball (or any unstable surface). Hold a bodybar at shoulder height and as far from your body as possible. Turn the bar in your hands; it should spin (not unlike accelerating a motorcycle). Make sure you do both directions.

See a NIFS Fitness Specialist to discuss how to improve your grip strength today! Enjoy.

Like what you've just read? Click here to subscribe to our blog!

This blog was written by Thomas Livengood, NIFS Health Fitness Instructor and Personal Trainer. To learn more about the NIFS bloggers, click here.

Topics: Thomas' Corner videos grip strength upper body BOSU

Shouldering the Load: Safe Alternatives to the Overhead Press Pattern

_68R6419
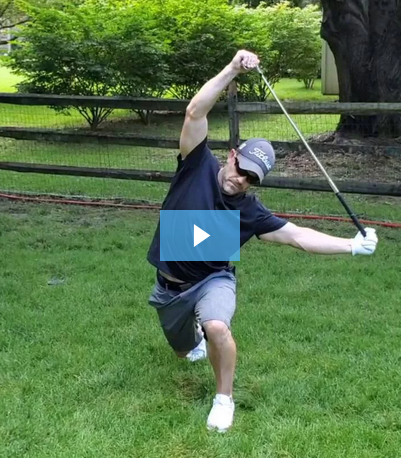
In my experience over the years working with folks from all walks of life to help improve their strength, mobility, performance, and overall fitness I have found that so many suffer from immobility in two major joints: the ankle and the shoulder, which is the focus of this piece. Lifestyle, occupation, inactivity, and overtraining are all culprits robbing so many of healthy range of motion in the shoulder and shoulder girdle.

Throughout the history of fitness and muscle, one of the sexiest exercises is the overhead press (OHP). The overhead press is used as an assessment of one’s strength, it’s involved in the popular Olympic lifts and many activities of daily living, and it feels pretty darn good to lift something heavy up over your head. With so many variations that can develop strength and stability in the upper body, the overhead press can be a phenomenal tool in a training toolbox.

Questions to Ask Yourself

There are many benefits to the overhead press exercise, but what if you suffer from immobility in the shoulder or have suffered an injury that has made the vertical press pattern difficult or painful? There are some options for you that can keep you safe while reaping the many benefits of the vertical press movement pattern. Before we get to those, however, I’ll ask a couple of questions.

What are your desired fitness outcomes and goals?

“If you think it, INK IT!” is a practice I learned long ago from a great coach, and for years I have been insisting clients write down what they hope to accomplish along their fitness journey. If you don’t know where you want to go, it will be difficult to formulate the map to get you there. Take the time to reflect, develop, and write your fitness goals before starting any fitness program.

How will the overhead press exercise help you get there?

Pretty straightforward question: how will the overhead press exercise help get you to where you want to go? Depending on your goals, the OHP may play a major role, or it might play a minor role in your success.

How do you know whether you should be including the overhead press in your training?

Once you have established your fitness outcomes and how the overhead press can assist in obtaining those outcomes, it is important to determine whether the overhead press is a safe exercise to include in your training. Your best first step is to complete a Functional Movement Screen (FMS) that will provide some crucial information to your fitness programming. First and foremost, the FMS, specifically the Shoulder Mobility Screen, will determine whether there is pain involved with the overhead position. If there is pain, you will need to see a medical professional to tackle that before anything else should happen.

A score of 1 on the Shoulder Mobility Screen signifies that, among other things, you should exclude overhead pressing from your training until the pattern is cleaned up and you are no longer scoring a 1 on the screen. A score of 2 or 3 means the vertical pressing motion can be included in your training safely. Schedule your FMS with one of NIFS instructors today to ensure you are able and safe to include the overhead press exercise in your programming.

Overhead/Vertical Press Options

Once you have your screen from your NIFS certified pro, you now know where you stand to shoulder the load. If you are cleared to press overhead, I say have at it and press on! But if you are directed to stay away from strict overhead pressing, here are a few options that can provide many of the same benefits from the overhead press while working in a safer shoulder space.

  • Landmine Press: 1/2K and Standing
  • Landmine Arc press: 1/2K and standing
  • Incline DB press: SA and double arm
  • Jammer Press

Screen Shot 2020-10-01 at 11.52.08 AM

Shoulder health, strength, and stability are so important in training and, more importantly, everyday living. The vertical press options here are great ways to continue to bulletproof your shoulders, and the best first step is to get screened and take care of your shoulders prior to heavy loading. One simple and highly effective way to tackle shoulder health is to add the “dead hang” into your training program. Learn more in Lauren’s recent post covering this effective drill. Stay shoulder safe!

Like what you've just read? Click here to subscribe to our blog!

This blog was written by Tony Maloney, ACSM Certified Exercise Physiologist and Health/Fitness Instructor. To find out more about the NIFS bloggers, click here

Topics: shoulders injury prevention muscles weight lifting strength exercises videos mobility upper body stability overhead press shoulder mobility

Hacks 4 Golf Hacks: Warming Up Before You Tee It Up

GettyImages-153066762Looking back on the history of my work in the blog world, I have found that every year around this time I tend to write about a sport I sometimes love to hate: golf. So, without further ado, it is time for my yearly “golf blog,” where I share a few insights from a hack’s viewpoint that will hopefully lead to some success in your game. If you play this frustrating yet beautiful game, you know that every round can either be 4 hours of bliss, or contemplating why you spent so much money on those clubs. And maybe that’s what makes the game so special for so many, the never-ending battle between good and evil (thoughts, that is).

Whatever it is that keeps you coming back to the links, obviously you want to play the best you can and as long as you can. The proper warm-up for any type of fitness or performance activity has been spoken and written about by countless fitness pros, yours truly included, but I would argue it’s super important to your game and your health to talk about warming up before you tee it up.

Before the Course

If you are like me, sometimes you get to the course with only a few minutes to spare before your tee time. Here are a few strategies you can implement that don’t take a lot of time and will benefit both your game and your body.

  • Be fit: Okay, I lied, this one does take some time, but being fit and healthy before taking on any activity is imperative to maintaining your health. I think we would all agree it might be foolish to hop into a 5 v 5 pickup game on the basketball court if you have been on the couch for the last three months. You would want to work on your cardio, power, and endurance so that you can compete and enjoy the activity. Same goes for golf. Don’t let the cart fool you: it is a physically demanding game—if you wish to compete with your pals, that is. So, take care of yourself and make sure you are getting that minimum 150 minutes per week of moderate to vigorous exercise recommended by the ACSM.
  • Soft-tissue work at home: If you have time before hitting the course to hit the foam roller, I highly recommend it. Spend some time on the glutes, lats, adductors, T-spine, and hamstrings. (link)

On the Course and in a Hurry

Here are some videos that demonstrate some important warm-ups and drills.

Screen Shot 2020-09-01 at 12.41.25 PM

  • Increase Tissue Temp: Walk, small plyometrics (jumping jacks), light jog

Drills:

  • Chest Stretch
  • SA OH Reach
  • Club windmills
  • Reverse Lunge with Lateral Reach
  • Lateral Leg Swings
  • Trunk Rotations (iso)
  • Back and Down Swings

Now, there may be a few things holding you back from completing a proper warm-up before enjoying a great day of the oldest game. You may not show up to the course in time. I make time to get there early to get outside and really begin the round before the first tee. You might feel a little “goofy” going through a proper warm-up in front of your friends. To that I say, “success favors the prepared,” and you can show them drills after you beat them on the course, or are able to play again immediately without soreness, or carry the bag for 18 holes and remain upright. A proper warm-up may not get you on tour, but it may save you a few strokes aside and keep you playing longer.

Like what you've just read? Click here to subscribe to our blog!

This blog was written by Tony Maloney, ACSM Certified Exercise Physiologist and Health Fitness Instructor. To find out more about the NIFS bloggers, click here.

Topics: videos golf warming up drills lifetime sports