<img height="1" width="1" style="display:none" src="https://www.facebook.com/tr?id=424649934352787&amp;ev=PageView&amp;noscript=1">

NIFS Healthy Living Blog

Plank Progression Series

GettyImages-1168143615The plank series needs no equipment, only a wall (if you make it that far). Attempt to complete the plank series in order. Complete the plank progressive series on the days you work out at the end of your workout. If you are x2 days in a row successful and have perfect technique with the exercise, move on to the next progressive variation. You will see that the traditional plank is repeated multiple times and we will add time as you progress along over break. You do not need to do more than what is asked of you. It will be easy at first, but trust me: it gets harder by the end.

Step 1: Build Awareness

The dowel is placed along the spine and is kept in contact with three points: back of the head (not the top), thoracic region (between shoulder blades), and the sacrum (tailbone). This forces you to understand and become aware of proper alignment. Essentially, the dowel serves as your coach. If it rolls off or wobbles, you aren’t in good alignment.

Additionally, the quadruped position is great to begin to develop awareness of optimal alignment because it takes most of the load off the system while still keeping the torso in a very similar position to the abs plank. 

Once you can hold optimal position for 30 seconds, move on to step 2. 

Step 2: Lengthen the Lever Arm

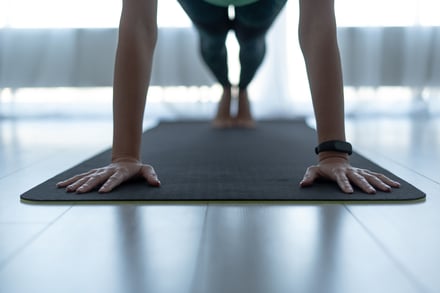
The straight-arm plank is essentially a static hold in push-up position. This takes what we learned in step 1 and adds in some load due to the increased length in the lever arm. The load on the abs here is not as great as on the elbows.

If you cannot hold optimal alignment for 30 seconds, keep working here until you can. If you can maintain optimal alignment without disturbing the dowel, you are ready to move on to step 3.

As I stated above, the elbow plank with dowel increases the load on the torso even further over the straight-arm variation. In other words, it demands more strength and control of optimal alignment.

Step 3: Elbow Plank

Once you can hold this position for at least 30 seconds without much fatigue, you are ready to move on to the advanced progressions that I’ve laid out below.

If you cannot, remain here at level three until you can achieve a 30-second hold without too much fatigue.

Keep in mind that just because you are doing planks, it doesn’t mean that you can do them correctly. The dowel is a simple method of telling you how good your planks really are.

Once you’ve mastered the basic plank with the dowel, you no longer need to use the dowel.

Plank Progressions

Now that you understand what is required to perform an optimal fundamental plank, I can show you the complete progression spectrum from beginner to advanced planks. Once you can maintain optimal alignment here for required times, move on to the next level.

Screen Shot 2021-01-28 at 2.10.59 PM

Level

Plank Progression Exercise

Sets & Time

Notes

1

Half-Kneeling Elbow Plank

2x1min

On knees & elbows

2

Traditional Plank

2x :45 sec

On elbows & toes

3

Push-up Plank

2x :45 sec

Push-up position

4

Plank w/ Leg Lift

2x :20 sec

Push-up position

5

Plank w/ Arm Lift

2x :20 sec

Push-up position

6

Half-Kneeling Side Elbow Plank

2x1min (R/L)

On knee & elbow, hip up, x1 min—R/L

7

Elbow Side Plank

2x :45 sec

On elbow & foot

8

Up/Down Plank

2x :30 sec

Alternating elbow plank to push-up plank continuously

9

Decline Plank

2x :45 sec

On elbows & toes with feet elevated

10

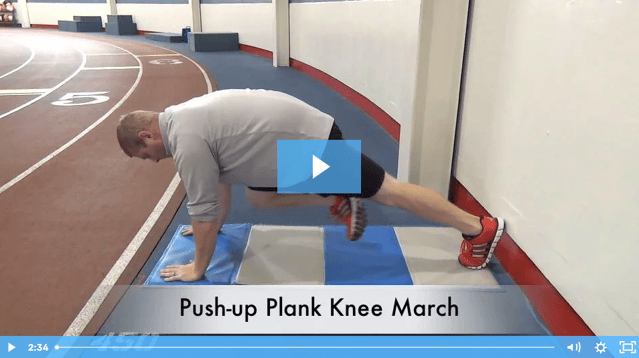
Plank w/Knee to Chest (March)

2x1 min total

Pull knee up to chest & alt R/L every 10-15 secs

11

Side Plank w/ Knee to Chest (March)

2x1 min total

Pull knee up to chest & alt R/L side after 30 secs

12

Side Plank w/ Leg Abduction

2x1 min total

Leg straight and extended upward & alt R/L side after 30 secs

13

Bird-Dog Static Plank

2x:30 sec

Push-up position, bring opposite elbow to knee touching underneath hips and hold (R/L)

14

Bird-Dog Active Plank

2x:30 sec

Push-up position, bring opposite elbow to knee touching underneath hips and then actively extend same arm/leg out and back to touching (R/L) & repeat

15

1-Arm Rotating Plank to Side Plank

2x:30 sec

Starting a traditional plank, take one arm/hand and reach for opposite armpit. Then actively rotate to a side plank and extend the arm to the sky & rotate back to plank (R/L) & repeat

16

Wall Plank


On elbows & toes—feet against the wall & elevated

17

Wall Plank w/ Knee to Chest (March)

2x 1 min total

Feet on wall—pull knee up to chest & Alt R/L every 10-15 secs

18

Wall Plank w/ Bird-Dog Static Plank

2x :30sec

Feet on wall—push-up position, bring opposite elbow to knee touching underneath hips and hold (R/L)


Like what you've just read? Click here to subscribe to our blog!

This blog was written by Michael Blume, MS, SCCC; Athletic Performance Coach. To learn more about the NIFS bloggers, click here.


Topics: workouts plank workout programs

Get SMART This Year: Fitness Goal Setting

GettyImages-474222302
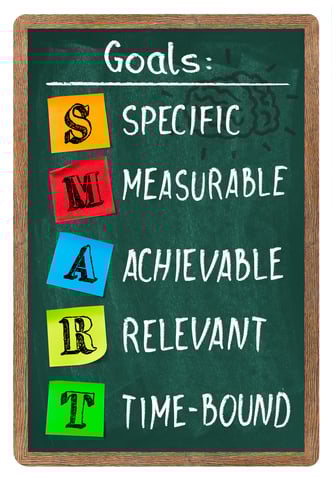
Think about some top goals you have. Maybe your top goal is to lose weight. Your weight-loss journey is what I call the “Big Picture”—your target on losing weight and starting a healthier lifestyle. Sometimes the big picture can be daunting. Many might perceive this goal as too big, or virtually unattainable. But IT IS ATTAINABLE! It just takes focus and hard work.

The best way to accomplish your big-picture goal is to first make the goal SMART (more on that shortly). Then, create smaller, short-term goals that you can check off along the way. These are sometimes called action steps. Action steps will allow you to create small habits that will help you not only REACH your goal, but also ultimately maintain your success.

GET SMART

SMART is an acronym:

  • Specific: Clearly identify the goal. Be concise.
  • Measurable: Attach a measure to the goal such as inches or blood-work measurements (%, mg/dL, etc), minutes, or percentage).
  • Attainable: Ensure that the goals are realistic and manageable. Really think deeply about this. Be honest about yourself and your lifestyle.
  • Relevant: Make sure the goal is important to you.
  • Time-bound: Define the timeframe during which you are aiming to achieve the goal.

Here are some SMART goal examples:

  • I will decrease my mile time from 8:30 to 8 minutes over the next 4 weeks.
  • I will drink 100 oz of water each day for the next 4 weeks.
  • I will decrease my HgA1c by 1% in 3 months.

Create Your Action Steps

Now that you have determined the BIG GOAL, it is time to create action steps that will help you reach that goal. Think of these as mini SMART goals.

  1. List 3-5 action steps (or habits) that pertain to your overall goal.
  2. Explain how they will help you reach the big goal.
  3. Decide how you are going to track your success with each action step you take.

Here are some examples of action steps:

Let’s use the SMART goal example from above. I will decrease my mile time from 8:30 to 8 minutes over the next 4 weeks. Here are some action steps that may help someone reach that goal:

  • Run 5 days per week for 15–30 minutes over the course of 4 weeks.
  • Run 4, 1-mile repeats 1 time per week until I retest my mile time in 4 weeks.
  • Hire a running coach immediately to assist me in programming a customized running plan.

Questions to Ask Yourself Later

Once you’ve achieved an action step, ask yourself these questions:

  • How did you do?
  • How did it make you feel?
  • Was it easy to do, or were you pretty challenged to stay on track?
  • Does it still pertain to your overall goal?
  • What worked and what didn’t?
  • What needs to change?

The answers to these questions will help you determine whether you are staying focused on your goal, whether you are ready to take on or create another SMART goal, or if you need a little more time to concentrate on the one you are trying to turn into a habit.

Once you feel that you have accomplished your goal, work on another. Make changes and adjustments as needed throughout your journey. And even though these steps seem small, they ultimately lead to a large reward.

Check out this blog for an even closer look at the goal-setting process and why it's important!

Like what you've just read? Click here to subscribe to our blog!

This blog was written by Sabrina Goshen, NIFS Registered Dietitian. To learn more about the NIFS bloggers, click here.

Topics: goal setting resolutions new year's fitness goals smart goals

Get the Perfect Deadlift Setup Every Time

GettyImages-579405946
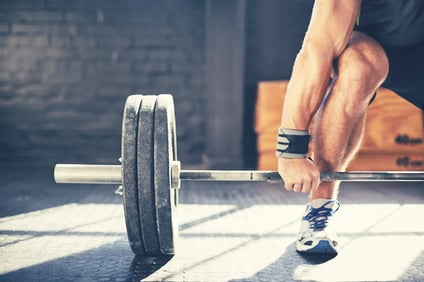
With the sport of powerlifting taking off in the last couple of years, more and more people are taking up the sport as a hobby and to improve their overall fitness levels. Training to improve strength in the squat, bench, and deadlift is a great way to improve total body strength and improve body composition.

Some may argue that lifting heavy is unsafe and should be saved for the athletes. The common myth is that lifting heavy may lead to injuries. The movement most argued against is the deadlift. When performed too heavy with poor form, this may be true. However, when performed with the proper progressions, and the proper technique, the deadlift is the best total-body movement to improve strength, power, and body composition.

Why the Deadlift?

There are three main benefits to performing the barbell deadlift:

  • First off, it is a whole-body movement. The deadlift works multiple muscle groups at the same time, offering more bang for your buck compared to isolation exercises.
  • Secondly, the deadlift improves strength and stability. Because it is a compound exercise, working more than one joint, this lift can be performed with heavier loads, leading to greater increases in strength.
  • Lastly, deadlifts can help improve posture. The muscles used while maintaining a flat back in the deadlift are the same muscles that help with sitting and standing up straight. The deadlift strengthens these muscles, leading to improved posture over time.

Now that we have gone over the benefits, let’s talk technique.

The Deadlift Setup

Follow these steps:

  1. Foot position: With your feet hip-width apart, the barbell should be placed over the center of your foot. An easy way to get the best foot placement is to look down, and move forward and backward until your shoelaces are directly under the bar.
  2. Grip: Without bending your knees or moving the barbell, bend over and grip the bar right outside of your legs. It is important that you do not move the barbell.
  3. Shins to the bar: Once you have your grip established, bend your knees and bring your shins to the bar. Do not over-bend them and push the bar away from you.
  4. Chest up and back flat: Without dropping your hips any further, puff up your chest and squeeze your shoulder blades together. By doing this, you will naturally flatten out your back.
  5. Drag: Take a big belly breath, hold it, and drag the bar up your shins. Keep your back muscles engaged and keep the bar close to your body the entire movement. When you let the bar get away from you, you have to compensate with your lower back, and this can lead to injury.

Keys to Success

Now that you have a safe setup, here are a couple of things to think about while performing the movement.

  1. On the last step of your setup, look out ahead of you. You do not want to overextend your neck, and you also do not want to be staring at the ground the entire time. Keeping your head in line with your spine will allow you to keep a neutral spine throughout the whole movement.
  2. When standing up with the barbell, your hips and shoulders should rise at the same time. If you allow your hips to come up first, the bar will get out in front of you, and like I mentioned earlier, you will have to compensate by pulling with your low back.
  3. Lastly, take a deep belly breath. A belly breath does not mean air all the way in your stomach, but what it does mean is filling your lungs all the way to the bottom to pressurize your core. A pressurized core equals engaged abdominals. When performing any lift, you want to create a solid core to help stay upright.
Watch the video below for the proper deadlift technique in action.

Screen Shot 2021-01-19 at 11.23.53 AMIf you are new to lifting and don’t know where to get started, come visit us at the Track Desk in the Fitness Center.

Like what you've just read? Click here to subscribe to our blog!

This blog was written by Evan James, NIFS Exercise Physiologist EP-C, Health Fitness Instructor, and Personal Trainer. To learn more about the NIFS bloggers, click here.

Topics: NIFS injury prevention weight lifting strength powerlifting deadlift total-body workouts heavy lifting

Optimal Movement Patterns for Building Muscle

Screen Shot 2021-01-14 at 1.10.19 PM
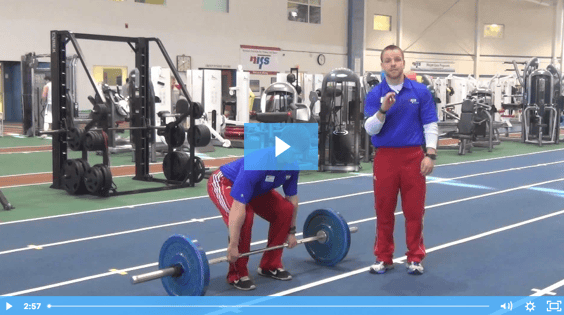
The traditional bodybuilding split of working one muscle group per day might work for the dedicated, high-level competitive bodybuilder who makes their living in the gym. But for the general population only looking to shed some unwanted pounds and improve their overall health, the traditional bodybuilding split is not ideal. Working multiple muscle groups in the same session is much more ideal because it ramps up the body’s metabolism more than working a single muscle group each day. To achieve this, we train the movement, not the muscles.

The Four Movement Patterns

There are four main categories in which we categorize the movement patterns: push, pull, squat, and hinge. Each category works a movement while working multiple muscle groups.

Push

This upper-body movement pattern uses all of your “pushing” muscles. The pushing muscles of the upper body include the chest, shoulders, and triceps. Common movements within this category include the following:

Read my full blog on the Push movement.

Pull

This upper-body movement pattern uses the “pulling” muscles. The pulling muscles of the upper body include the lats and the biceps. There are two different pulling variations, the horizontal pull and the vertical pull. The horizontal pull targets the lower lats and the vertical pull targets the upper portion of the lats. It is important to include both variations in your program. Common movements within this category include the following:

Read my full blog on the Pull movement.

Squat

The squat movement pattern is the pushing movements pattern for the lower body. The squat pattern mainly works the quadriceps and the glutes. This category also includes all single-leg movements. The squat pattern is a large compound movement that should be progressed properly. Common movements in this category include the following:

Hinge

The hinge movement pattern is the pulling movement pattern for the lower body. The hinge pattern is better known as the deadlift. The primary muscles worked during the hinge movement are the hips, hamstrings, and lower back. The deadlift is another exercise that should be progressed properly for safe lifting. On days that you work the hinge pattern, you should do some additional hamstring isolation movements. Common movements for the hinge pattern include the following:

Using the Movement Patterns

Knowing that there are four movement patterns, and which movement pattern works which muscle group, you can build your exercise routines. In a future blog, I will discuss why the full-body program is superior, and how to schedule your week using the movement patterns. In short, you can build your exercise routine by putting together two or more of the movement patterns in one day. After working a muscle group, you don’t want to work that same muscle group for at least 48 hours.

***

If you need any help building an exercise program, or want a health professional or personal trainer to put one together for you, come visit us at the Track Desk at any time.

Like what you've just read? Click here to subscribe to our blog!

This blog was written by Evan James, NIFS Exercise Physiologist EP-C, Health Fitness Instructor, and Personal Trainer. To learn more about the NIFS bloggers, click here.

Topics: weight loss muscles weight lifting weightlifting exercises building muscle movement squat leg day movement patterns pull hinge push

Does Cranberry Really Cure Urinary Tract Infections?

GettyImages-1193255058Cranberries and cranberry-derived products are commonly used as a remedy for urinary tract infections, especially among women. Cranberries contain proanthocyanidins (PACs), specifically A type (PAC-A). It is argued that this component of cranberries fights and prevents UTIs, just as an antibiotic would. However, there is much controversy on this topic.

Clinical Trials and Studies on Cranberry for UTIs

Freire Gde C. completed a large review of 24 studies totaling 4,473 participants. In the research, there was minimal evidence suggesting that cranberry products prevented UTIs. Within those studies, cranberry juice decreased the number of UTIs in women who had recurring UTIs; however, the studies that showed a significant efficacy were small trials. When studies grew in size, the difference between the placebo groups and the cranberry groups shrank.

Furthermore, a Stapleton AE et al study completed a randomized control trial of 176 participants, of whom 120 were taking cranberry juice and 56 were given the placebo over the course of 168 days. The adherence to instruction was similar between both groups (91.8% and 90.3%). However, cranberry juice did not significantly reduce UTIs.

The Maki KC et al study argues that cranberry juice intake does indeed lower the number of UTI episodes in women with a UTI history. In their RCT, 185 women were given 240-mL cranberry juice each day for 24 weeks, while 188 women were given the placebo. The cranberry group had 39 UTIs, while the placebo group had 67 UTIs. This makes the differences significant, meaning cranberry juice did indeed work.

So, why do some trials show significance while others do not? Occhipinti A et al1 suggests this is due to the lack of authentication of cranberry products used (some are not really cranberry-derived). Thus, the products used do not contain PACs-A, which are what scientists claim fight the UTI. In their study, they authenticated and measured the PCAs-A in the cranberry product given. They gave one group a cranberry product with 36 mg PACs-A two times daily and another group with the same number of participants a product with no PACs (placebo). After 7 days, a significant difference in colony forming unit/mL counts (via urine cultures) was found between the placebo and the PACs-A group. The PACs-A group had significantly fewer colonies. The argument here is that for cranberry products to work, the cranberry product must be carefully authenticated to ensure that it indeed contains PACs-A, which is a component typically lost in processing.

The argument here is that for cranberry products to work, the cranberry product must be carefully authenticated to ensure that it indeed contains PACs-A, which is a component typically lost in processing.

Drug Interactions, Additive Effects and Side Effects

Lexicomp, a drug database used by medical professionals, still advises people to monitor cranberry intake while taking warfarin; however, there is little research to suggest the two adversely interact. Since cranberry juice is acidic, it is important to avoid drinking it within 2 hours of taking erythromycin, a common antibiotic, because it will decrease metabolism of the drug.

Common side effects of cranberry are nausea, vomiting, tightness in the chest, itching, cough, swelling of the face or lips, seizures, GI upset, and loose stools.

The Clinical Bottom Line

There is little evidence that suggests cranberry products decrease UTIs, mainly because the PACs-A have been lost in the processing. Although people are welcome to use cranberry-derived products, I would warn about the GI upset that can occur with excessive use, the cost of cranberry tablets, lack of authentication of the products, and added sugar content in the juices. Because of the lack of evidence, I would not advise individuals to spend their money on cranberry tablets. I would also argue that the risks associated with added sugars in the juices outweigh the small chance of preventing a UTI. If you insist on using cranberry for UTIs, be sure that it contains the bioactive PACs-A.

Further Research Is Needed

Much of the research done to prove cranberry juices and products prevent UTIs fails to address the authentication of the products used, and whether they even contain the bioactive PACs-A. I think further research should include authentication of the products used. If they do that, they may see that cranberry can indeed reduce and treat UTIs.

Like what you've just read? Click here to subscribe to our blog!

This blog was written by Sabrina Goshen, NIFS Registered Dietitian. To learn more about the NIFS bloggers, click here.

Topics: nutrition supplements fruits and vegetables dietary supplements food as medicine infections cranberry home remedies juice

Shiny Penny! How Band Distraction Can Improve Your Mobility

Pigeon Stretch-1
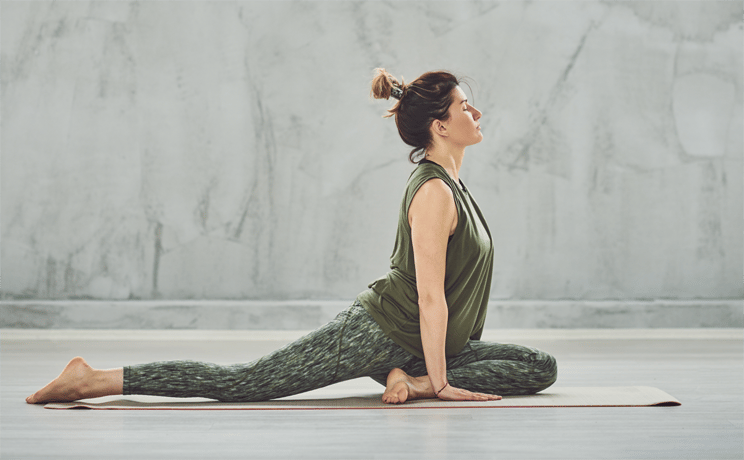
Whether you’re a competitive athlete, a weekend warrior, or the casual gym-goer, addressing mobility concerns can go a long way toward performance enhancement and injury prevention. If a joint is unable to move through a complete range of motion unloaded, then it’s going to be “bad news bears” when it comes to putting that same joint under any external load. Eventually, limited mobility could lead to muscular imbalances and compensation patterns, which could ultimately lead to the onset of injury. In other words, you can’t look to build strength on top of dysfunction.

How Band Distraction Works

There are numerous ways to tackle mobility, and it’s a heck of a lot more than just lying on a mat, hitting some static stretches for 10 minutes, and calling it a day. One such technique, band or joint distraction, involves using resistance bands to specifically isolate and improve the way bones glide over each other within a joint. This is accomplished by separating the articulating surfaces to allow for synovial fluid (the body’s homemade version of WD-40) to fill the joint and allow for less friction and (hopefully) increased motion. In other words, it creates “space” inside the joint complex. Band distraction can be used with nearly any joint in the body; however, the usual suspects are typically the ankle, hip, and shoulder.

Examples of Mobility Drills Using Band Distraction

Screen Shot 2021-01-07 at 12.35.58 PMHere are a few specific examples of band-distracted mobility drills:

  1. World’s Greatest Stretch
  2. Pigeon Stretch
  3. Half-Kneeling Ankle
  4. Shoulder Girdle (2 versions)

Important Tips

A few things to keep in mind when utilizing band distraction on a joint:

  • Be sure to anchor the resistance band to an immovable post, squat rack, etc.
  • Position matters! Be sure the band is placed over the correct structures, usually the crux of the joint or as close to it as possible.
  • This is one piece of the mobility puzzle. Pair this technique with soft-tissue work (foam rolling, trigger-point therapy, etc.) as well as a thorough dynamic warmup to encourage adequate blood flow and maximize readiness.
  • You don’t need to stretch each area for an eternity. Try 30 seconds to start on each structure.

Like what you've just read? Click here to subscribe to our blog!

This blog was written by Lauren Zakrajsek, NIFS Health Fitness Instructor, Personal Trainer, and Internship Coordinator. To learn more about the NIFS bloggers, click here.

Topics: shoulders injury prevention resistance exercises mobility joints hip mobility ankle mobility exercise bands band distraction