 The New Year is just around the corner and many will be out to improve themselves on many levels in 2021, with health and fitness usually being number one on the list. If losing weight, increasing lean muscle tissue, and sculpting a lower half that will certainly turn heads, while all at the same time improving your heart health is what you are looking for, I have one answer. The use of sprints in the world of fitness and sport performance is nothing exceptionally new, but can be new to you. Actually, sprinting (fast, short bouts of running) was used to stay alive long before we used it as a mode of training.
Author Mark Sisson has spent a great deal of time spreading the message of the importance of sprinting to overall health, and that it was a huge part of daily life for our early ancestors. He believes, and I like his theory, that primal humans (represented by a caveman known as Grok) owed their fitness to three important concepts:
- They walked great distances during their hunting and gathering trips.
- They lifted heavy things such as building materials and large animals.
- They sprinted for their lives from time to time from wild animals, and chased down game for their paleo dinner.
So Mark says, walk a bunch, lift heavy things (and set them back down, of course), and sprint once in a while, and fitness will find you. I think he nailed it. There isn’t much difference between a sound fitness program and what I just described. So why is sprinting so important and beneficial?
The Benefits of Sprinting
There are easily a hundred benefits of sprinting. This acute stressor can have many positive effects on your body. Here are just a few benefits of adding sprint work into your training:
- Sprinting can be used across all fitness levels.
- Sprinting doesn’t take a lot of time to do.
- Sprinting burns fat.
- Sprinting improves endurance.
- Sprinting improves insulin sensitivity.
- Sprinting is a fun and easy way to get and stay lean.
When implementing sprinting into your training, there are some pretty important steps to follow. To help you get started, here are a few tips that will get you on your way to sprinting more in 2017.
Step 1: Prepare Your Feet and Mobilize Major Joints
Feet: https://nifs.wistia.com/medias/7w84n4t9px
Mobilize: https://nifs.wistia.com/medias/l6m3ft8v72
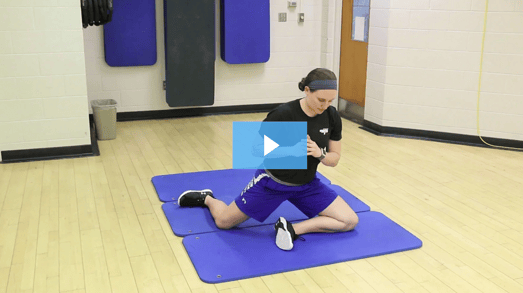
Step 2: Perform a Proper Warmup
Warmups: https://nifs.wistia.com/medias/x6i393bxk3
Step 3: Ease into Sprinting
When starting your sprinter program, follow a progressive level of intensity and volume. You do not want to start out with all-out sprints for 100 meters for sets of 5 to 10. That is a surefire recipe for an injury at worst, and failure to perform the movement properly at best.
A great tip I picked up from Eric Cressey is to start by sprinting uphill first before moving to the track or any flat surface. This will help with proper mechanics and decrease the chances of injury because you are less likely to overextend. Your timed intervals should start at a 1:2 work-to-rest ratio and gradually ramp up to a 1:1, and even a 2:1 ratio. For example, do :20 of max work followed by :40 of rest, then repeat for the desired number of sets.
The recovery from the sprint is just as important, and I would recommend using your heart rate to tell you when it is time to go again. Waiting until your heart rate is 110bpm or lower before starting your next bout is a good general rule. I am also a huge fan of using your heart rate both as a measure of intensity and for determining your rest. You would rest until your heart rate recovered to 110–120bpm before starting your next set. The bottom line is that there will be no first-place ribbon waiting for you at the end of your sprint, so know your limits and use a progressive program when implementing sprinting.
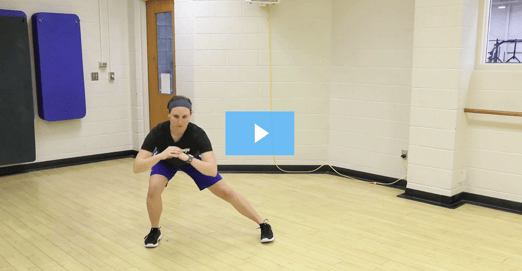
Step 4: Mix It Up with Different Types of Sprinting
Treadmill: https://nifs.wistia.com/medias/bsjs720s4a
One of the best things about sprinting is that there are several ways to sprint, and sprinting is relative to you. If you give everything you’ve got into a sprint, that is where the work is done, but it doesn’t mean you will be breaking any land speed records (unless your last name is Bolt). Your sprints don’t have to be rep after rep of 100m dashes; it just has to be a near max effort for a few reps or a short period of time. Those who claim they just got done completing 20 sprints were probably not maximally sprinting. If you intersperse a couple periods of higher effort levels with periods of lower effort levels, you will be in good shape (pun intended).
Here are some other sprinting options:
Sprinting can be a fun and very effective training tool in both fat burning and performance. I can’t stress enough the importance of a proper warmup and easing into higher-intensity sprints. Stay healthy so you can stay moving! (And if you have injuries, see this blog for tips on working through it.)
This blog was written by Tony Maloney, ACSM Certified Exercise Physiologist and Fitness Center Manager. To find out more about the NIFS bloggers, click here.
 I am often asked what is a good warm-up routine, and my answer typically consists of, “it depends.” A warm-up is typically done at the beginning of a training session and involves low-intensity movements to help get your body ready. The reason I tend to say “it depends” is that your goals, limitations, and what kind of training you have planned for a specific day will dictate your optimal warm-up.
  Want to jump higher, jump farther, or possibly dunk a basketball? With all the athletes I have trained over the years, at some point within their sport they all jump. Competitive as athletes are, they want to be able to jump higher like in volleyball, or jump farther like swimmers coming of the blocks, for example.
 A common nuisance to almost all fitness enthusiasts is the overall lethargic feeling you get from being extremely sore due to a challenging workout. Sometimes this is a deterrent to those looking to develop a consistent workout pattern, and can be especially bothersome if you haven't experienced this phenomenon before.
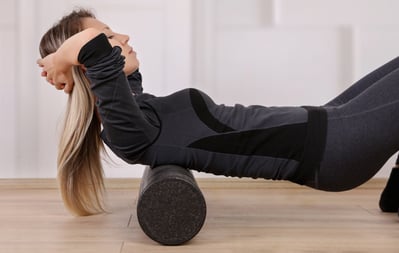
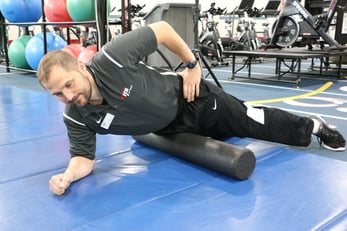 Most workout formulas include a warmup process. If hip mobility is a focus, your workout would benefit from a few additions to the routine. Foam rolling, which has been around for a while, is a great way to get blood circulating to the muscles and decrease soreness (if you worked them out prior). Spending a few minutes to roll out the trigger spots (areas of higher tenderness) will help you feel better, and you will be able to exercise on a more consistent basis.
 Second, I would suggest a dynamic movement stretch (rather than traditional static stretching) to help not only stretch the muscle, but also warm up the body for more movement. “The
 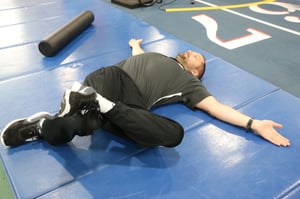 Finally, another great stretch to do is simply called a
  How many times have you had every intention of heading to the gym either before or after work, only to be deterred by nagging back pain? Maybe you woke up feeling stiff and sore, or maybe you had a long day at work and had a flare-up of pain. Either way, you’re far less motivated to be active when in pain, which quickly turns into a slippery slope. Pain is often a signal that something is not right, and your body will likely encourage behaviors that relieve your pain or prevent it from worsening. If your pain increases with movement, the likelihood of you working out becomes very low. The less you move, the better you feel, and voila, your back pain “magically” goes away!
 I used to work at a golf course during my time as a teacher. It was a great way to spend my summers and be close to a game I truly enjoy playing. I mainly mowed greens and tees and dug a bunch of holes. I really enjoyed that time of my life very much. On all of the mowers there was a sign that read, “If this equipment can’t work, nor can you.” I think the message is self-explanatory: if the equipment is not properly cared for, it is a very good possibility it will stop working, leading to loss of productivity and failure to complete the job.


 Have you ever gone into the gym and jumped right into your workout, only to notice that it took a good 20 minutes to get into it? Or how about heading out for a run without any form of warming up, and you really don’t start to feel into your rhythm until halfway through?