Olympic (Oly, ah-LEE) and powerlifting have become increasingly popular over recent years and will continue to grow, considering their application to functional training and athletic movement.
 Whether you have particpated in our Powerlifting Competition or interested in joining, I’m going to give you a solid progression that will allow you to develop a strong power clean with proper technique. The following movements can be a starting point for beginners or experienced lifters looking to get a fresh perspective on their current programs.
When I venture into any Olympic or powerlifting movements with a client or athlete, the most important factor is that their body be able to perform the movement that I am asking them to do. I get a good idea of this by using the Functional Movement Screening (FMS) and a few lower-intensity exercises (kettlebell swing, goblet squat, ground-based plyometrics, etc.) that utilize similar movement patterns to those that the Oly or powerlifts entail. If an individual is not able to perform these movements correctly or their FMS score contraindicates their participation in them, I would focus on other areas in order to better prepare that individual for these lifts. Once I believe someone is fully capable of performing the lifts (in this case with regard to the power clean progression), I could start them on the progression.
1. The Deadlift
The first (and arguably most important, in my opinion) step in this progression would be to teach proper hip-hinge technique for a deadlift. This is the foundation of the majority of the Oly movements and needs to be perfected in order to reach the fullest potential in subsequent lifts. Learning this movement could take as little as a couple weeks, but will likely take more like 4 to 6 weeks depending on your current abilities. Take your time; it will be worth it!
Points of Emphasis:
- Keep your back flat.
- Keep the bar close to your body.
- Use a Hook or Pronated grip (which has a better translation to Olympic movements).
- Start by pulling slowly from the ground; velocity will be added later.
2. The Power Shrug
Once you have perfected the deadlift, you can implement the next movement. From the deadlift position, I usually transition to a power shrug. The power shrug is just what it sounds like, a shrug with more speed than normal. The power shrug allows for the client or athlete to feel what it is like to achieve triple extension after the deadlift. It begins with a deadlift to an RDL position (with the bar at or just below the knees). Once the RDL position is achieved, the hips are driven through to generate the upward momentum to the bar. The client simultaneously shrugs his or her shoulders toward their ears to finish the movement.
Steps to Achieve:
- Start with a deadlift to the RDL position.
- Once the RDL position is met, drive the hips through.
- Finish with shoulders shrugged toward the ears and on the tiptoes.
3.The Hang Pull
The next step in my progression would be to go into a hang pull. This movement is more of a “top-down” movement versus a “bottoms-up” movement when compared to the deadlift and the power shrug. The deadlift and power shrug start from the ground and move upward from there. In contrast, the hang pull starts from a standing straight up position. The ultimate goal for all of the movements will be to get to the powerful RDL position. The hang pull involves lowering the bar to the knees and then driving the hips through to generate an explosive upright rowing motion. You may integrate the shrug that you have learned in progression #2 in order to produce more of that upward drive. The movement finishes with the client coming down from their toes after the pulling motion.
Steps to Achieve:
- Stand up straight.
- Lower the bar down the legs in a hip-hinge motion.
- Once RDL is achieved, drive the hips through, shrug, and row.
- Finish on tiptoes.
4. The Hang Clean
Now the fun begins. Through the first three steps you’ve learned to properly hip hinge and how to achieve triple extension through the hips, knees, and ankles. You’ve learned to shrug and pull from steps 2 and 3. If done properly, step 4 (the Hang Clean) should be a piece of cake. The hang clean builds off of the hang pull by adding the firing of the elbows under and through the bar to achieve a front rack position with the barbell positioned across the shoulders. If you have been diligent through steps 1 to 3, this should not be an issue. The biggest problem I see with individuals in this stage would be a lack of mobility through the wrists, triceps, and shoulders. Timing is everything with these lifts, so once you know you are doing them correctly, practice, practice, practice. The less your mind has to think about any part of this movement, the more success you will see.
Steps to Achieve:
- Perform steps 1 to 4 for the Hang Pull.
- Slightly sink the hips.
- Pull and fire the elbows under the bar.
- Finish with the bar racked across the shoulders.
5. The Power Clean
You have made it this far; it’s time to seal the deal! The final progression for the power clean would be, well, the power clean. During this progression, your job will be to assemble all of the pieces of the power clean puzzle from steps 1 to 5. This movement will start with the deadlift to the RDL position, continue with a big shrug and pull, fire the elbows, and sink beneath the bar. It is essentially step #4, but we are pulling from the floor.
Sounds simple, right? Not exactly. This will introduce a whole separate challenge with regard to timing, but as always, your timing will get better with practice. Once you feel comfortable pulling from the ground and catching the bar in the upright/hips loaded position, catching into a front squat will be next (but you should perfect this first).
Steps to Achieve:
- Deadlift to RDL position.
- Drive hips through.
- Shrug shoulders and pull upward: get triple extension!
- Sink and fire elbows beneath the bar.
- Catch and rack the bar across the shoulders.
***
Olympic and powerlifting movements are definitely the king of the fitness world jungle. They should be done with extreme attention to detail due to the high velocities of the bars (Oly lifting) and extreme weights being used (powerlifting). That doesn’t mean you need to be a fitness expert to perform them; just learn how to do them correctly. Although these pieces to the power clean puzzle lead you in the right direction, it is always beneficial to have another set of eyes on you to make sure that everything is in working order. Realize that it takes a while for your body to adapt and grasp these movement concepts, especially if you are new to this type of lifting. Remember, be patient and a stickler on details; it will pay off in the long run!
***
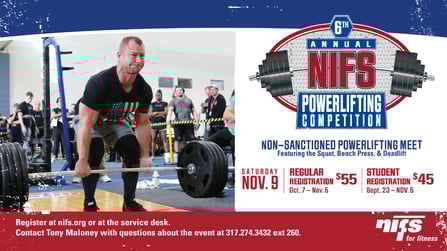
NIFS 6th annual Powerlifting competition is coming in November. For more information and to get registered click here. Early Bird pricing is $45 until October 6th.