<img height="1" width="1" style="display:none" src="https://www.facebook.com/tr?id=424649934352787&amp;ev=PageView&amp;noscript=1">

NIFS Healthy Living Blog

Pedro Mendez

Recent Posts by Pedro Mendez:

Upper-body and Lower-body Warm-up Routines

GettyImages-641796518I am often asked what is a good warm-up routine, and my answer typically consists of, “it depends.” A warm-up is typically done at the beginning of a training session and involves low-intensity movements to help get your body ready. The reason I tend to say “it depends” is that your goals, limitations, and what kind of training you have planned for a specific day will dictate your optimal warm-up.

Tailoring Your Warm-up

Now, a warmup does not have to be something innovative, but you do want to perform movements that will mirror your actual workout session. For example, if you have a lower-body day, I would recommend warming up with lower-body movements (and the same for the upper body).

How Long Should a Warm-up Be?

The time a warmup should last can range from 5 minutes to 10 minutes depending on how you are feeling that specific day. If you feel ready to go or have a time limitation, staying closer to that 5-minute limit would be best. If you are feeling a little tired and have no time restriction, then closer to 10 minutes would work better.

Sample Warm-ups

Here I provide a quick sample warmup for a lower-body day and an upper-body day. I do want to emphasize that this is a very basic warmup and it is not meant to fix any compensation that you may have.

Lower-body Warm-up

Perform 2 rounds for 10 repetitions for each exercise. If an exercise is unilateral, perform 10 repetitions for each side.

  1. Glute Bridge x 10
  2. Glute Bridge with Marches x 10e
  3. Downward Dog x 10
  4. Shoulder Taps x 10e
  5. ½-Kneeling Hip Stretch x 10e

Miniband Series: Perform 10 repetitions for each exercise. If an exercise is unilateral, perform 10 repetitions for each side.

  1. Squat (miniband around top of knees)
  2. Standing Marches (miniband goes around shoes)
  3. Standing Hip Circles (miniband goes around ankles)
  4. Lateral Walks (miniband goes around ankles)
  5. Monster Walks (miniband goes around ankles)

Upper-body Warm-up

Perform 2 rounds for 10 repetitions for each exercise. If an exercise is unilateral, perform 10 repetitions for each side. You will need a Superband for this as well.

  1. Sidelying Thoracic Rotation
  2. Downward Dog
  3. Superband Chest Press
  4. Superband Chest Fly
  5. Superband Pull Apart

As you can see, you do not have to reinvent the wheel when it comes to the warm-up, but you do want to make sure that the warm-up will get you ready for your workout.

This blog was written by Pedro Mendez, CSCS, FMS, Health Fitness Instructor and Strength Coach at NIFS. To learn more about the NIFS bloggers, click here.

Topics: workouts warmups lower body upper body low-intensity warm-up

Try Cluster Set Training to Get Stronger Faster

GettyImages-524703038
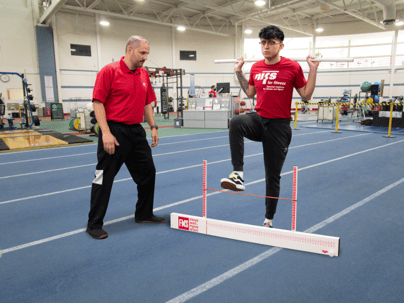
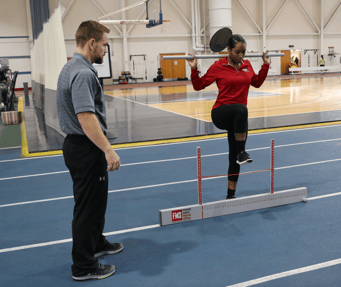
If you are an athlete, powerlifter, or just a person who loves to see progress, you might want to try out cluster set training. This is an advanced type of training designed to get you stronger faster than traditional set training.

Traditional Set Training and Cluster Set Training Defined

Traditional set training is typically what everyone at the gym does when lifting weights: you perform a set of continuous repetitions and then rest. An example of this would be Barbell Back Squatting 3 sets for 8 reps.

Cluster set training is performing the same amount of sets and reps, but instead of continuous repetitions, you perform 1 or 2 reps and then rest, then repeat the same reps until you get to your desired rep goal. An example of this would be Barbell Back Squatting 3 sets for 8 reps, but those 8 reps are divided into clusters of 1 or 2 reps followed by a short rest period. You also typically want to rest 15 to 30 seconds between each cluster to get the desired effect.

Why Cluster Set Training Works So Well for Strength and Power

The reason cluster set is so beneficial for strength and power gain is that it allows you to continue to train at close to max or max effort longer than traditional set training would. The reason is that you get short bouts of rest in between your set, which decreases repetition fatigue. Another reason it works is that you are increasing your motor unit synchronization and decreasing your reciprocal inhibition, which allows you to get stronger. Those last two are neural mechanisms that occur during training, especially max effort training.

How to Add Cluster Set Training to Your Workout

The best way to implement this in your training is to use cluster set training with your main lifts: Power Clean, BB Back Squat, Bench Press, and Deadlift. One thing to note is that this type of training is designed to improve strength and power gains and not necessarily hypertrophic gains (an increase in muscle mass). If your main goal is to increase muscle mass, I would recommend sticking to a traditional set training method because this has been proven to increase those effects more so than the cluster set training method.

Get Help from NIFS

Give this type of training a shot and see whether your numbers increase! If you have any questions about cluster set training, you can reach out to me at pmendez@nifs.org and I will gladly answer any questions or concerns. Last thing here is that this is an advanced type of training and should be done by advanced lifters. If you are a novice lifter, I would recommend sticking to traditional set training until you are ready for this.

New call-to-action

This blog was written by Pedro Mendez, CSCS, FMS, Health Fitness Instructor and Strength Coach at NIFS. To learn more about the NIFS bloggers, click here.

Topics: workouts weightlifting power strength training weight training cluster sets

Is Tempo Training Better for Overcoming Strength Training Plateaus?

GettyImages-rbhf_46Let me ask you a question. Have you ever hit a plateau in the weight room when it comes to increasing strength? What about when it comes to increasing power output (vertical jump, short distance sprint)? Well if you have, you are not alone. I know I have hit plateaus in the past and it can definitely be frustrating when you are not able to get past it.

The question I always asked myself was, “What am I doing wrong now?” Well it wasn’t necessarily that I was doing anything wrong. I followed the basic recommendations for strength gain (that being 2–6 sets of 2–6 repetitions). I used to follow those parameters religiously because that’s what I had learned early in my undergrad classes. What I didn’t know is that there are virtually endless ways to get past that plateau. I share my favorite here.

Traditional Strength Training

Let me first describe what strength really means. Strength is essentially how much force a person can exert—or to simplify that, how much weight a person can lift. Traditional strength training is lifting a certain amount of weight, typically about 80–95% of your 1-rep max by 2–6 sets of 2–6 repetitions (NSCA, 2016).

Tempo Training

Tempo training is essentially lifting a certain amount of weight for a certain amount of time. What I mean by this is that I can manipulate the amount of tension I want during each rep by how long I have my athletes either lower the weight or bring the weight back up. This type of training has been found to elicit more strength and power output gains than traditional strength training (Dolezal, 2016).

I can have my athletes train at two different types of tempos that will essentially give me the outcome that I desire, whether that be more strength gains or more power gains. The first tempo would be more eccentric based (lowering the bar during a squat, lowering the bar during a bench press, etc.). I typically have my athletes lower the bar for about 3–5 seconds and then explode up. The parameters I use, and that have been found to have the best results, are about 65–85% of their 1-rep max for about 3–4 sets of 3–6 reps (Dolezal, 2016).

The second method of tempo training I use is velocity-based training. This essentially means I have my athletes perform a certain amount of reps as fast as possible. This type of training has been proven to increase both strength and power output in both athletes and the general population (Banyard, 2019). Performing 3–5 sets of 3–5 repetitions at about 50–70% is enough to elicit these changes.

The Verdict: Which Strength Training Method Is More Effective?

In my opinion, tempo training is a much better tool to use versus traditional strength training. The reasons are that with traditional strength training, you really have to make certain you stay within the parameters. With tempo training, there is more freedom in how you train, as well as the additional benefit of improving power output and strength, whereas traditional training does not really increase power output (Banyard, 2019). If you’d like a more technical explanation of why tempo training is better, let’s meet up at NIFS!

Like what you've just read? Click here to subscribe to our blog!

This blog was written by Pedro Mendez, CSCS, FMS, Health Fitness Instructor and Strength Coach at NIFS. To learn more about the NIFS bloggers, click here.


Topics: nifs staff strength training strength and conditioning plateaus tempo training

Stuck in a Rut? How to Avoid Plateauing in the Weight Room

GettyImages-679304968Let me ask you a question. Have you ever hit a plateau in the weight room when it comes to increasing strength? What about when it comes to increasing power output (vertical jump, short-distance sprint)? Well if you have, you are not alone. I know I have hit plateaus in the past and it can definitely be frustrating when you are not able to get past it.

The question I always asked myself was, “What am I doing wrong now?” Well it wasn’t necessarily that I was doing anything wrong. I followed the basic recommendations for strength gain (2–6 sets of 2–6 repetitions). I used to follow those parameters religiously because that’s what I learned early in my undergrad classes. What I didn’t know is that there are virtually endless ways to get past that plateau. I will share my favorite here.

Traditional Strength Training

Let me first describe what strength really means. Strength is essentially how much force a person can exert, or to simplify that, how much weight a person can lift. What traditional strength training is, is lifting a certain amount of weight—typically about 8095% of your 1 rep max by sets of 2–6 of 2–6 repetitions (NSCA, 2016).

Tempo Training

Tempo training is essentially lifting a certain amount of weight for a certain amount of time. What I mean by this is that I can manipulate the amount of tension I want during each rep by varying how long I have my athletes either lower the weight or bring the weight back up. This type of training has been found to elicit more strength and power output gains than traditional strength training (Dolezal, 2016).

I can have my athletes train at two different types of tempos that will essentially give me the outcome that I desire, whether that be more strength gains or power gains. The first tempo would be more eccentric based (lowering the bar during a squat, lowering the bar during a bench press, etc.). I typically have my athletes lower the bar for about 3–5 seconds and then explode up. The parameters I use and that have been found to have the rest result are about 65–85% of their 1 rep max for about 3–4 sets of 3–6 reps (Dolezal, 2016).

The second method of tempo training I use is velocity-based training. This essentially means I have my athletes perform a certain amount of reps as fast as possible. This type of training has been proven to increase both strength and power output in both athletes and the general population (Banyard, 2019). Performing 3–5 sets of 3–5 reps at about 50–70% is enough to elicit these changes.

The Verdict

In my opinion, tempo training is a much better tool to use versus traditional strength training. The reasons are that with traditional strength training, you really have to make certain you stay within the parameters. With tempo, there is more freedom in how you want to train as well as the additional benefit of improving power output as well as strength, where traditional training does not really increase power output (Banyard, 2019).

I realize that I have oversimplified this topic, but the actual mechanisms of why tempo training is more beneficial than traditional training are out of the scope of this blog. If you would like more information, I would be happy to explain in more detail in another blog or in person.

Like what you've just read? Click here to subscribe to our blog!

This blog was written by Pedro Mendez, CSCS, FMS, Health/Fitness Instructor and Strength Coach at NIFS. To learn more about the NIFS bloggers, click here.

Topics: fitness center weightlifting strength training plateaus tempo training

Early Sport Specialization Is Detrimental to Kids’ Health

GettyImages-155601842Recently I heard someone say something along the lines of, “That sixth-grade basketball player is ranked #1 in the country.” That got me thinking: How in the world are we ranking sixth-graders? They haven’t even gone through puberty yet!

Early sport specialization basically refers to putting a child into one sport before puberty and keeping them in that one specific sport their whole childhood and adolescent life. Parents think that if their child is focused on one sport, they have a higher chance of getting an athletic collegiate scholarship and possibly going pro at their respective sport. This is the furthest thing from the truth. Early sport specialization is actually detrimental to young children physiologically, psychologically, and fundamentally.

Children Should Learn a Variety of Sports

Children should be exposed to as many sports as possible as they grow up because this allows them to learn different skills that they might not learn if they are focused on only one sport. If a child focuses on the skills required to play baseball or tennis, that child will not master the physical literacy that every athlete should have. Physical literacy is the basic sport and movement skills required for sports that include agility, balance, coordination, and speed (Brenner, 2016).

Variety Will Help with Injury Prevention and Avoiding Burnout

Being a strength coach and personal trainer, a lot of parents ask me to train their child from as early as 10 years old because they think their child is the next LeBron James or Usain Bolt. What I have found out is that those kids typically can’t perform a simple movement like a skip or jumping jack. It actually is sad to see kids struggle with basic movements like this. Allowing kids to play sports for fun is the best way to keep them from burning out or getting seriously hurt before they reach puberty.

Let Kids Play to Have Fun

At the end of the day, we need to allow kids to be kids and play to have fun. Putting too much pressure on kids takes away from their experience and they begin to get scared of failing or not being good enough. They need to learn to fail in certain situations when it comes to athletics or they will not know how to deal with it on their own. Parents and coaches need to work together to eliminate the concept of trying to get their kid to be a professional athlete because chances are it won’t happen. Allow them to enjoy their young years without the pressure.

Like what you've just read? Click here to subscribe to our blog!

This blog was written by Pedro Mendez, CSCS, FMS, Health/Fitness Instructor and Strength Coach at NIFS. To learn more about the NIFS bloggers, click here.

Topics: injury prevention kids sports professional athlete football student athletes basketball early sport specialization team sports baseball parent

A Quick Look at the Science Behind Exercise for Brain Health

GettyImages-1009819802Often I ask my clients or athletes why they exercise. The most common answers that I get from them are “because I want to look better” or “for good health,” which are great reasons for sure. But what if I told you that exercise helps one of the most important organs in your body that doesn’t include any visible muscle: the brain.

The Effects of Exercise

I like to think that seeing physical changes are the only side-effects of exercise, but the main benefit is that with exercise you can improve memory retention, create new neurons, and essentially become smarter.

Increasing Neurotransmitters for Connections and Learning

Exercise contributes to many factors that help improve brain health. When you exercise you don’t think about this, but it increases your BDNF (brain-derived neurotrophic factor) levels. This neurotransmitter is responsible for many things in the brain, but I will list only a couple. BDNF is like fertilizer to neurons, which helps then grow. The more neurons you have, the higher your potential to make connections and learn new things. What BDNF also does is helps protect the neurons against cell death.

Increasing Glucose for Fuel and Learning

When you exercise, your muscles release IGF-1 (insulin-like growth factor) because your body needs fuel (glucose) to maintain that activity. In the brain, though, glucose is the main source of fuel. Some studies have shown that when IGF-1 is in the brain, it works with BDNF to increase learning instead of being used for fuel.

Increasing Growth Factor for New Brain Cells

The last benefit I will talk about is how exercise helps improve FGF-2 (fibro-blast growth factor). When you exercise, this is also transported to the brain and works together with BDNF to help with neurogenesis (growth of new cells). This has many benefits, such as new stem cells that can be used to learn new things as well as help with memory retention and reducing memory loss.

Learn More at NIFS

This is a very broad description of what goes on in your brain when you exercise and how exercise helps brain health. If you would like to learn a little more about this, I am happy to explain more in detail about the process that occurs in the brain. You can email me at pmendez@nifs.org.

Like what you've just read? Click here to subscribe to our blog!

This blog was written by Pedro Mendez, CSCS, FMS, Health/Fitness Instructor and Strength Coach at NIFS. To learn more about the NIFS bloggers, click here.


Topics: memory brain fitness exercise and brain health brain health

Hip Thruster vs. Squat: Which Is Best for Glute Hypertrophy?

GettyImages-1147025300
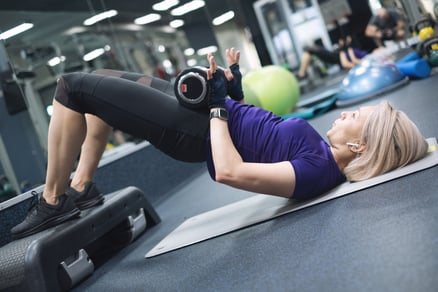
Squatting has always been the go-to exercise for those who want to make glute gains. You have probably heard someone say, “If you want to get better glutes, squatting is the way to go.” Recently, though, hip thrusters have gained momentum as the best exercise for glute development. Although, there is no concrete evidence that one is better than the other, some studies have been done (also here). Hopefully by the end of this blog, you will have a better understanding of the similarities and differences between these two exercises.

Glute Activation During Squats

During squats, the upper gluteal muscles help stabilize the pelvis as you walk out from the rack position. During the eccentric(downward) portion of the squat, only 20 to 30 percent of maximum voluntary contraction (MVC) was shown. At the bottom part of the squat, only 10 to 20 percent of MVC for glute activation was shown through EMG activity. The interesting part is that the bottom part of the squat is where everyone assumed you get the most glute activation, when in reality it is the lowest activation part. The concentric (pushing up) portion of the squat is where glute activation was seen to be the highest, at 80 to 120 percent. This makes sense because the main role of the glutes is to extend the hips.

Glute Activation During Hip Thrusters

During the hip thrust exercise, at the beginning phase, the glutes are relatively off because there is no external force placed on them. Because the first motion of the hip thrust is a concentric action (hip extension), the glutes begin to activate right away. It was measured to be at a range of 120 to 200 percent of glute activation during the concentric phase of the exercise. Another reason why MVC was higher is that the repetitions fairly quickly maintain a constant tension on the glutes.

Biomechanics of Squat and Hip Thruster

Screen Shot 2019-10-24 at 12.08.28 PMBiomechanically these two exercises are different because the squat is performed in the vertical plane whereras the hip thruster is performed in the horizontal plane. This difference allows for different forces on the body. In a squat, the glutes must fire to create hip extension torque, but they must also fire in order to create hip external rotation torque to prevent knee valgus (knee buckle). In a hip thrust, the glutes fire to create hip extension torque, but they must also fire in order to create posterior pelvic tilt torque to prevent anterior tilting of the pelvis and lumbar hyperextension.

With the squat, the limitation can be due to back strength, which you do not have with the hip thruster. On the other hand, glute strength is the limiting factor during the hip thruster. During a squat, you are typically able to get more hip flexion to avoid this issue.

The Verdict

For full range gluteal strength, a more complete neurological stimulus, and full development of the upper and lower gluteal fibers, you’ll want to perform both the squat and the hip thrust. Either exercise alone won’t suffice. The good news is that you don’t have to choose between squats or hip thrusts for maximal glute development; you should perform both movements.

Like what you've just read? Click here to subscribe to our blog!

This blog was written by Pedro Mendez, CSCS, FMS, Health/Fitness Instructor and Strength Coach at NIFS. To learn more about the NIFS bloggers, click here.

Topics: fitness center exercises muscle mass glutes hypertrophy building muscle squat hips

The Functional Movement Screen Exercises in Depth

Screen Shot 2021-09-27 at 1.55.13 PMIn my last blog I briefly described the importance of the Functional Movement Screen to determine where one should begin with their workout program. The score that an individual receives determines whether they are ready for certain movements. In this blog I will go more in depth about the actual purpose of each test of the FMS, what the scores mean, and the reliability of the FMS.

The Purpose of the FMS

The FMS was created to measure motor control of movement patterns, quickly identify pain or limitations that need to be addressed, and to set a baseline for movement competency within the body. Being able to determine asymmetries in the body will help the tester figure out which movement has the greatest deficiency and which movement needs the most help. The FMS consists of seven movement patterns that are performed without warmup. The reason is that we want to see what a person’s movement capacity is at its natural state.

FMS-logo

The Exercises That Are Part of the FMS

Here is more detail on each of the exercises that are part of this screening:

  • Deep Squat: This test shows us the most about how a person moves. The reason is that it allows us to see total extremity mobility, postural control, and pelvic and core stability. If you think about it, everyone at some time in the day performs a squat, whether that is sitting down, playing sports, picking up something off the ground, and so on. When the dowel is overhead, this requires mobility and stability of the shoulders, and the pelvis must provide stability and control while performing the squatting motion.
  • Screen Shot 2019-10-08 at 11.56.10 AM

    Hurdle Step: This test demonstrates how well someone is able to walk (locomotion) as well as accelerate. The hurdle step is a great assessment to determine any kind of compensation the body performs while you take a step forward. This movement also lets us know how well a person is able to stabilize and control oneself while in a single-leg stance. If pelvic and core control is lacking with this, the person will not be able to stabilize themselves properly and will most likely begin to shift too much or lose alignment.
  • Inline Lunge: This test helps demonstrate the ability that one has to decelerate. This is important because we as humans need to be able to decelerate every day, whether that be in sports or just daily living activities. It also allows the tester to observe the rotational and lateral movement capacity of someone. Pelvic and core control and stability is extremely important to be able to perform this movement properly. Since this test requires the person to be in a split stance, the tester can also see how well a person is able to get into hip, knee, and ankle flexion when lunging down and determine whether there is a mobility or stability issue.
  • Shoulder Mobility: This test helps show the relationship between the scapular-thoracic region, thoracic spine, and rib cage. A person with good thoracic extension typically does well on this test. One side should demonstrate internal rotation and extension and adduction, and the other side should demonstrate external rotation, flexion, and abduction.
  • Active Straight-Leg Raise: This test helps demonstrate many things, even though it might seem very basic. With the leg that is coming up, we typically want to see a good range of hip flexion. On the leg that stays down, we typically look for how good the range of hip extension is. Another variable that I like to look at is how well their core stability is. If they are not able to keep their back flat on the floor, this lets me know that the person is not able to own that position and needs help with core stability.
  • Trunk Stability Push-up: This test often gets mistaken as being an assessment for upper-body strength. This is not the case, though. The actual purpose of this assessment is to measure the stability of the core. If the spine or hips move during the push-up movement, this is usually an indication of other muscles compensating for the lack of core stability.
  • Rotary Stability: This tests for rotary stability in multiple planes. Core, pelvis, and shoulder girdle stability are what is being assessed. This also allows us to measure the ability of a person to crawl. Being able to demonstrate proper weight shift in the transverse plane and also coordination during the stabilization and mobility of this movement will help determine whether a person is ready for more complex movements.

FMS Scoring

I will keep this section short and sweet and explain the basic fundamental purpose of the scoring and what each number means. The FMS scoring ranges from 0–3, so there are 4 possible scores that a person can get. A 0 indicates that there was pain during the movement. A score of 1 usually indicates that the person was not able to complete the full movement properly or was not able to get into the correct position to execute the movement. A score of 2 indicates that the person was able to complete the movement but had to compensate somehow to actually execute it. A score of 3 indicates the movement is optimal and no compensations were detected.

Reliability of the Test

Many research studies have been done to determine the reliability of the FMS in recent years. The main findings that have been discovered are that the FMS can accurately identify people with a higher chance of an injury. The three groups at a higher risk are professional football players, male marine officer candidates, and female collegiate basketball, soccer, and volleyball players.

People always ask me what score determines an elevated risk for injury on the FMS. What most studies suggest is that a score of 14 or lower gives a person a 1.5 times higher risk for injury than a person who gets a score higher than 14. This does not mean that if you score lower than a 14, you should be frightened; again, most studies done are with a specific population (stated above). More studies are needed on the general population, but what is certain is that the FMS is a great tool for personal trainers, athletic trainers, physical therapists, and strength and conditioning coaches to use on their populations to get a better understanding of how well a person moves.

If you are interested in completing an FMS screening at NIFS, click here for more information.

Like what you've just read? Click here to subscribe to our blog!

This blog was written by Pedro Mendez, MS, CSCS, and Health Fitness Instructor.

Topics: NIFS injury prevention pain exercises functional movement assessments movement functional movement screen

Train Like an Athlete with Help from NIFS

GettyImages-969284736
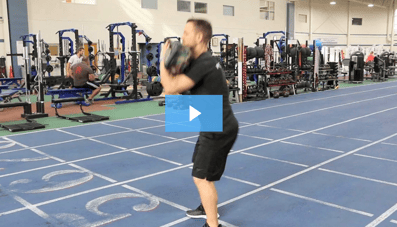
I am often asked what kind of workout program I follow, and my response is always, “I follow a program that gets me faster, stronger, and more athletic.” When people hear this, they assume that I am some kind of athlete and that they won’t be able to work out the way I do since they are not “athletes.” This is a huge misconception that I have noticed throughout the years that I have been working out. What people do not understand is that we are all athletes in our own way, and can actually train like one in order to get faster, stronger, and more athletic.

Find Out Where You’re Starting From

For me the key is to understand where you are at in terms of movement. Many programs out there assume that you move perfectly, so starting them might not necessarily be the best if you have not had the training experience needed to actually perform those movements. A good assessment to determine whether you have any compensatory patterns or movement deficiency is the Functional Movement Screen (FMS). With the FMS, we can narrow down exactly which corrective exercises are needed to get a person ready for the complex movements that might be programmed.

Start with Exercises That You’re Ready For

Once you have determined where you are at movement wise, it’s important to start with exercises that your body is ready to handle at that time. Possibly regressing a complex exercise like the Barbell Back Squat to a simpler exercise like the KB Goblet Squat or 2KB Squat will allow you to own that movement better and in turn will prepare you to progress back to the complex movement faster while performing it better.

Perform Athletic Movements

Training like an athlete does not necessarily mean you have to match their intensity or lift the same amount of weight as they do. But it can mean performing the same movements, such as these:

  • Warm-up routine
  • Power exercises
  • Squat variation
  • Horizontal upper-body push variation
  • Split squat or half-kneeling variation
  • Vertical/horizontal upper-body pull variation
  • Supine/prone abdominal exercise variation
  • Accessory exercise

These are exact movements that I program for my athletes. The cool thing is that anyone can do these movements as long as the right exercise is prescribed. No two athletes that I have trained move the same, and there are many that actually need to start with the most basic forms of movement (body squat, hands elevated push-ups, etc.). I am sure many of you have performed these “basic” exercises in the past. These exercises are often considered “too easy” at times, but if they are performed correctly, it can be a challenge even to athletes.

You Can Get Help from NIFS Trainers

I get it, it can be very intimidating for a beginner or even an experienced lifter to train like an athlete if they don’t know exactly how to go about starting a program like that. Luckily, here at NIFS, our trainers are well equipped with the materials and knowledge to get anyone who is looking for a new challenge started toward being faster, stronger, and—most importantly—more athletic.

Like what you've just read? Click here to subscribe to our blog!

This blog was written by Pedro Mendez, CSCS, FMS, Health/Fitness Instructor and Strength Coach at NIFS. To learn more about the NIFS bloggers, click here.

Topics: NIFS training athletes personal trainer functional movement screen fitness assessment