<img height="1" width="1" style="display:none" src="https://www.facebook.com/tr?id=424649934352787&amp;ev=PageView&amp;noscript=1">

NIFS Healthy Living Blog

Powerlifting Prep Lesson #3: The Deadlift

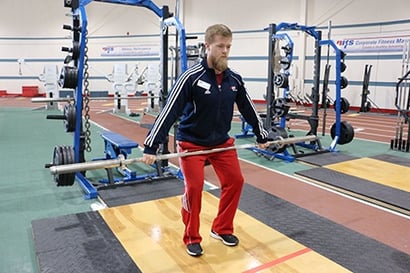
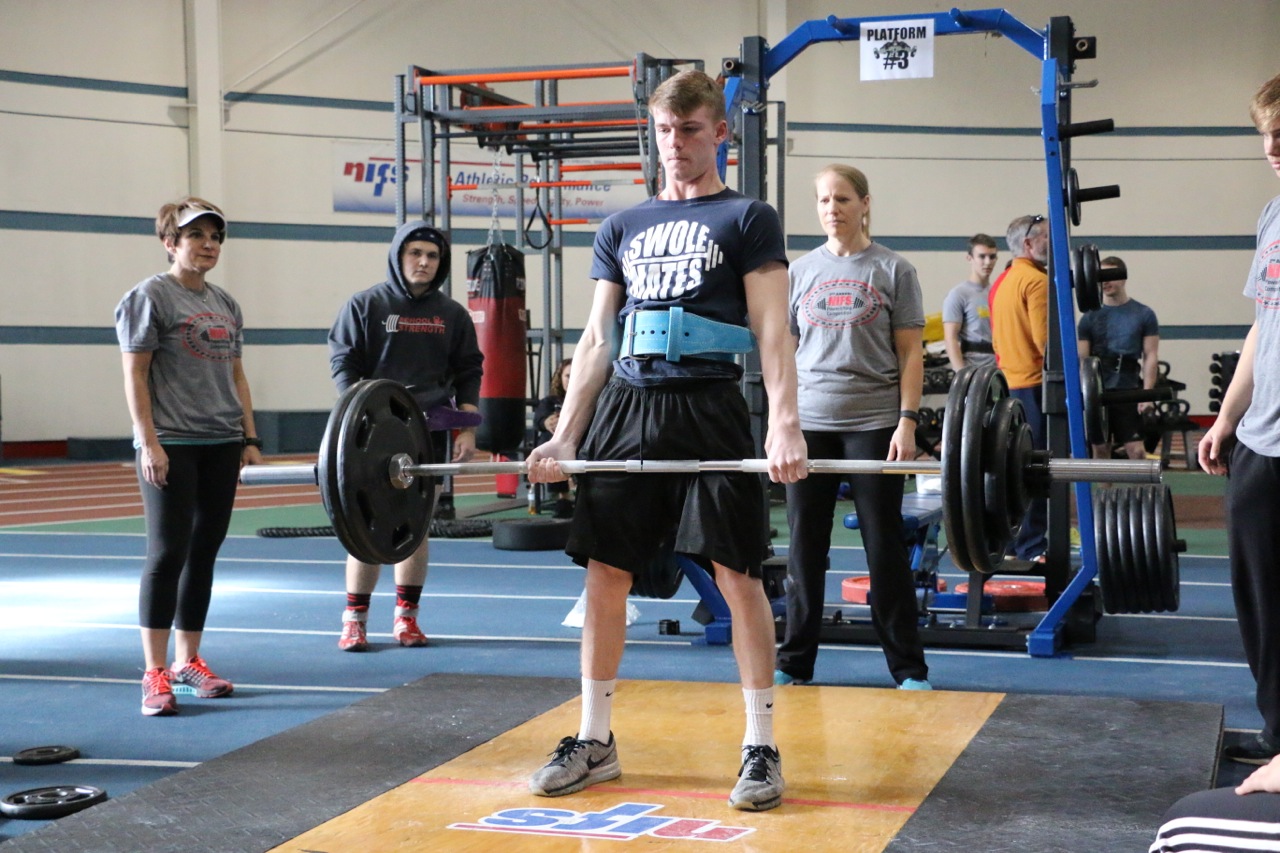
IMG_4534.jpgIn my previous posts, Powerlifting Prep Lesson #1: The Squat and Powerlifting Prep Lesson #2: The Bench, we took a look at how managing the three key principles of mobility, stability, and tension can have a huge impact on your ability to perform those two lifts at a high level while decreasing the chance of injury. We turn now to the big daddy of them all, the deadlift!

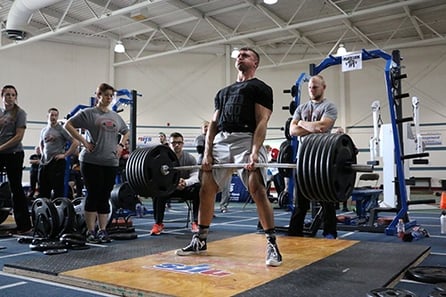
This hinging/pulling lift is easily one of the most popular lifts on the planet, and everybody wants to pull a huge bar from the ground and slam it back down. There really is no feeling like it. And not only does it look pretty cool on Instagram, the deadlift is one of the most functional exercises you can do that transfers very nicely to the outside world. Since the dawn of time we have picked up heavy things and set them back down, essentially doing deadlifts day in and day out. In the powerlifting world, the deadlift is where champions can be forged, or injuries suffered.

So let’s break down this giant lift, focusing on the three key principles introduced earlier:

  • Mobility: The full range of motion of a particular joint(s).
  • Stability: Alignment, with integrity, under load.
  • Tension: Defined with terms such as stiffness and phrases like “bending the bar,” and “spread the floor.”

Mobility

You might think that mobility would not play a big role in this lift, but like most weightlifting movements, it’s imperative. I hope I have done a good job in this series of posts to stress that it all starts with mobility. Strength, power, endurance, and any physical attribute must start at mobility, if you want to be the best that there is. The deadlift is no exception; and if you can’t touch your toes, you probably need to take a few steps back before heavy loading the deadlift.

The deadlift is a hinge pattern, so we will start there by focusing on the active straight-leg raise to monitor and improve the mobility of that pattern. A great place to start is with a leg-lower exercise or a kettlebell butt touch exercise to help improve your mobility for the deadlift.

Stability

For stability, take one more look at the active straight-leg-raise pattern to ensure you capture the mobility you gained through the two movements described above. The lying leg raise with core activation looks a lot like the leg-lowering exercise from above, as it should, but here you are adding stability to the mobility you just gained. Trunk stability is key in the deadlift; without it, spines tend to hyper-flex and lead to injury. Planks and plank variations are always a great place to start, as well as loaded carries and dynamic-stability movements such as a sandbag plank drag to challenge and train the musculature of the trunk so you can pull more weight safely.

Next, and just as with the squat and the bench, intra-abdominal pressure will also be key in pulling the most weight possible. Remember to “fill the can” by inhaling fully and pressing the air against your belt during the set-up and first phase of the deadlift. This again will help fire all of the muscles of the trunk to provide maximum stability during the lift. If you want to learn more about breathing and stability in loaded movements, check out this article from Mike Reinold as he breaks down this concept even more.

Tension

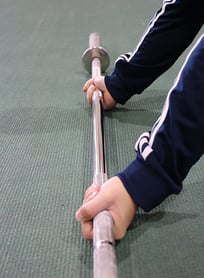
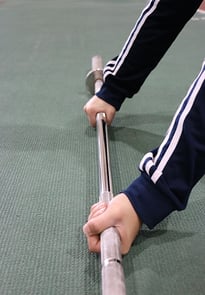
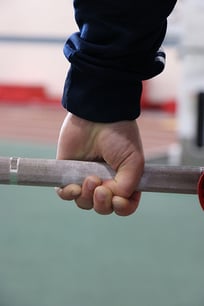
Tension in the deadlift starts with grip! Many studies correlate grip strength to overall strength, so the stronger the grip the bigger the deadlift. Loaded carries and all the variations are my go-to to help train grip strength as well as any pulling motions such as chin-ups and inverted rows.

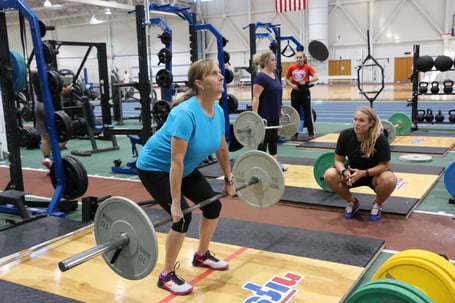
In the other two lifts I referred to “bending the bar” as a cue to create tension in the system (body) during the lift. In the deadlift, I want you to think about taking that tension out of the bar by preloading the system before pulling the bar from the ground. Pull the bar toward your body without it leaving the ground; you should hear the plates make a kind of clicking noise. This will fire the lats and other spinal musculature to brace before accepting the load of the bar. Ideally in doing so, your entire body will move as one system, like a crane lifting a two-ton I-beam. This will make you a stronger unit to pull the bar off the ground and help eliminate hyper-flexing in the spine that can lead to a bad injury.

***

Executed correctly, the deadlift is a super-functional and super strength-building exercise. It is also one of the more exciting lifts in any powerlifting competition, and it’s sure to make some noise once again at the NIFS 5th Annual Powerlifting Competition coming up on November 10. Registration is full, but you should still come out and support all the athletes competing. It is a great show of strength, competition, and sportsmanship and great way to spend a Saturday morning in November!

Like what you've just read? Click here to subscribe to our blog!

This blog was written by Tony Maloney, ACSM Certified Exercise Physiologist and Fitness Center Manager. To find out more about the NIFS bloggers, click here.

Topics: NIFS weightlifting powerlifting competition mobility deadlift stability tension

Powerlifting Prep Lesson #2: The Bench Press

attachment.jpgIn my previous post, NIFS Powerlifting Competition Prep Lesson #1: The Squat, I showed you how managing three key principles can have a huge impact on your ability to squat low and heavy as well as minimize the risk for injury. As a reminder, here are those three key principles:

  • Mobility: The full range of motion of a particular joint(s)
  • Stability: Alignment, with integrity, under load.
  • Tension: Defined with terms such as stiffness and phrases like “bending the bar” and “spread the floor.”

Once again I will break down each of these principles and apply them to the next big lift, the bench press. First, be sure to check off your list a few of the basics of the bench press when you are setting up for your next set. As soon as you are up to speed on those weightlifting basics, take a look at how these three principles can impact your bench and how to work to improve your performance.

Mobility

In the bench press, this principle is generally focused around the mobility of the shoulder complex and thoracic spine. I could argue the effects of immobile hips, but we will save that for another time. The ability of the shoulder to pass through the full range of a pressing motion will play one of the biggest roles in determining your success. Just as with the squat, I would strongly recommend starting with soft tissue work of the lats, pecs, and upper back. Utilize different tools like a foam roller, or a tennis or lacrosse ball depending on your level of tightness.

After mashing the tissue surrounding the shoulder complex, the next step is to perform some active stretching of the shoulder area. This can be as simple as basic arm circles and a door stretch or a quadruped t-spine rotation exercise. One of my favorites for shoulder mobility is the hang. Get to a pull-up bar, grasp it with an overhand grip, and hang from it. Take long, controlled breaths while you hang with longer, more forced exhalation. Start with these or any other drills for the shoulder and upper body and you will increase your rate of success in the bench.

Stability

Trunk stability and core strength play a major role in this lift. To help strengthen the muscles of the trunk, I like to keep things simple by performing planks and plank progressions like the RKC plank. Secondly, and just as with the squat, intra-abdominal pressure is also key in the bench press. “Filling the can” with air is the best way to set this principle in motion. Before lowering the bar to the chest, inhale fully, attempting to fill your entire trunk with air (wearing a belt here helps). Hold that breath and lower the bar with the “can full” and explode from the chest.

Placing your feet flat on the ground will also add stability to the system. Even if you need to have some risers like me, get your feet flat on the ground. This helps with keeping your back flat on the bench, allowing you to utilize the trunk to do its job: to stabilize you.

One more thing: stabilize the shoulders with external rotating of the shoulder by “dialing” your hands outwardly like you were turning two large radio knobs (those still exist, right?). Stabilize the mobility you gained from the previous drills and really pack a punch in your bench press.

Tension

“Bending the bar” is a phrase introduced in the preceding post about the squat, and it holds just as much weight in the bench as well. During your setup, you want to act as if you are actively bending the bar before lowering it to your chest. This will create tension in the lats, shoulder complex, and upper back. This tension, as you will see more with the deadlift in the next post, allows the body to move as a “stiff” unit, expressing the greatest amount of strength during this phase. You can also increase tension by pushing your heels through the ground, another reason to have your feet flat on the ground during the pressing motion. Creating tension from the onset of the lift is what will separate a good lift from a failed lift.

***

The only secrets to a bigger bench are the principles I have listed above. These are standards to performing at a higher level and will allow your body to respond to heavier and heavier weights. Implement even a few of the suggestions from above and feel the difference.

Like what you've just read? Click here to subscribe to our blog!

This blog was written by Tony Maloney, ACSM Certified Exercise Physiologist and Fitness Center Manager. To find out more about the NIFS bloggers, click here.

Topics: NIFS weightlifting powerlifting competition mobility stability tension bench press

NIFS Powerlifting Prep Lesson #1: The Squat

If you have never entered a powerlifting competition but are interested in competing for the first time, it's a high-energy, exciting celebration of strength. Many enter with the goal of dominating their weight class as well as grabbing that coveted top male or female trophy and being Champion.

Powerlifting 2018 DeadliftIf you are one of the athletes who want to throw their hat into the ring, I want to give you three key principles that will help you be the best you can be on event day for each of the three lifts. Those lifts, of course, are the squat, bench, and deadlift. Today we will focus on the squat. We will get to the other two soon, so keep an eye on the NIFS blog. You can improve by using these three key principles, whether you are a competitor or a spectator.

We will look at the same three weightlifting principles for each of the lifts, but each concept will be aimed specifically for each of the three different movement patterns. I learned long ago that principles should guide not only your training, but also your life. And as it relates to movement, variations of movement patterns may change, but the principles to train it will not.

The three key principles we will focus on for each of the lifts are

  • Mobility: The full range of motion of a particular joint(s).
  • Stability: Alignment, with integrity, under load. (A great lesson from Gray Cook that I learned in a workshop once.)
  • Tension: For our context in this and the two following posts, we will define tension as the word stiffness and explain phrases like “bending the bar” and “spread the floor.”

All three of these principles will directly impact how well you perform in each of the three lifts in specific ways. Let’s see how these can impact your squat and how to work to make things better.

Mobility

In the squat, and the back squat specifically, we continue to find the lack of ankle mobility to be a huge factor in how deep you can go and how much weight you can throw on your back. In a July article by Gray Cook (if you can’t tell, I learn a lot from him), Gray explains the importance of knowing your ability to flex your ankle and how it can disrupt the chain. Come see us and we can provide that screen for you. Improving your ankle mobility is a sure-fire way to improve your squat. The first step would be to do some soft-tissue work on the calf and surrounding areas using a foam roller, roller stick, or tennis/lacrosse ball. A simple drill that I would recommend is a wall ankle flexion drill, which you will perform in a few different directions.

Place your hands on a wall with one foot approximately 2–3 inches away from the wall and stagger the other foot behind you. While keeping the heel of the front foot “glued” to the ground, attempt to touch the wall with that same-side knee. Hold the position for a 2 count, return to the start position, and repeat for 4–5 more reps. Then aim that same side knee over your big toe and repeat for 5–6 reps, and then again but with your knee aimed out over your pinky toe. Switch legs and repeat the series. If you can touch the wall with your knee and your heel stays on the ground, move back one inch. The goal is to increase the degree of flexion in your ankle. You can measure your progress by how far from the wall your foot is.

Stability

Considering that powerlifters place huge amounts of weight on their shoulders and pretty much sit down and stand up, spinal stability is so important in performing technically sound and safe squats. Of course, planks and carries are great exercises to strengthen your trunk muscles, which will help prepare you for squatting, but what about during an actual mid-weight squat? Increase your intra-abdominal pressure by bracing your abdominal and low-back muscles. A great way to accomplish this is by wearing a belt. Tighten the belt and push your entire midsection against it, then squat. The belt also provides its own stability by reducing spinal flexion, or bending over. Lastly, wearing a belt is a requirement during competition, so if you are not training with one, you’d better get on it.

Tension

Tension, or stiffness in a lifter, is key when loading up the body with a challenging load. Without it, safety is at risk as well as success in completing the lift. “Bending the bar” is a phrase we use where a lifter will attempt to bend the bar on their shoulders by pulling the bar down with their hands. This, as they say, will take tension out of the bar and stiffen the lifter to move as one complete unit. Another major benefit of this cue is engaging the lats of the back by pulling the bar around your shoulders to help engage the glutes, which are key muscles in a strong squat. The lats connect to the glutes, the only muscle that connects the upper and lower body. Simply put, by creating tension in the lats, you increase the effectiveness of your butt.

The other cue that will increase tension in a lifter, specifically in the glutes, will be to “spread the floor” with your feet. Once in position and before you squat, feel as if you are trying to create space between your feet by pushing the floor away. Your position should not change, but your tension surely will. Maintain spreading the floor throughout the squat to reap the full benefits of this strategy.

***

So squat on, athletes, using mobility, stability, and tension to improve your positioning, which will ultimately lead to bigger lifts. Stay tuned as we break down the bench and the deadlift, focusing again on these key aspects.

Come watch our 6th Annual Powerlifting Competition here at NIFS, Saturday, November 9th at 9am.

Like what you've just read? Click here to subscribe to our blog!

This blog was written by Tony Maloney, ACSM Certified Exercise Physiologist and Fitness Center Manager. To find out more about the NIFS bloggers, click here.


Topics: NIFS weightlifting powerlifting competition glutes mobility movement squat stability tension

NIFS August Group Fitness Class of the Month: Yoga

_DIV8896.jpg

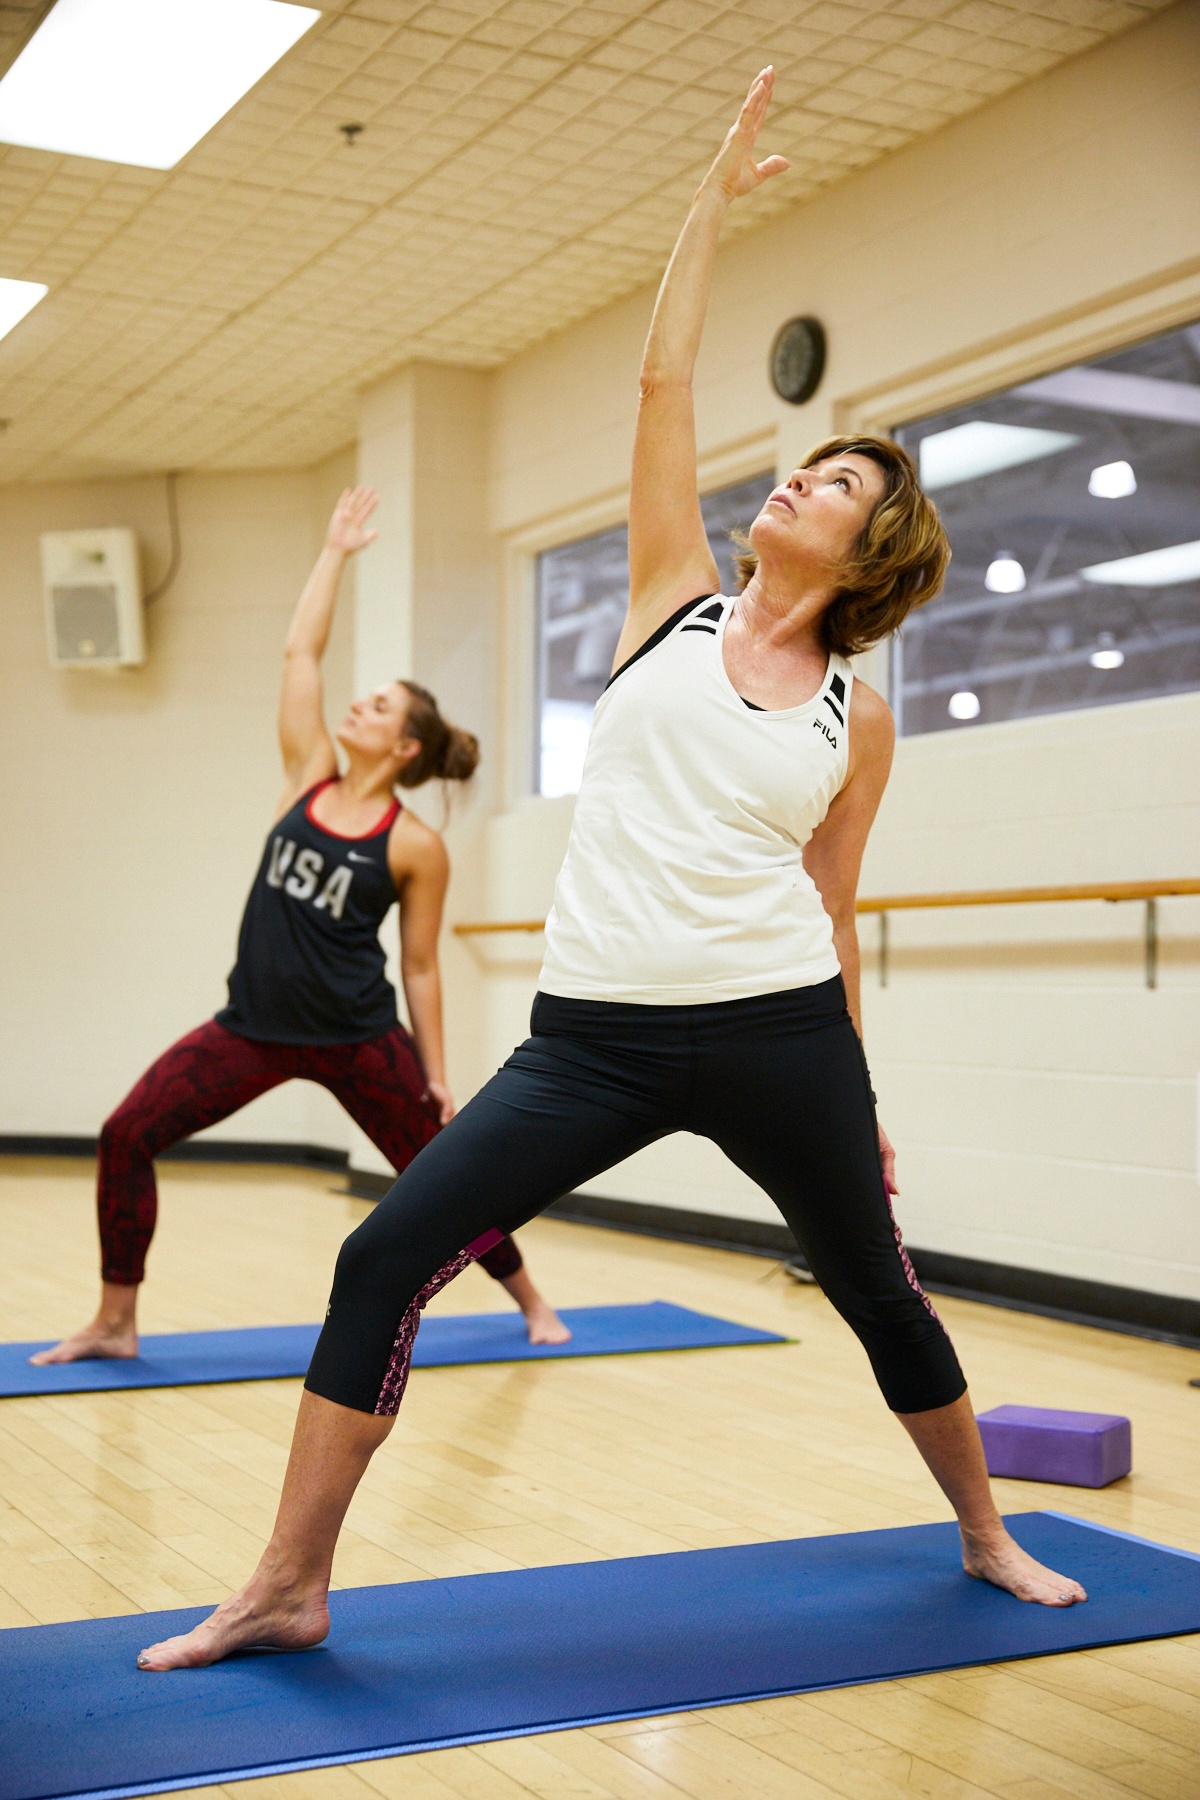
Yoga is good for all types of people who have all types of fitness goals. No matter what your age, size, shape, or training regimen, you can reap the benefits of doing it on a regular basis. In fact, there are different types of yoga, and some of them are quite challenging regarding strength and balance.

Yoga is NIFS Group Fitness Class of the Month. Let’s take a look at some specific groups of people and why yoga can be beneficial to them.

Athletes

For many athletes, the idea of getting a good, solid workout means needing a wheelchair to get out of the gym. However, a good 60-minute yoga session could really help far more than the mind tells you it can. In fact, one of these sessions may be, at times, even more beneficial than that 60-minute lift you were just about to do. Yoga helps to improve strength, flexibility, balance, coordination, mental control, and mobility; increases power; and works as a perfect active-recovery exercise.

Seniors

For senior fitness, yoga is great to help gain better stability and balance. As people age, their balance, stability, and proprioception diminish. But with the help of yoga, you can slow down the process. On top of improved stability and balance, yoga helps to improve flexibility and overall joint health, reduces high blood pressure, improves breathing, and helps to reduce anxiety or depression.

The General Population

For the everyday exerciser who is simply trying to fit exercise into their regular, busy life schedule, yoga is great, too! Yoga is actually a form of physical fitness and has several benefits for those looking for a relaxing yet challenging workout. Yoga helps boost emotional health, reduce back pain, reduce heart disease, put asthma at ease, boost memory, improve flexibility… and the list goes on.

Youth

Yes, yoga is good for kids as well. Yoga is good for the youth population because it gives them time to step away from technology, inwardly connect with themselves, and listen to their own feelings and ideas. For this age range of people, it has been found that yoga can help improve self-esteem, attention span, empowerment, and self-regulation.

Nifs YogaPowerlifters

Believe it or not, powerlifting and yoga are a match made in heaven! Yoga for those who like to lift heavy helps improve grip strength and endurance, improve breathing, relieve knee and lower-back pain, aid in flexibility (specifically in the back for power lifters), and increase strength. While you might not be the first one in class to touch your toes, make that your next goal, then lift the car above your head!

***

Check out NIFS’ group fitness schedule and join us for a class in Indianapolis. Namaste, friends and fellow soon-to-be yogis!

Like what you've just read? Click here to subscribe to our blog!

This blog was written by Amanda Bireline, Fitness Center Manager. To find out more about the NIFS bloggers, click here.

Topics: NIFS yoga group fitness balance senior fitness kids powerlifting athletes Group Fitness Class of the Month

Get a Grip on It: Four Powerlifting Grips

Alex-grip.jpgOne of the most important (and sometimes overlooked) pieces of the resistance training puzzle could be right in the palm of your hands. Have you ever thought about the way you hold onto an Olympic or powerlifting bar? For some, the answer may be no. You may be worried more about other techniques, such as posture or breathing. For others, the answer may be yes. The effort you put into how you grip the bar may be your key to success in lifts such as the snatch, deadlift, and clean, among many other resistance exercises.
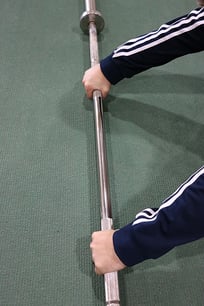
But how should you grip the bar? Are you sure that the grip you are currently using is the most ideal for that lift? Maybe a switch of grips is what you’re looking for to break through your current plateau.

Here is a breakdown of four grips and different ways that they can be used in the gym for exercises or other technique purposes.

1. Pronated (or Overhand) Gripovergrip.jpg

The pronated grip is generally the most common grip used during resistance training. You place the hand over the bar, dumbbell, or kettlebell with your knuckles up. Your thumb can either be wrapped around the bar (closed grip) or not wrapped around the bar (open or false grip). I would not recommend the open grip because you do not have full control of the bar. The closed grip allows the thumb to prevent the possibility of the bar slipping from the hands, especially during exercises where the weight is held above the body (for example, during pressing movements).

When to use a pronated grip: You can use a closed-pronated grip for pretty much every lift that you perform in the gym. I would recommend this for many of the pressing movements and for stability during the squat.

  • Bench press
  • Shoulder press
  • Barbell squat
  • Basically anything

2. Supinated (or Underhand) Gripunder.jpg

The supinated grip is the exact opposite of the pronated grip. The hands are placed underneath the bar so the knuckles aim backward or toward the floor. I generally only categorize the “closed” variation of the supinated grip versus the open/closed options in grip #1. The thumb being wrapped around the bar allows for maximum grip throughout any lift you are performing. I utilize this grip during many of my pulling movements.

When to use a supinated grip: You can use a closed-supinated grip as a variation for many of the main vertical and horizontal pulling movements.

  • Row
  • Inverted row
  • Chin-ups
  • Bent-over row
  • Lat pulldown

3. Alternated Gripalternate.jpg

The alternated grip is a combination of the preceding two grips. In the alternated grip, one hand is pronated and one hand is supinated. It is common for grip strength to be a limiting factor in your ability to lift heavy weight, especially when performing a pronated grip. The bar tends to roll out of the hands very easily, especially during maximal-effort lifts. The alternated grip places the hands in a more favorable position to prevent the rolling or slipping of the bar from the hands. This is also a useful grip to use when you are spotting someone, especially on the bench press.

When to use an alternated grip: You can use this grip for deadlift variations as well as spotting.

  • Traditional/Sumo Deadlifts
  • Spotting

4. Hook Grip hook.jpg

The hook grip is a nontraditional grip that can sometimes be difficult to master, but could yield great results in terms of the lifts you use it for. It is similar to a pronated grip, but the thumb is placed underneath the middle and index fingers. The benefits of this grip are similar to those of the alternated grip. It prevents the bar from rolling out of the hands because of the placement of the thumb and fingers. This makes it an ideal grip for heavy and explosive movements like the clean and snatch.

I recently finished a new certification course called the CWPC or Certified Weightlifting Performance Coach. This certification is based on two Olympic lifts, the snatch and the clean and jerk. I gained a lot of great information through that course, but one key piece of information that I took away to implement into my own training program was the use of the hook grip. I had previously used a closed-pronated grip for both the clean and snatch, but have switched to the hook grip over the past five weeks. I can definitely see improvement in my ability to grip the bar, but there was definitely a bit of a learning curve.

My main issue was the comfort of the grip itself. It was definitely not pleasant through the first couple of weeks; however, the last couple have been some of the best weeks that I have ever had in Olympic lifting. I feel like I have more control of the bar in my hands, and now I do not have to worry about the bar flying out my hands when the weight becomes challenging. If you can get past the discomfort through your first few training sessions, it will be well worth the switch.

When to use a hook grip: You can use this grip for just about any exercise, similar to the pronated grip.

  • Clean and Jerk
  • Snatch
  • Pullups
  • Deadlift

***

When choosing a grip, go with what makes sense to you. For many exercises, you have a variety to choose from. This just adds more options to your training regimen. By simply switching the grip, you are essentially switching up the exercise as well. Play around with them and see which one feels best!

For more on how to improve your grip strength, see this post.

Source: Baechle, T. R., Earle, R.W. (2008) Essentials of strength training and conditioning (pp. 326-327). Chicago, Illinois. National Strength and Conditioning Association.

Like what you've just read? Click here to subscribe to our blog!

This blog was written by Alex Soller, Health Fitness Instructor. Click here for more information about the NIFS bloggers.

Topics: NIFS weightlifting powerlifting grip strength grip

Periodization of Your Workouts for Maximal Strength Gains

deadlift-3.jpgPeriodization is a fancy word for timing out your strength training to avoid mishaps such as overtraining, undertraining, or psychological “burnout.” A correctly periodized training program allows for maximal strength gains within the time frame of the program.

There are several different subcategories within the realm of periodization. The two most popular forms are linear and undulating periodization, and they can be similar in effect, yet they are quite different in execution.

Linear Periodization

This is a great example of the KISS (Keep It Super Simple) method. This type of programming calls for simply adding weight to your lifts, week after week, and trying your very hardest to outwork your previous workout. This tried-and-true method has shown results in all levels of lifters and athletes, from novice to advanced competitors.

“Linear” refers to the line of progression when you look at the weights used from each workout to the next. This line will slowly and steadily increase until the end of your program, when it is time to show off how strong you have gotten. A typical linear periodization program will last anywhere from 8 to 16 weeks.

Undulating Periodization

Now that you are familiar with linear periodization, take that nice straight line and make it a chaotic zig-zag from the first week of the program to the last, and now you have undulating periodization. Basically, instead of increasing weight or reps linearly throughout your program, you will consistently be adding or dropping weight and/or reps from each workout to the next.

The idea behind undulating periodization is to allow optimal recovery time between ultra-intense workouts, eliminating physical or mental overtraining. This is a method often used by more advanced lifters and athletes because of the commonly intense nature of the training sessions. For example, if a competitive powerlifter trained three days a week, a sample week of their program might look something like this (percentages shown are those of the respective one-rep max for each individual lift):

  • Day 1: Squat—80% 5 sets/3 reps
  • Day 2: Bench Press—70% 6 sets/3 reps
  • Day 3: Deadlift—75% 3 sets/8 reps
Which Method Should You Choose?

Neither of these methods has been proven to be better than the other. Each person will have their own opinions on which is better and why. I would suggest starting with linear periodization for two reasons:

  1. It is a very easy method to follow. There is no reason why anybody should start a linear program and not be able to finish it.
  2. It is a very accommodating method for beginner lifters. It is effort based, and what you give is what you get.

Like I said previously, these methods might not be ideal for everyone. They are great templates for individuals who want to get stronger, but they must be tailored to best fit you and your goals. For more information regarding training programs, ask of the NIFS Health Fitness Specialists to create one for you. If this methodology intrigues you and you would like to try it out, specifically mention this blog and they will create a program based on one of these training strategies.

This blog was written by Aaron Combs, NSCA CSCS. To find out more about the NIFS bloggers, click here.

Topics: NIFS workouts NIFS programs weight lifting strength powerlifting strength training programs periodization

Crucial Conversations: PRs Falling in NIFS Powerlifting Competition

PLM_2015.jpgThe NIFS 3rd Annual Powerlifting Competition is less than a month away, and the expectations for this year are high. From its modest beginnings, the powerlifting event at NIFS has doubled in the number of athletes registered, and the audience tripled from the first event to the second event. With big attendance and even bigger lifts, the outlook for this year’s event is very promising.

For me personally, the very cool part of this growth is that although we are currently a non-sanctioned event, the competition rises year after year. It’s about a community coming together to celebrate strength, competition, and sportsmanship. There is no shortage of high-fives and attaboys and attagirls on this fall Saturday morning. It is a great thing to witness previous strangers become warriors fighting the same war together; it’s quite moving, and impossible not to join in and feed off the energy.

A Conversation with Lifter Aaron Sparks

I had the opportunity to speak with a two-time (soon to be three-time) participant in this great event about what it takes to compete and what struggles he had to overcome to be at his best on event day. Aaron Sparks is a longtime lifter and athlete, and also works for us here at NIFS, so he is constantly around the barbell and plates. Aaron was gracious enough to take time out of his schedule to answer some questions and to share his experiences with you. Join me as we learn what it takes to take down personal records and compete at this level.

Tony: Tell the readers a little about yourself.

Aaron: My name is Aaron Sparks. I am 25 years old and currently a student in the DPT program at Indiana University. I love fitness and everything involved with it, including bodybuilding, nutrition, and powerlifting.

Tony: How long have you been lifting for strength and big numbers?

Aaron: I started lifting recreationally about 10 years ago while playing high school football, but I didn’t start taking it seriously until about 4 years ago when I started actually watching what I eat. I have been powerlifting and really trying to get stronger for the last 3 years.

Tony: Have you competed in any other fitness competitions?

Aaron: The only other fitness competitions I have been in are the two previous NIFS powerlifting competitions.

Tony: What made you take the risk and compete in the NIFS Powerlifting Competition?

Aaron: I have always loved competition and really miss it since my high school football days are over. This was an opportunity for me to show off how hard I have been working in the weight room. For the most part, not many people see all the hours you put in, so it is nice to have the chance to show people how much it has paid off.

Tony: What did it mean to you to compete in the first two NIFS Powerlifting Competitions?

Aaron: Competing was an overall great experience and the atmosphere was amazing. Everyone was there rooting for the person next to them to hit a PR, but at the same time, everyone wanted to lift more than the next guy or gal. It is always great to get a group of people together a common goal and see what they are made of. It gives everyone an opportunity to show off what they have been working for.

Tony: What struggles have you endured to lift and train the way you do?

Aaron: I’ll admit the hardest part for me with working out has always been the nutrition aspect. I love food and pig out every chance I get. On a more powerlifting related note, the hardest part is approaching each week to beat the numbers you hit the week before. Sometimes you have good days, sometimes you have bad days, but you never want to regress from the week before. It’s mentally exhausting to have to push yourself over and over again on such heavy reps so that you can continue making progress toward your goal.

“It is always great to get a group of people together with a common goal and see what they are made of.”

Tony: As a three-time competitor in this event, what brings you back year after year?

Aaron: For me, the main motivation is trying to beat my numbers from the year before, but I also absolutely love the atmosphere of the competition. Everyone is rooting for each other, but at the same time they are trying to beat the person next to them. It’s great seeing people new to the sport make progress and hit PRs. It is also a low-stress competition since it isn’t sanctioned, but it also gives people the opportunity to get exposed to the sport.

How Far Can You Go?

Aaron has placed in the top 2 of his weight class each year he has competed in this event. I know what he is after this year: VICTORY. And with his dedication to improvement, through countless workouts and nagging injuries, he is determined to be better. Aaron took a risk a few years ago in signing up to represent himself among a strong group of competitors and has reaped the rewards. T.S. Elliot once said, "Only those who will risk going too far can possibly find out how far one can go." Are you ready to see how far you can go?

There are a few spots remaining, so don’t wait to get registered for the NIFS 3rd Annual Powerliting Competition. Sign up today to be a part of a very special event hosted only once a year!

get registered for Powerlifting

This blog was written by Tony Maloney, ACSM Certified Exercise Physiologist and Fitness Center Manager. To find out more about the NIFS bloggers, click here.

Topics: NIFS weightlifting powerlifting competition Crucial Conversations

5 Reasons to Compete in the NIFS 3rd Annual Powerlifting Competition

risk.jpgFor all you Rocky fans out there (and I am assuming that is all of you), the name Frankie Fear should instantly take you to Rocky’s basement in the fifth installment of the series, where the Italian Stallion is introducing Frankie to Tommy Gun. Frankie Fear is regarded as your best friend, because he keeps you sharp, hungry, and focused on survival and victory. Rocky goes on to explain that fear is like a fire deep inside, and if you learn to control it, it can make you “hot,” but if you don’t, it can “burn you up.”
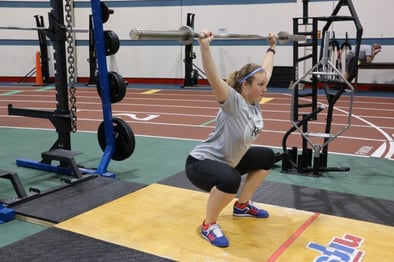
Now I am not doing this powerful scene much justice, but the meaning of it has stuck with me for a very long time. Fear can be paralyzing, and can keep you from taking a risk that could change your whole life. Or, fear can push you further than you have ever gone before. So is Frankie your bestie? Do you control the “fire,” or does it control you?

Risk = Reward

A few years back, before my first 12-mile Tough Mudder, fear was definitely a fire lit up inside me for a month leading up to the event. I’ve been a competitor my entire life, so I have experienced the fear of competition many times and could easily control it. The fear that was overwhelming was the fear of taking a risk at a brand-new obstacle—12 miles of obstacles, to be exact. I saw some of the YouTube videos of this event: mud, tall obstacles, high falls, electricity! That fire was being stoked, and I was beginning to question the risk-reward relationship of this event. But with the help of a true friend, training, and controlling that fire, I completed the 12-mile crazy track.

The risk, of course, was both physical harm and mental defeat. But the reward was redefining who I was and what I was capable of. You find out a great deal about yourself during intense challenges, and what I learned that day has carried me through so many more challenges and battles. Not only during the event, but in the training leading up to it, I defined some new physical heights and a motto that nothing is impossible.

Top 5 Reasons to Compete

So why would you risk competing in this year’s Powerlifting Competition? There are plenty of reasons why, and you should have a few reasons of your own. But here are my top 5 risk = reward reasons to compete in the NIFS 3rd Annual Powerlifting Competition:

  1. Learn to control Fear. This will serve you well not only in this competition, but in life.
  2. Visit 3 bars (squat, bench, deadlift) for one low cover charge. Unlike the other bars, you will gain perspective and a medal!
  3. Dare to be GREAT. It’s been written that the “enemy of great is often the good.” Don’t settle for “okay,” or “good enough”; dare to be better than that.
  4. Surround yourself with like-minded people. The competition will be filled with others who have taken the risk to compete; share the experience and the gains
  5. Find out what you are truly capable of. Gain the mindset that nothing is impossible, and bring out that inner Warrior that will carry you through so many challenges in your life.

A Testimonial from a First-Time Lifter

Still not convinced you should compete? Here is what a first-time lifter at our first meet had to say:

"This was my first powerlifting meet, and I was a little nervous coming in not really knowing what to expect. However, EVERYONE was very nice including the staff running the event and the competitors. After doing several powerlifting meets after this one, this one ran the smoothest and fastest by far. It was an amazing atmosphere with lots of spectators and everyone cheering you on every single lift." —Bailey Schober

Don’t let fear burn up your opportunity to be great and to find out what you are ultimately capable of! The risk that you will take will be worth the reward.

get registered for Powerlifting

This blog was written by Tony Maloney, ACSM Certified Exercise Physiologist and Fitness Center Manager. To find out more about the NIFS bloggers, click here.

Topics: NIFS challenge weightlifting powerlifting competition risk fear

The First Rule of NIFS Barbell Club: Talk About Barbell Club

Today marks the beginning of our Barbell Club here at NIFS. This is a free Olympic and Powerlifting program for anyone who is looking to:

  • barbell.jpgImprove performance of one or multiple lifts
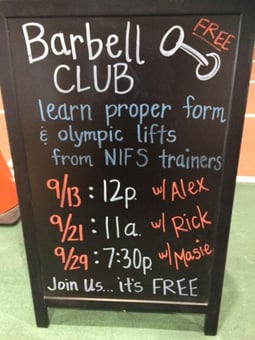
  • Improve technique
  • Learn the basics about the lifts
  • Do all of the above
You may have years of experience with these different types of lifts, or you may never have attempted or thought about attempting them in your life. Regardless, everyone can benefit from what the program has to offer. As NIFS coaches, we have great experience coaching these movements in safe and effective ways that take you through the progressions. The importance of this is paramount due to the fact that the ballistic nature of many of the movements requires injury prevention. When you think about weightlifting in terms of a food chain, Olympic and Powerlifting are the king of the jungle.

What Movements Will You Learn?

Here are the movements that may be coached during your session:

  • IMG_7315.jpgClean (Hang or Power)
  • Clean and Jerk
  • Snatch
  • Deadlift
  • Squat
  • Bench Press
How Can Barbell Club Help You?

As one of the coaches of the NIFS Barbell Club, my plan is to help out with any individual questions that members may have. If you’ve been around these lifts in the past, you know that there are many details that go into making the movement safe and successful. One of my favorite tools to use is slow-motion video. Many people have done these lifts for years and have never seen themselves do it on video. This can give you an idea of your bar path as well as visual cues with posture (head/foot position, and spine angle).

Another tool that can help you achieve your goals will be advice in programming. You may have been working on a lift for months and have made steady progress but have recently plateaued. Where do you go from there? After ensuring that your technique looks sound, my next goal would be to give you a few ideas on other lifts that you can perform to improve the main lift. For instance, you want to improve your snatch and have failed for the past 2 weeks at 93kg. Instead of continuously failing at 93, how about adding a few sets of “snatch pulls” at that trouble weight or even higher? This will help your body start to adapt to handling that amount of weight.

Can New Powerlifters Join?

But what if you have never attempted to do any Olympic or Powerlifting movement? Are you still allowed to attend? Absolutely! Beginners are my favorite individuals to instruct in these techniques because they have no preconceived notion of what the lift is supposed to be. We will help you learn the basics of the movement and let the session lead to wherever it may. As a beginner, the goal is not to be doing a full snatch or clean and jerk on day 1. More than likely, you will not be able to absorb enough knowledge within that one-hour session to do that. Instead, our goal is to build the foundational movement pattern that will allow you to excel in future training sessions.

No matter your experience level, come give Barbell Club a shot. Did I mention that IT’S FREE? You have nothing to lose and a wealth of knowledge to gain!

Like what you've just read? Click here to subscribe to our blog!

This blog was written by Alex Soller, CSCS; NIFS Athletic Performance Coach. To find out more about the NIFS bloggers click here.

Topics: NIFS group training NIFS programs injury prevention weightlifting safety personal training powerlifting

Weightlifting Gear: Equipment to Enhance Training—or Ego?

lifting.jpgThere are numerous different products on the market now that are supposed to help improve your strength training. From lifting belts to Mark Bell’s patented Slingshot, there is more gear available now than ever. For a novice lifter, the multitude of available products will probably just leave your head spinning. What is actually helpful and what is just a moneymaker? Here is my take on some of the most popular products out there.

Lifting Belts

There are some products that I will advise most lifters to stay away from, but this is not one of them! A lifting belt is imperative to a good strength training regimen. Any kind of substantial load for a squat or a deadlift is going to put a lot of pressure into your abdominal cavity, as well as onto your spine. A lifting belt acts as a brace when the lifter takes in a large breath and pushes their abdomen out into the belt. This ensures that the spine stays stable in place and has nowhere to go, resulting in a much-reduced risk of injury. This piece of equipment is the first that I would recommend purchasing for any new lifter, especially if you are thinking about competing in powerlifting.

Not sure if you want to compete? Try it out at the annual NIFS Powerlifting Competition! It is a great starter meet to get your feet wet and see what competition is all about.

Olympic Lifting Shoes

You have probably seen or heard of lifting shoes before. They have an elevated heel and make a nice, loud “SMACK” sound on the platforms at NIFS during a properly executed Olympic lift. These shoes can be helpful for more than just Olympic lifting, though. They can be very helpful for front and back squats (depending on your body type). If you have the right body type (usually tall and lanky), these shoes will create better leverage for you to squat more efficiently. The elevated heel actually shifts your center of gravity forward just a slight bit, which allows the squatter to sit backwards and reach “good depth” easier.

These shoes can be somewhat costly for students. Try to find a good deal on a pair of lifters if you are strapped for cash. The more expensive pairs (Nike Romaleos) can run up to $250 or $300, but Adidas makes a similar shoe that you can find for around $75. If you are not an Olympic competitor, there is not much need to spend a couple hundred dollars on these shoes.

Mark Bell’s Slingshot

So, we have looked at an “almost necessary” product and a “nice to have, but don’t totally need” product. Here is an example of a “don’t really need at all” product. Mark Bell’s Slingshot is a highly elastic band with two arm sleeves on the side, which, once you put the Slingshot on, causes the elastic band to stretch across your chest. Basically, this tool allows the lifter to handle heavier loads on the bench press than they normally could. The few advantages to this product are

  • Less shoulder pain for those with very severe shoulder issues
  • Overloading the bench press with above-maximal weight
  • Frankly, loading your ego by seeing how much you can bench when using it

If you’re thinking I am just hating on Mark Bell or his product without just cause, please reconsider. I am a big fan of Mark and his no-nonsense business style. He knows what his product is for and to whom he should market it. I even have a Slingshot of my own! That being said, I think there are too many young lifters who buy his products just because they see him as an idol and they want to be like him in any way possible. The Slingshot is a tool that can be utilized by experienced lifters, and it can be helpful. But, for the beginner lifter, this product will almost certainly do you more harm than good.

Start with the Basics

There is a time and place for most lifting products, but most of them are not needed until you are way down the road to being competitive. Start with the basic products that will benefit you, not confuse you. A lifting belt is a great product to start with, and possibly a pair of lifting shoes. Do your research about all lifting products and try to determine which ones will work the best for you. I urge you to not just buy any of these products on a whim, thinking that they have to help you because somebody famous said so.

Like what you've just read? Click here to subscribe to our blog!

This blog was written by Aaron Combs, NSCA CSCS. To find out more about the NIFS bloggers, click here.


Topics: NIFS equipment NIFS programs injury prevention weightlifting powerlifting strength training