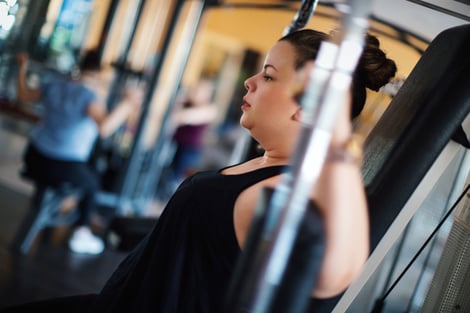
 Science News (August 9, 2021) reported a study released by the University of Kentucky College of Medicine and College of Health Sciences that adds to the growing evidence that resistance training has unique benefits for fat loss. As a longtime fitness trainer, I have known about the effectiveness of resistance training for fat loss and body composition from my experience with clients and my own personal health and fitness journey. However, it is interesting to see science finally start to catch up with the real world and offer up some details of human physiology and systems biology as evidence as to why resistance training is so effective.
The Science
This study showed that in mice and in humans, in response to mechanical loading, muscle cells release particles called extracellular vesicles. These extracellular vesicles instruct fat cells to enter fat-burning mode.
It has been understood for a while that extracellular vesicles played a role in selectively interacting with proteins, lipids, and RNA and more recently had a role in intercellular communications. This study adds to that understanding by showing how skeletal muscle communicates with other tissues.
According to McCarthy, “To our knowledge, this is the first demonstration of how weight training initiates metabolic adaptations in fat tissue, which is crucial for determining whole-body metabolic outcomes. The ability of resistance exercise-induced extracellular vesicles to improve fat metabolism has significant clinical implications.”
What It Means for You: Resistance-based Training Is a Fat-loss Tool
Well, that was science-speak, but what does this mean to you? “Significant clinical implications” means that the research provides clinicians with findings that can be used in treating medically needed fat loss with resistance-based training along with diet and other forms of exercise, such as cardiovascular training.
Fitness in the US Is Declining
Our culture is getting heavier, with a rising percentage of the population crossing over to obesity. Recent studies have shown that 88 percent of the adult American population is metabolically unfit, with expected conditions that include high blood pressure, heart disease, and diabetes. And Covid showed us clearly that metabolic unfitness was associated with bad Covid experiences and poor outcomes, including death. (Oh, and by the way, American life expectancy has been trending down even before Covid.)
Whatever we are doing as a culture is not working for health and longevity. Changing these adverse conditions requires changes at the individual level because large parts of our social fabric (business, media, and special interests) are too wrapped up in greed and maintaining the status quo for their interests and not acting for the greater good. So it’s up to each individual to decide what is best for their own health regarding diet, exercise, sleep, and stress reduction. All four of these factors are all very important, but exercise and diet seem to get the most attention and are the places where most people start their journey of making life-quality changes.
Where Do You Begin Your Fat-loss Journey?
“Experts” are all over the media with supplements, books, and podcasts. The number of theories and opinions is staggering. Most seem reasonable on the surface, which adds to the confusion about what to choose and where to start.
Adding to the complexity, huge international corporations, through massive advertising campaigns, are marketing online workout programming to support a major purchase of their in home exercise equipment. They offer cardio equipment and digital-controlled strength machines—slick and attractive to someone sitting on the couch with pizza and a beer.
And your online fitness searches provide social media marketing the information they need to dump even more choices in your lap based on what you have been viewing online. Hmm…
Confusing? Overwhelming?
Let’s erase the messy whiteboard and create a simpler view of the objective.
Remember, I started this blog with a study that showed how resistance training sets the cells up for burning body fat. The purpose of sharing this study was to support the concept of resistance training as an effective method for fat loss and an approach you should consider seriously.
A Training Template for Fat Loss
The following is a straightforward template to serve as a starting point to begin your resistance training/fat-loss exploration.
The human body has six patterns of functional movement:
- The body sits down and stands back up. The knees and hips flex and extend. In the gym, we see this in various forms of squatting, lunging, and step-ups.
- The body hinges at the hip joints and bends down to pick up things using the largest and strongest muscle complex of the body, the glutes. In the gym, this could be deadlifting on one end of the spectrum to lying on your back on a mat, knees up and feet on the ground for doing hip thrusts. (Both the squat and deadlift techniques should be taught by a competent coach to speed the acquisition of proper skills and to avoid injuries).
- While standing, if you hold your arms out in front of your body, the arms would be horizontal to the ground. This right angle to the spine position is called the horizontal plane. If you were doing a push-up facing the ground or lying on your back doing a chest press, the arms would still be at a right angle to the spine, thus on the horizontal plane. The arm movement on this plane would either be pushing away from the body (for example, the bench press) or pulling back toward the body (for example, the back row). There are numerous options to choose from for working on this plane.
- When the arms move in line with the spine, this is the vertical plane, and once again you are either pushing away (for example, the shoulder press) or pulling toward the body (for example, the lat pulldown or pull-up). The horizontal and vertical push/pulls cover the basic functional movement patterns of the upper body. When done standing, the core ties the lower- and upper-body segments into a functional unit for expressing strength and power.
- The core is an important component of the basic workout template. As indicated above, the core ties together the lower- and upper-body segments, but also serves to stabilize and protect the lumbar spine.
- A forgotten and often overlooked exercise that is key to a strong-functioning body is the carry. As simple as it sounds, you pick up something and carry it: moving weight for distance and/or time. This exercise brings together strength, balance, muscular endurance, and grip strength.
There are numerous exercises to choose from to fill in the slots of the template: various reps and sets schemes, frequencies of sessions, recovery days and resistance sources depending on what best meets the needs of the individual, but having a structure to work with is critical for success, especially at the beginning.
You can certainly explore and experiment on your own, but I recommend that you take advantage of the trained professionals here at NIFS. There is a lot of knowledge and experience available to help you on your journey. We are here to assist you—just ask.

This blog was written by Rick Huse, NIFS Health Fitness Specialist. To find out more about the NIFS bloggers, click here.
 I am often asked what is a good warm-up routine, and my answer typically consists of, “it depends.” A warm-up is typically done at the beginning of a training session and involves low-intensity movements to help get your body ready. The reason I tend to say “it depends” is that your goals, limitations, and what kind of training you have planned for a specific day will dictate your optimal warm-up.
  Looking for a simple and fun way to plan your own workout? You can use a deck of playing cards to determine which exercises to do and how many reps. Here are the steps for planning this game-based workout.
 The “perfect” workout rarely happens. Every so often, you may have one of those training sessions where every block flows smoothly and programmed repetitions and sets are executed flawlessly. But for most days, there will be missed reps, you may feel more fatigued than you think you should, or the workout may not come together as you hoped it would. That is fine. Your goal should be to strive to be as close to perfect as possible, with the understanding that it may not always happen.
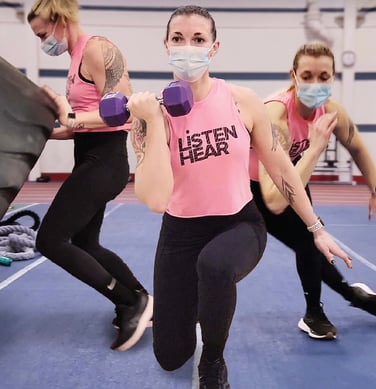 With the world now instantly accessible through technology, it’s easy to understand why a growing number of people expect things to be done in a shorter amount of time. Like many others, I’m a big fan of things that are fast and effective, and that includes my workouts. High-intensity circuit training does just that by providing an effective and convenient way to increase exercise results in less time.
  If you are an athlete, powerlifter, or just a person who loves to see progress, you might want to try out cluster set training. This is an advanced type of training designed to get you stronger faster than traditional set training.
  We’re in the midst of the holidays. You probably have family commitments or events pulling you away from the gym or time with
  The month of October, also known as ROCKTOBER or SQUATOBER and famous for Halloween, is here. I thought I would put together two workouts—a fun workout, Pumpkin Partners, and a challenging workout, The Hell Bridge—that everyone can enjoy this October! Both are great for outdoor training in cooler weather
 Bring in the summer with some fun ideas to get your fitness goals accomplished. Completing both circuits will help you get a jump-start on your fitness goals going into this summer. This workout can be done outside or in the gym.