<img height="1" width="1" style="display:none" src="https://www.facebook.com/tr?id=424649934352787&amp;ev=PageView&amp;noscript=1">

NIFS Healthy Living Blog

Make Training Less Complex with More Complexes

Screen Shot 2020-10-13 at 12.56.26 PMIf you are like me, with a busy, on-the-go lifestyle, you probably don't have more than an hour to get inside the gym and train. Lucky for you, that’s okay!

By training with a full-body routine utilizing complexes, you can spend less time in the gym and still see the results. This not only saves you time in the gym, but it also allows for more time with family and friends, all while seeing the results you want. One way to accomplish this is through a barbell or kettlebell complex.

What Is a Complex?

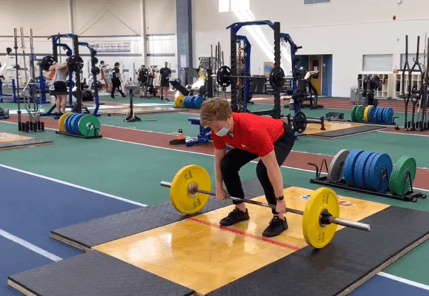
A complex is a series of movements that are performed back to back in which the set number of reps is done for a movement before moving to the next. A complex can be performed with a barbell or one or two kettlebells/dumbbells. Each movement within the complex should flow into the next one. A good way to achieve this is to start from the ground and work your way up.

How to Build a Complex

Any number of reps can be done for each movement. The more movements within the complex, the fewer reps you will want to complete for each one. A complex consisting of four to six movements should be kept at one to five reps per movement. If your complex is only two to three movements, you can use higher reps. Some examples of complexes include the following:

Barbell 1

  • Row x 1–5 reps
  • Deadlift x 1–5 reps
  • Hang Power Clean x 1–5 reps
  • Front Squat x 1–5 reps
  • Push Press 1–5 reps

Barbell 2

  • Deadlift x 3–6 reps
  • Clean x 3–6 reps
  • Press x 3–6 reps

Kettlebell or Dumbbell 1

  • Pushup x 1–5 reps
  • Row x 1–5 reps
  • DL x 1–5 reps
  • Clean or Snatch x 1–5 reps
  • Squat x 1–5 reps
  • Press x 1–5 reps

Kettlebell or Dumbbell 2

  • Pushup x 3–10 reps
  • Row x 3–10 reps
  • Swing x 3–10 reps
  • Squat x 3–10 reps

I recommend completing two to three rounds, but you can also work up to as many rounds as possible with good technique. Within each complex there will be a movement that limits the weight for the entire complex, and it is better to start the first round with a weight you think will be too light.

For example, the movement that will decide your weight in Barbell 1 above is the push press. The deadlift might feel easy, but that is okay. By the end of the complex you will be happy you did not go as heavy as possible. Try to do the entire complex without setting down the weight to rest, and remember to complete all of the reps for one movement before moving on to the next movement.


Why Should I Implement Complexes?

These complexes are an amazing full-body tool that you can use if you are running low on time for your session, or if you have limited days per week you can come in and train. They are also a great way to add additional volume to your workouts, or can even be used as a finisher at the end to build resilience and touch up your conditioning. If your goal is to be better conditioned, adding a sprint or jog component at the end using pieces such as the echo bike, rower, ski-erg, or SPARC trainer can provide a nice cherry on top of an already stellar total-body workout.

Give these complexes a try to get your blood pumping, and let us know how they go! If you need any technique tips or complete workout programs, come visit us at the track desk for more information on what we offer and how to get that set up!

Like what you've just read? Click here to subscribe to our blog!

This blog was written by Evan James, NIFS Exercise Physiologist EP-C, Health Fitness Instructor, and Personal Trainer. To learn more about the NIFS bloggers, click here.

Topics: workouts weight lifting weightlifting kettlebell weights strength and conditioning workout programs full-body complexes efficiency

Work Capacity Training with Kettlebells

GettyImages-1001563404
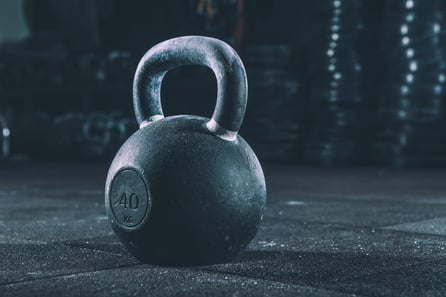
The Russian kettlebell is unique among exercise tools. It is an offset-handle weight that travels easily between the legs in a pendulum movement that can be easily seen in the kettlebell swing (two-hand and one-hand swings). If done correctly, the hips hinge straight backward as if you were trying to push a swinging door open while holding a tray. If you squat, even a little bit, there is little rearward movement and the door doesn’t open. Hip power is lost.

The Swing

When I teach future kettlebell instructors, I spend 2 and a half hours on teaching the swing. It is that complicated, and as you will see, that important. Hopefully, a future instructor can take that information and skills and teach a client how to do a reasonable swing in 10 to 20 minutes, reasonable enough to get through a workout. Regardless of how long someone has been lifting kettlebells, their swing skills can always be improved.

That hip hinge swing movement is used for kettlebell cleans and for the glamour lift, the kettlebell snatch. Without proper swing skills, it is impossible to progress very far into the art of kettlebell lifting and to truly get the unique rewards of kettlebell lifting.

Weight Exercises

Kettlebells are a weight and can be used for typical weight exercises—sometimes successfully, sometimes passable, and many times just plain head-shaking stupid. What most people miss is what the Russians discovered a long time ago. In one-on-one athletics, the first athlete to fatigue is likely to lose. In military hand-to-hand combat, the first soldier to fatigue is likely to die. The repeatable hip hinge–based movements (swings, cleans, snatches, clean and press, clean and push press, and clean and jerks) are tremendously effective in building strength/endurance, and work capacity. The variables are time of lifting, reps per minute, and of course the amount of weight used.

Tasha Nichols, a group fitness instructor here at NIFS, won her 58Kg weight class in Dublin, Ireland 2015, doing the one-arm snatch for 10:00 (hand switch at the 5:00 mark) with a 16kg KB with a total of 203 repetitions. The time was 10:00, averaging just over 20 reps per minute, and the weight was 16kg (35.3 pounds). That is work capacity!

Work Capacity Kettlebell Workout

Here is a little workout to give you an idea what work capacity training feels like.

Maxwell Circuit

  • Swings: 15 
  • Goblet Squats: 5
  • Push-up: 5
  • One-arm row: 5/5

That is 1 round and the workout is a minimum of 8 rounds and a maximum of 15. Rest long enough to complete the next round but no longer. Swings can be done with a dumbbell if a kettlebell is not available. Be careful when holding a dumbbell by the bell end. It can slip.

Block off the space you’re using to swing anything. Children and pets can walk in when they are least expected

Goblet Squat is done with the weight held at chest level. If this bothers your shoulders, hold the weight at arm’s length between your legs but be sure to actually squat. Do not allow it to become a sloppy deadlift.

Kettlebell Training

Training with kettlebells properly, anyone can seriously improve their strength and endurance. Like most activities, you must put in the time to practice and get better to see real results. Interested in learning more about kettlebell lifting and how you can increase your work capacity? Contact Rick Huse for more information. 

Enjoy the pain!

Like what you've just read? Click here to subscribe to our blog!

This blog was written by Rick Huse, CSCS, NIFS Health Fitness Specialist. To find out more about the NIFS bloggers, click here.

Topics: fitness center workouts nifs staff endurance weightlifting strength kettlebell work capacity

STRENGTH: 6 Expert Weightlifting Tips to Be Stronger Than Ever

GettyImages-1152704907

Strength. We all want it, and many of us will go to great lengths to obtain it. Strength and the ability to be strong will find its way into all of our lives, from weightlifting in the gym to all the activities of daily living (ADLs). It was once explained to me that you should picture your absolute strength as a bucket; the bigger the bucket (the stronger you are), the more things you can put into the bucket. Aspects of health and fitness such as mobility, endurance, agility, and power can all be better developed and improved with the presence of strength. To put it simply: be strong—be better.

Of course you can google “how to get strong,” and you will find no shortage of philosophies and program theories to wade through to answer that question. Some may actually be safe and useful, but who can you trust these days? I tend to learn from those who have “been there and done that” and continue to do it because of a high success rate of most-wanted outcomes.

Get Strong Tips from Dan John

Dan John is one of the top fitness coaches, and I never miss a chance to hear him speak or read his weekly newsletters. I have learned so much from reading his materials and implementing his principles into my training and the training of others. Dan will be the first to tell you that he continues to learn from people like Pavel Tsatsouline and many others. Dan believes his tips are an “easy” way to get strong.

Following are six of his expert tips that I have integrated into my training (and the training of those I work with).

  • Lift heavy. This seems obvious, but it really is where it all begins. If you lift heavy weights to get strong, you have to challenge the system and force it to adapt. Without adaption, there will be no gain.
  • Perform the fundamental human movements. There are some variances in what is believed to be fundamental, depending on who you talk to. But I believe those movements are Squat, Hinge, Push, Pull, and Carry.
  • Keep sets and reps low. I love Dan’s “Power of 10” rule: never go over 10 total reps for any exercise. For example, 2x5, 5x2, 3x3, 6 singles, 5, 3 and 2.
  • Stop your set and workout before fatigue. Stay fresh and leave some energy for the next training session.
  • Don’t even struggle. Choose the proper load so that you can finish each rep with integrity, not sideways and crooked.
  • Never miss a rep. Choosing a load that you are 100% confident you can make can be hard for some. Most of us want to challenge the limits with every rep and set. Refrain from that for true gains.

A Challenge to Prepare for Powerlifting Competitions

Following these tips, from time to time I will cycle in my training what Dan refers to as the 40-Workout Strength Challenge. I wanted to share a program that I learned from Dan that added 10 pounds to my bench, 30 pounds to my squat, and 50 to my deadlift. Dan also has seen a few PRs fall in both throwing and weightlifting competitions. I am a big believer in the program’s concepts and simplicity. We are very good at overcomplicating things when it is not necessary. Here you work on fundamental movements all the time, and you make sure you hit every rep. This could be a great challenge for you leading into the competition; however, just like anything else, it might not work for everyone. Here’s the setup:

  1. Pick one exercise from the fundamental human movements described above. If competing is your goal, I would suggest a back squat, bench press, and deadlift. Add in a chinup and a farmer’s carry and you are good to go.
  2. Perform these exercises for the first 10 workouts every training session with varying sets and reps.
  3. Never miss a rep, and if the weight feels light, add more weight.
  4. After the first 10 workouts you can repeat them 3 additional times or make small changes to the movements every two weeks (for example, change to an incline bench, front squat, rack pulls, barbell bent-over rows, and racked carry). There are far too many examples of exercises and combinations to list here; I would suggest scheduling a personal program session with a NIFS instructor to help you out.

Here is how I set up my challenge that may help you develop yours. I can’t stress enough that this is what worked for me. It may not work for you, but it could be well worth the try.
Screen Shot 2017-10-03 at 3.00.04 PM.png

I found that after completing this 40-workout challenge, not only did I add pounds to my big lifts, but many of the other tasks in my life became easier. The other aspect of this challenge I really, really liked was that due to its simplicity, I can turn my brain down a bit and just lift. It provided that escape from our day-to-day tasks that I think we all need from time to time.

This blog was written by Tony Maloney, ACSM Certified Exercise Physiologist and Health Fitness Instructor. To find out more about the NIFS bloggers, click here.


Topics: NIFS weightlifting strength powerlifting

Five Great Things About the 5th Annual NIFS Powerlifting Competition

IMG_0151
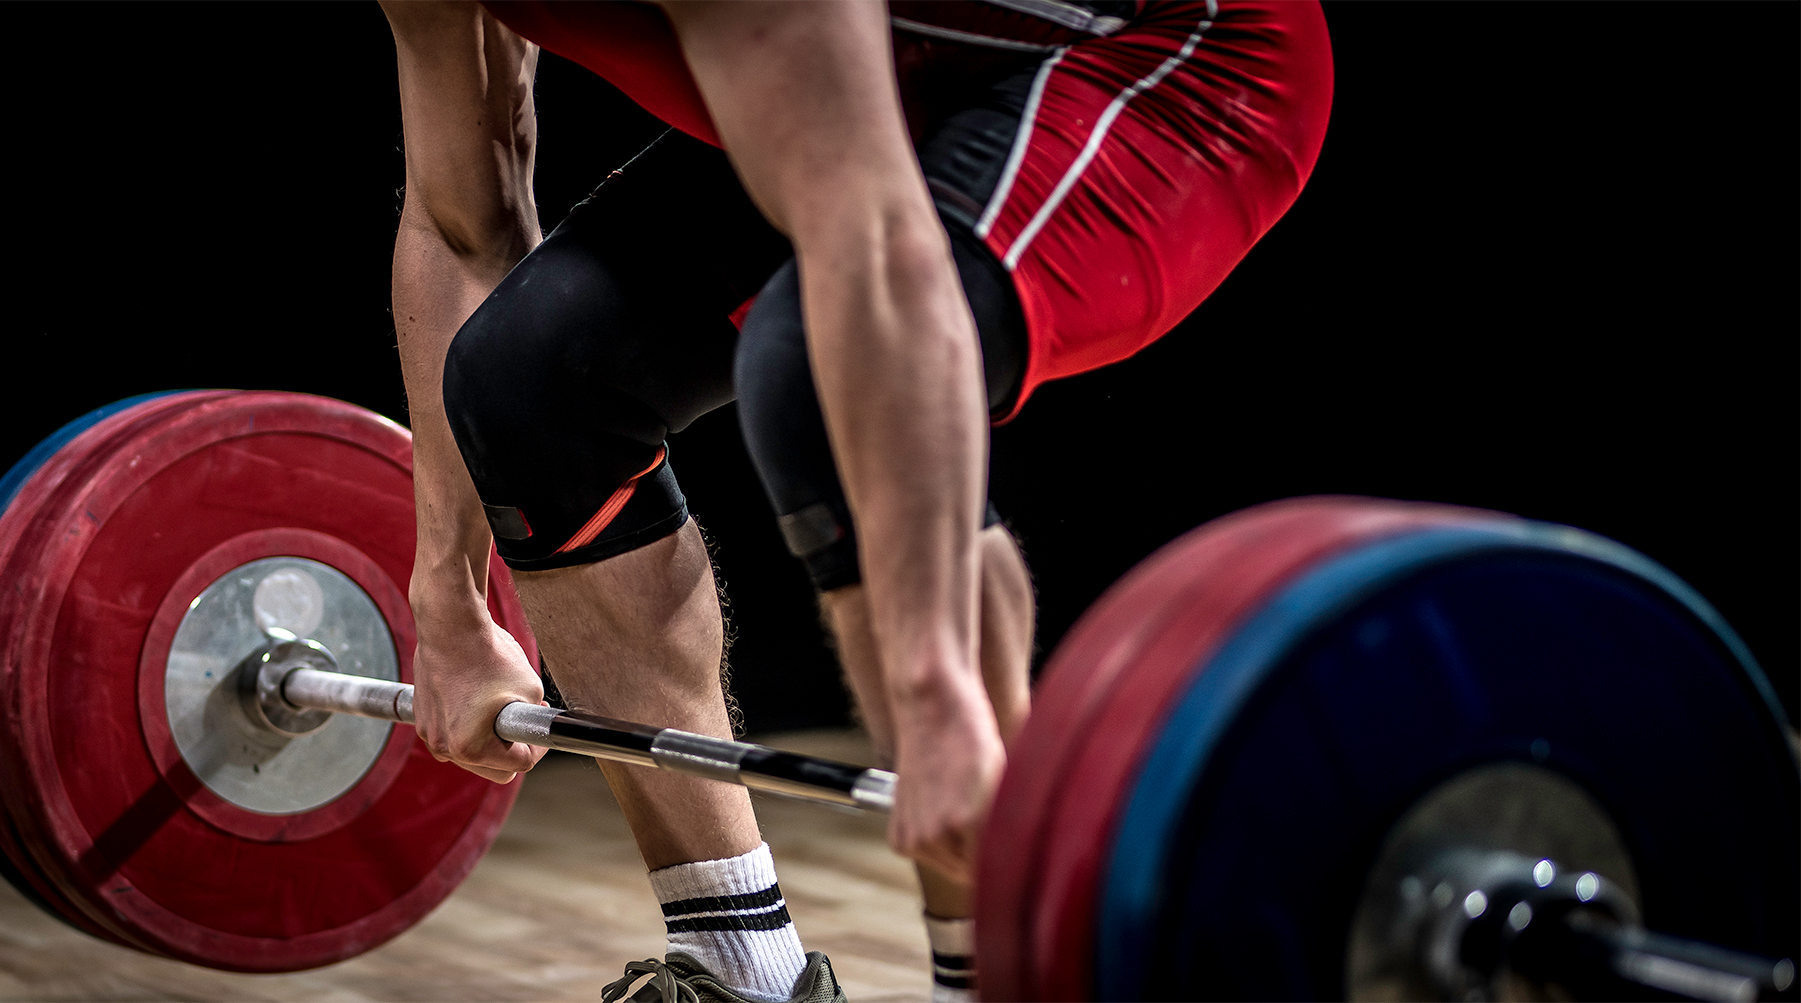
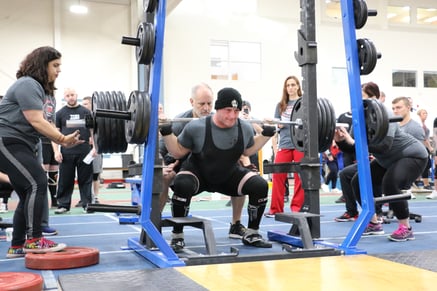
Almost five years ago, the team and I hosted the first ever powerlifting event here at NIFS. Also known as the Iron Triathlon (shirt slogan spoiler alert), the first year was a modest one with 25 athletes competing. This year, the competition registration sold out in just under three days! From our humble beginnings to this year’s event, it’s been a ride. There has been so much hard work, resulting in so many smiles and victories for both the athletes and the crew. We have learned a lot from year one to now, and we have developed from our challenges and gotten better each year.

As we near this year’s NIFS Powerlifting Competition coming up on November 10, I found myself wondering what were some of the best things that have happened in the five years of this event. Here are the five best results to come from the past five years.

Growth

As mentioned before, our first event consisted of 25 athletes who put on a great show and set the tone for years to come. The next year we doubled our registration. Obviously the word got out that the athletes, event staff, and environment were second to none. We increased again the third year and sold out the 4th and 5th annual competitions. The team and I couldn’t be prouder to provide such a great event that athletes and spectators are flocking to Indianapolis to compete in and witness.

“The competition was amazing and it was extremely smooth from setup to setup. I will definitely recommend NIFS to anyone, and the crew you had there was stellar. I’ve volunteered for a few powerlifting meets myself and I understand how exhausting just setting everything up can be. The atmosphere was great.”
—Damon Bryant

Competition

As the number of registrations rose, so did the level of competition. Athletes were coming from other states to compete, and they all brought their talents to Indy to win. We have seen Squats and Deadlifts over 700 pounds and Bench numbers surpassing the 300 and even 400-pound mark. Our first event had five female athletes competing; this year there are 22! It’s awesome to see so many strong women competing.

"I would say that this is a great first meet for any beginner powerlifter or anyone interested in pushing their body to their weightlifting limits. It gives you the chance to compete against people around your body type and ultimately see what you're made of."   
—Tyler Mullen

Comradery

IMG_0363
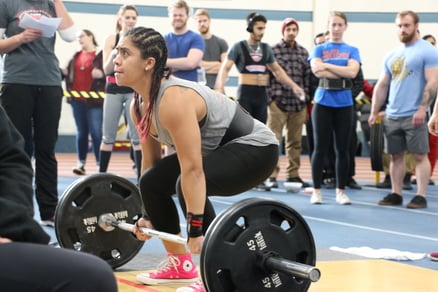
One thing we hear a lot is how inclusive and supportive the environment is on event day. Even though athletes arrive to be victorious over one another, they all support and cheer on each other to do their best. I think the sport of powerlifting is just this way, but I also think the NIFS event intensifies the comradery among these athletes. It sounds corny, but there is something in the air that day, something that reinforces that it’s “WE” and not just “I.”

"I loved how encouraging everyone was. Even though it was a competition, people were constantly saying ‘you can do it’ or ‘great job’. High-fives were everywhere and it was awesome. PLUS all the free goodies—what college kid doesn’t love free stuff?"  
Madison Stewart

Victories

One of the coolest aspects of our event is that, for many, it’s their first competition. As a non-sanctioned meet, it’s a great first step to see whether the sport of powerlifting is for you. So many first-time lifters, those who maybe once thought they couldn’t succeed in this kind of competition, have not only competed, but have taken home some hardware. There’s nothing like witnessing someone take on their fears and conquer them; it is so powerful!

"This was my first powerlifting meet, and I was a little nervous coming in not really knowing what to expect. However, EVERYONE was very nice, including the staff running the event and the competitors that were competing. After doing several powerlifting meets after this one, this one ran the smoothest and fastest by far. It was an amazing atmosphere with lots of spectators and everyone cheering you on every single lift.”
—Bailey Schober

Athletes

The amazing staff and crew are responsible for providing an energetic and smooth event, and so many thanks go out to each team over the past four years. But it’s the athletes who put on the show. I have had the great pleasure to meet and work with some pretty outstanding individuals during the past four years of this competition. These athletes work so hard for so long to put it all on the line that day, and they do such a phenomenal job. Of all the enjoyable aspects of this event, being around all these amazing athletes is by far my favorite. Having the opportunity to learn about them, maybe meet their families that day, and be able to give them that last word of encouragement before their last attempt at a PR—it lights me up! I know I speak for the entire crew that we cannot wait to get underway on November 10!

“NIFS is one of my favorite competitions each year because of the great people that make it all possible. Thank you for hosting such a great event that I look forward to returning to each year!”
—Ben Poore

So if you are interested in seeing why this event is so awesome, put it on your calendar for November 10, and witness the spectacle and a bunch of bars bending. Lifting begins at 9am, and it’s a measly $5 per person. Kids 12 and under get in free. We hope to see you all there!

Like what you've just read? Click here to subscribe to our blog!

This blog was written by Tony Maloney, ACSM Certified Exercise Physiologist and Fitness Center Manager. To find out more about the NIFS bloggers, click here.

Topics: nifs staff NIFS programs weightlifting Indianapolis competition NIFS Powerlifting Competition

Get a Grip: Exercises to Increase Your Grip Strength

GettyImages-505776960
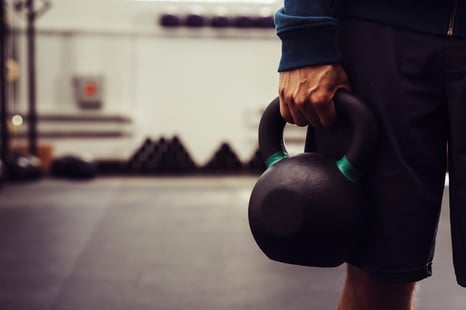
How long have you been stuck on your max for bench press or unable to become efficient at
pull-ups or even able to do a good pull-up? More often than not, people have many areas of concern; upper-body strength, stamina, and technique come to mind. Outside these main aspects of lifting weights, what else is there that you can focus on to help improve your personal bests without making it too complicated? One area you can focus on that gets relatively little attention is grip strength. You already use it a lot, right? The answer might surprise you when you take a look at how it can improve your overall fitness experience.

For the most part, most upper-body lifts require some grip strength. The exercises that require the most tend to be the ones for which you have to hold dumbbells, barbells, kettlebells, or chin-up bars. Whereas other exercises on machines can provide safety and ease of use, they sometimes lack the grip strength aspect that is required with the free-weight exercises. In the fitness world, there’s a saying that goes, “If you want to get good at push-ups, do push-ups.” You can focus some of your exercise time on developing these muscles.

Exercises That Increase the Strength of Your Grip

Here are some easy ideas to implement into your own workouts next time you are at the gym.

  • Farmer’s carry: This exercise can be a little deceptive to the beginner, but as you will find out, there's more than just legs at work. Other than legs, core, shoulders, and back, you will notice that it is imperative that you have some grip strength to be able to complete the exercise, or else you won’t get too far. Remember the saying above.
  • Weightlifting: When you are lifting weights, be sure to grip the bar tightly. Always practice squeezing against the bar when you lift. Conversely, try to incorporate a grip aspect into other exercises as well. Tools to help you work on grip include Fat Grips, the Axle Bar (aka the Fat Bar), and Grippers. Grippers have been around for a long time, with the “Captains of Crush” being known as the toughest around.
  • Stress ball: The stress ball, which is extremely cheap and easily available, can act as an on-the-go tool. There actually may be more stress balls available in the US than there are people, so if you do not have one, I’m sure someone you know does. Simply put one in your car and while you’re stuck in traffic or at a red light, grab that ball and squeeze out 50 reps on each hand. Not only will your grip strength improve, but you may experience actual stress relief.

Let a NIFS Health Fitness Specialist Help Increase Your Strength

As you can see, there are many ways to help your grip strength. The most important thing to remember is that if you want to improve, you will have to use it and use it often. When you think about all the muscles you use for exercise and how they work together, you must understand that you are only as strong as your weakest link. If your grip is the weakest link, every exercise that requires you to hold weights, or yourself, will be subpar. With increased strength, those plateaus will fall.

NIFS has several options in the fitness center to help aid your quest for improved grip strength, including hand grip dynamometer testing (yes, we can test your grip strength). See a health fitness specialist to schedule an appointment to talk about your goals and fitness assessment options. Take control of your workouts, and get a GRIP on your life.

Like what you've just read? Click here to subscribe to our blog!

This blog was written by Thomas Livengood, NIFS Health Fitness Instructor and Personal Trainer. To read more about the other NIFS bloggers, click here.

Topics: NIFS weightlifting exercises grip strength grip carries fitness assessment

Powerlifting Prep Lesson #3: The Deadlift

IMG_4534.jpg
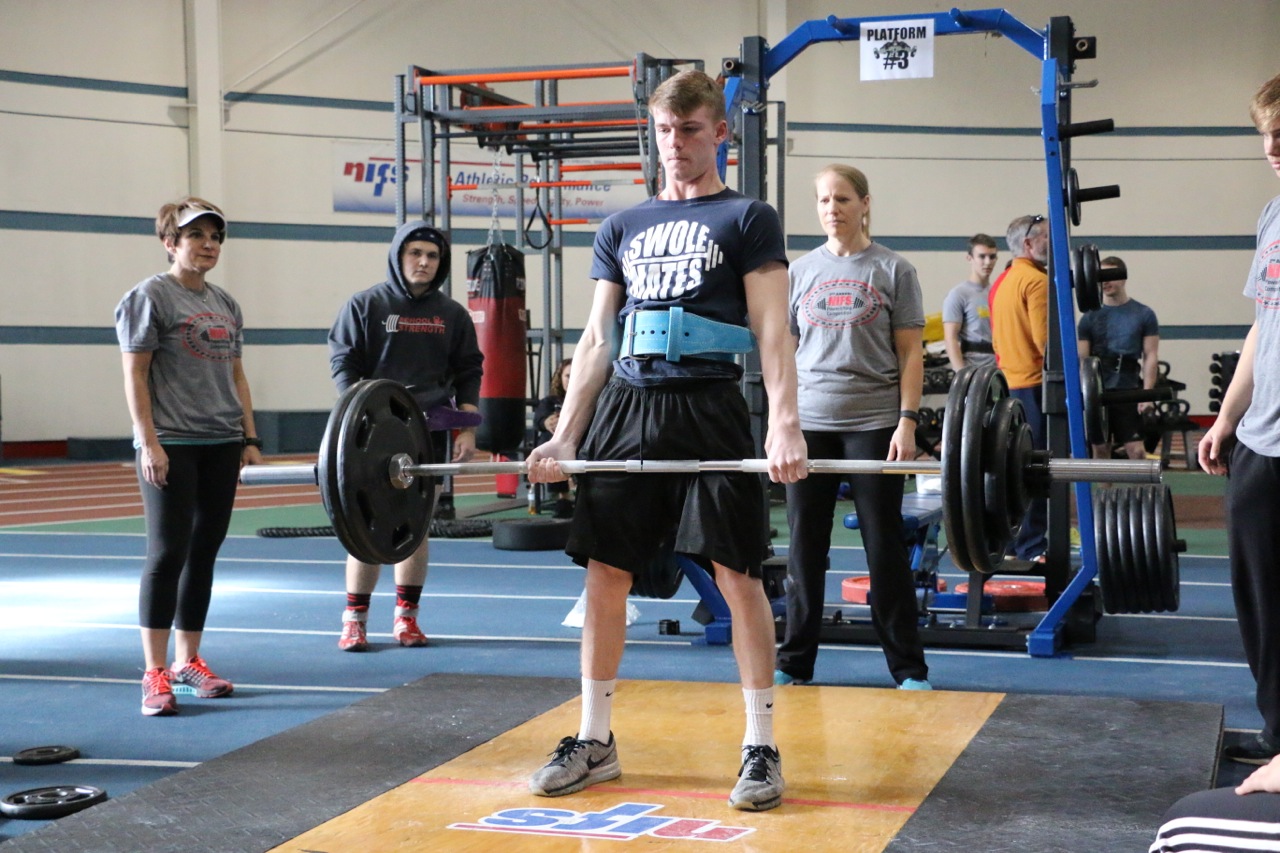
In my previous posts, Powerlifting Prep Lesson #1: The Squat and Powerlifting Prep Lesson #2: The Bench, we took a look at how managing the three key principles of mobility, stability, and tension can have a huge impact on your ability to perform those two lifts at a high level while decreasing the chance of injury. We turn now to the big daddy of them all, the deadlift!

This hinging/pulling lift is easily one of the most popular lifts on the planet, and everybody wants to pull a huge bar from the ground and slam it back down. There really is no feeling like it. And not only does it look pretty cool on Instagram, the deadlift is one of the most functional exercises you can do that transfers very nicely to the outside world. Since the dawn of time we have picked up heavy things and set them back down, essentially doing deadlifts day in and day out. In the powerlifting world, the deadlift is where champions can be forged, or injuries suffered.

So let’s break down this giant lift, focusing on the three key principles introduced earlier:

  • Mobility: The full range of motion of a particular joint(s).
  • Stability: Alignment, with integrity, under load.
  • Tension: Defined with terms such as stiffness and phrases like “bending the bar,” and “spread the floor.”

Mobility

You might think that mobility would not play a big role in this lift, but like most weightlifting movements, it’s imperative. I hope I have done a good job in this series of posts to stress that it all starts with mobility. Strength, power, endurance, and any physical attribute must start at mobility, if you want to be the best that there is. The deadlift is no exception; and if you can’t touch your toes, you probably need to take a few steps back before heavy loading the deadlift.

The deadlift is a hinge pattern, so we will start there by focusing on the active straight-leg raise to monitor and improve the mobility of that pattern. A great place to start is with a leg-lower exercise or a kettlebell butt touch exercise to help improve your mobility for the deadlift.

Stability

For stability, take one more look at the active straight-leg-raise pattern to ensure you capture the mobility you gained through the two movements described above. The lying leg raise with core activation looks a lot like the leg-lowering exercise from above, as it should, but here you are adding stability to the mobility you just gained. Trunk stability is key in the deadlift; without it, spines tend to hyper-flex and lead to injury. Planks and plank variations are always a great place to start, as well as loaded carries and dynamic-stability movements such as a sandbag plank drag to challenge and train the musculature of the trunk so you can pull more weight safely.

Next, and just as with the squat and the bench, intra-abdominal pressure will also be key in pulling the most weight possible. Remember to “fill the can” by inhaling fully and pressing the air against your belt during the set-up and first phase of the deadlift. This again will help fire all of the muscles of the trunk to provide maximum stability during the lift. If you want to learn more about breathing and stability in loaded movements, check out this article from Mike Reinold as he breaks down this concept even more.

Tension

Tension in the deadlift starts with grip! Many studies correlate grip strength to overall strength, so the stronger the grip the bigger the deadlift. Loaded carries and all the variations are my go-to to help train grip strength as well as any pulling motions such as chin-ups and inverted rows.

In the other two lifts I referred to “bending the bar” as a cue to create tension in the system (body) during the lift. In the deadlift, I want you to think about taking that tension out of the bar by preloading the system before pulling the bar from the ground. Pull the bar toward your body without it leaving the ground; you should hear the plates make a kind of clicking noise. This will fire the lats and other spinal musculature to brace before accepting the load of the bar. Ideally in doing so, your entire body will move as one system, like a crane lifting a two-ton I-beam. This will make you a stronger unit to pull the bar off the ground and help eliminate hyper-flexing in the spine that can lead to a bad injury.

***

Executed correctly, the deadlift is a super-functional and super strength-building exercise. It is also one of the more exciting lifts in any powerlifting competition, and it’s sure to make some noise once again at the NIFS 5th Annual Powerlifting Competition coming up on November 10. Registration is full, but you should still come out and support all the athletes competing. It is a great show of strength, competition, and sportsmanship and great way to spend a Saturday morning in November!

Like what you've just read? Click here to subscribe to our blog!

This blog was written by Tony Maloney, ACSM Certified Exercise Physiologist and Fitness Center Manager. To find out more about the NIFS bloggers, click here.

Topics: NIFS weightlifting powerlifting competition mobility deadlift stability tension

Powerlifting Prep Lesson #2: The Bench Press

attachment.jpg
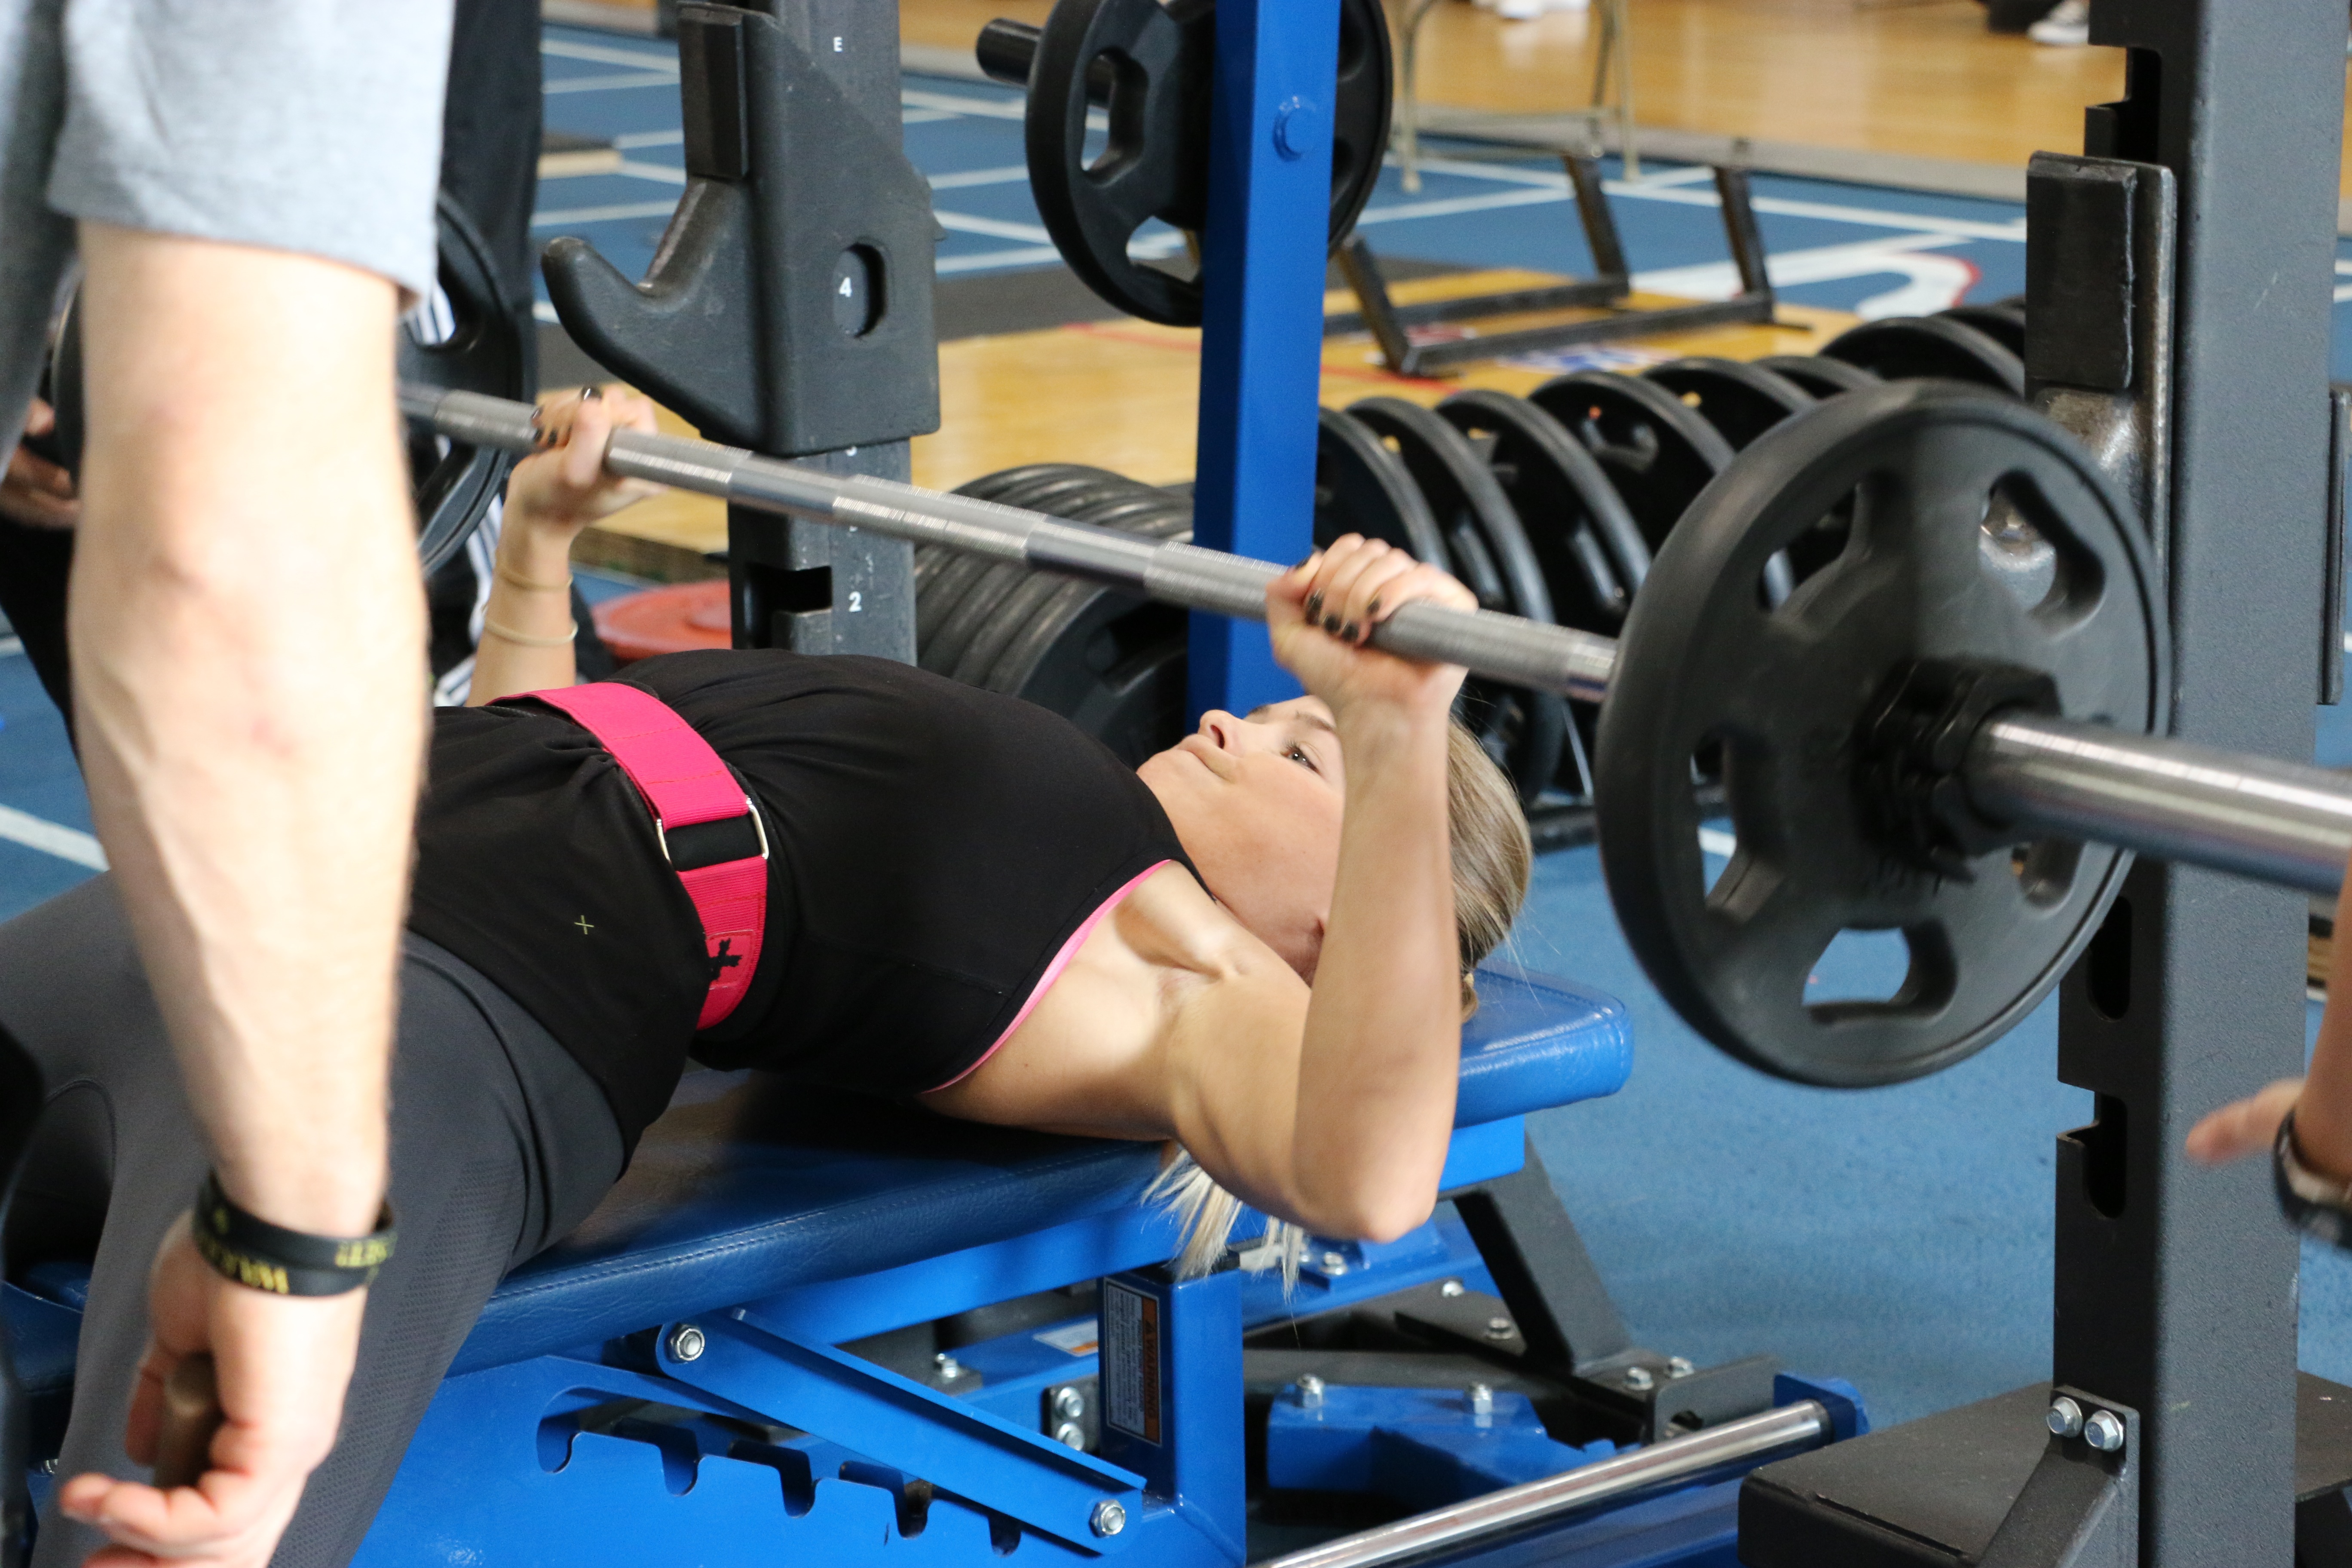
In my previous post, NIFS Powerlifting Competition Prep Lesson #1: The Squat, I showed you how managing three key principles can have a huge impact on your ability to squat low and heavy as well as minimize the risk for injury. As a reminder, here are those three key principles:

  • Mobility: The full range of motion of a particular joint(s)
  • Stability: Alignment, with integrity, under load.
  • Tension: Defined with terms such as stiffness and phrases like “bending the bar” and “spread the floor.”

Once again I will break down each of these principles and apply them to the next big lift, the bench press. First, be sure to check off your list a few of the basics of the bench press when you are setting up for your next set. As soon as you are up to speed on those weightlifting basics, take a look at how these three principles can impact your bench and how to work to improve your performance.

Mobility

In the bench press, this principle is generally focused around the mobility of the shoulder complex and thoracic spine. I could argue the effects of immobile hips, but we will save that for another time. The ability of the shoulder to pass through the full range of a pressing motion will play one of the biggest roles in determining your success. Just as with the squat, I would strongly recommend starting with soft tissue work of the lats, pecs, and upper back. Utilize different tools like a foam roller, or a tennis or lacrosse ball depending on your level of tightness.

After mashing the tissue surrounding the shoulder complex, the next step is to perform some active stretching of the shoulder area. This can be as simple as basic arm circles and a door stretch or a quadruped t-spine rotation exercise. One of my favorites for shoulder mobility is the hang. Get to a pull-up bar, grasp it with an overhand grip, and hang from it. Take long, controlled breaths while you hang with longer, more forced exhalation. Start with these or any other drills for the shoulder and upper body and you will increase your rate of success in the bench.

Stability

Trunk stability and core strength play a major role in this lift. To help strengthen the muscles of the trunk, I like to keep things simple by performing planks and plank progressions like the RKC plank. Secondly, and just as with the squat, intra-abdominal pressure is also key in the bench press. “Filling the can” with air is the best way to set this principle in motion. Before lowering the bar to the chest, inhale fully, attempting to fill your entire trunk with air (wearing a belt here helps). Hold that breath and lower the bar with the “can full” and explode from the chest.

Placing your feet flat on the ground will also add stability to the system. Even if you need to have some risers like me, get your feet flat on the ground. This helps with keeping your back flat on the bench, allowing you to utilize the trunk to do its job: to stabilize you.

One more thing: stabilize the shoulders with external rotating of the shoulder by “dialing” your hands outwardly like you were turning two large radio knobs (those still exist, right?). Stabilize the mobility you gained from the previous drills and really pack a punch in your bench press.

Tension

“Bending the bar” is a phrase introduced in the preceding post about the squat, and it holds just as much weight in the bench as well. During your setup, you want to act as if you are actively bending the bar before lowering it to your chest. This will create tension in the lats, shoulder complex, and upper back. This tension, as you will see more with the deadlift in the next post, allows the body to move as a “stiff” unit, expressing the greatest amount of strength during this phase. You can also increase tension by pushing your heels through the ground, another reason to have your feet flat on the ground during the pressing motion. Creating tension from the onset of the lift is what will separate a good lift from a failed lift.

***

The only secrets to a bigger bench are the principles I have listed above. These are standards to performing at a higher level and will allow your body to respond to heavier and heavier weights. Implement even a few of the suggestions from above and feel the difference.

Like what you've just read? Click here to subscribe to our blog!

This blog was written by Tony Maloney, ACSM Certified Exercise Physiologist and Fitness Center Manager. To find out more about the NIFS bloggers, click here.

Topics: NIFS weightlifting powerlifting competition mobility stability tension bench press

NIFS Powerlifting Prep Lesson #1: The Squat

If you have never entered a powerlifting competition but are interested in competing for the first time, it's a high-energy, exciting celebration of strength. Many enter with the goal of dominating their weight class as well as grabbing that coveted top male or female trophy and being Champion.

Powerlifting 2018 DeadliftIf you are one of the athletes who want to throw their hat into the ring, I want to give you three key principles that will help you be the best you can be on event day for each of the three lifts. Those lifts, of course, are the squat, bench, and deadlift. Today we will focus on the squat. We will get to the other two soon, so keep an eye on the NIFS blog. You can improve by using these three key principles, whether you are a competitor or a spectator.

We will look at the same three weightlifting principles for each of the lifts, but each concept will be aimed specifically for each of the three different movement patterns. I learned long ago that principles should guide not only your training, but also your life. And as it relates to movement, variations of movement patterns may change, but the principles to train it will not.

The three key principles we will focus on for each of the lifts are

  • Mobility: The full range of motion of a particular joint(s).
  • Stability: Alignment, with integrity, under load. (A great lesson from Gray Cook that I learned in a workshop once.)
  • Tension: For our context in this and the two following posts, we will define tension as the word stiffness and explain phrases like “bending the bar” and “spread the floor.”

All three of these principles will directly impact how well you perform in each of the three lifts in specific ways. Let’s see how these can impact your squat and how to work to make things better.

Mobility

In the squat, and the back squat specifically, we continue to find the lack of ankle mobility to be a huge factor in how deep you can go and how much weight you can throw on your back. In a July article by Gray Cook (if you can’t tell, I learn a lot from him), Gray explains the importance of knowing your ability to flex your ankle and how it can disrupt the chain. Come see us and we can provide that screen for you. Improving your ankle mobility is a sure-fire way to improve your squat. The first step would be to do some soft-tissue work on the calf and surrounding areas using a foam roller, roller stick, or tennis/lacrosse ball. A simple drill that I would recommend is a wall ankle flexion drill, which you will perform in a few different directions.

Place your hands on a wall with one foot approximately 2–3 inches away from the wall and stagger the other foot behind you. While keeping the heel of the front foot “glued” to the ground, attempt to touch the wall with that same-side knee. Hold the position for a 2 count, return to the start position, and repeat for 4–5 more reps. Then aim that same side knee over your big toe and repeat for 5–6 reps, and then again but with your knee aimed out over your pinky toe. Switch legs and repeat the series. If you can touch the wall with your knee and your heel stays on the ground, move back one inch. The goal is to increase the degree of flexion in your ankle. You can measure your progress by how far from the wall your foot is.

Stability

Considering that powerlifters place huge amounts of weight on their shoulders and pretty much sit down and stand up, spinal stability is so important in performing technically sound and safe squats. Of course, planks and carries are great exercises to strengthen your trunk muscles, which will help prepare you for squatting, but what about during an actual mid-weight squat? Increase your intra-abdominal pressure by bracing your abdominal and low-back muscles. A great way to accomplish this is by wearing a belt. Tighten the belt and push your entire midsection against it, then squat. The belt also provides its own stability by reducing spinal flexion, or bending over. Lastly, wearing a belt is a requirement during competition, so if you are not training with one, you’d better get on it.

Tension

Tension, or stiffness in a lifter, is key when loading up the body with a challenging load. Without it, safety is at risk as well as success in completing the lift. “Bending the bar” is a phrase we use where a lifter will attempt to bend the bar on their shoulders by pulling the bar down with their hands. This, as they say, will take tension out of the bar and stiffen the lifter to move as one complete unit. Another major benefit of this cue is engaging the lats of the back by pulling the bar around your shoulders to help engage the glutes, which are key muscles in a strong squat. The lats connect to the glutes, the only muscle that connects the upper and lower body. Simply put, by creating tension in the lats, you increase the effectiveness of your butt.

The other cue that will increase tension in a lifter, specifically in the glutes, will be to “spread the floor” with your feet. Once in position and before you squat, feel as if you are trying to create space between your feet by pushing the floor away. Your position should not change, but your tension surely will. Maintain spreading the floor throughout the squat to reap the full benefits of this strategy.

***

So squat on, athletes, using mobility, stability, and tension to improve your positioning, which will ultimately lead to bigger lifts. Stay tuned as we break down the bench and the deadlift, focusing again on these key aspects.

Come watch our 6th Annual Powerlifting Competition here at NIFS, Saturday, November 9th at 9am.

Like what you've just read? Click here to subscribe to our blog!

This blog was written by Tony Maloney, ACSM Certified Exercise Physiologist and Fitness Center Manager. To find out more about the NIFS bloggers, click here.


Topics: NIFS weightlifting powerlifting competition glutes mobility movement squat stability tension

Weightlifting for Women: Enhance Weight Loss and More

ThinkstockPhotos-512273152.jpg
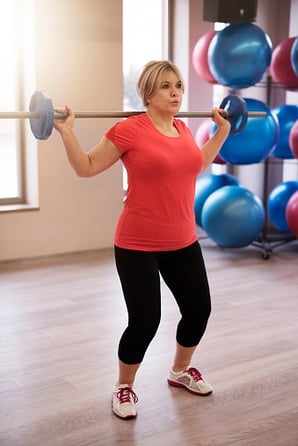
Let’s play out a little scenario. Judy just renewed her gym membership because it’s almost time for her annual summer vacation. She currently weighs 170 pounds but wants to lose around 30 pounds before she goes on vacation. She has taken herself through this transformation once before by running 4 miles on the treadmill every other day until she finally got to her desired weight. She plans to come to the gym this year with the same game plan as last time. Judy does not lift weights because she only wants to lose fat, not gain muscle.

Now here is the question: Should Judy repeat her cardio routine this year, or should she incorporate heavy resistance training?

Lifting Heavy Weights Has More Benefits Than Cardio Alone

This may be the approach many females take when trying to lose weight. Doing cardiovascular exercise is much easier and more effective at weight loss than weight training, right? WRONG! In fact, I strongly believe any woman who is looking to lose weight should invest more of her time into weight training. But I don’t recommend just any weight training; it needs to be heavy weight training!

Reasons to Add Weightlifting

It’s easy to understand why many females prefer not to lift heavy weights when in the gym. It often causes a lack of comfort if you are not used to pushing your body to its max strength levels. In addition, the female lifting recommendation for years has been to stick with light to moderate weight with an abundance of sets and reps. While this is not a bad recommendation, lifting heavy can add a great list of benefits that lighter weight (and cardio) just cannot compare to, all while possibly giving you faster, more dramatic results.   

  • Burn more calories. In terms of fat loss, forcing your body to lift heavy weight repeatedly will stimulate muscle growth, which creates a higher metabolism. The more muscle in the body, the more fat-burning potential will be created. When you are done lifting weights, your body continues to burn calories due to its need for muscle recovery. This is called EPOC, excess post-exercise oxygen consumption. So even when you are no longer in the gym working out, your body is still burning calories for you. EPOC does not happen with non-resistance training.  
  • Get toned, not ripped. Lifting weights brings out a woman’s natural curves and body structure. It’s easy to believe lifting weights will cause bulky muscles to form, just as many guys become bulky when we lift. However, there is one huge difference between males and females and that’s the presence of testosterone. As you may know, one responsibility of testosterone is muscle hypertrophy. Since females have very low amounts of testosterone, becoming bulky is often not a realistic expectation. Instead, when females participate in heavy weight training, their bodies actually become smaller due to more muscle and less fat. Females actually become leaner and curvier, which often leads to an increase in body image and self-confidence. 
  • Gain confidence. I believe a strong reason many females would rather do cardio instead of weightlifting may be due to their lack of confidence. If the treadmill or the elliptical has always been your best friend, you may find it hard to step out of your comfort zone and challenge yourself with a heavy weight-training program. However, what many females come to find out is once weightlifting barriers have been torn down, confidence levels rise. I have heard many women in the gym say there is nothing more satisfying than when they are finally able to lift a weight that they could not lift previously. It not only reassures you that with some hard work and consistency you can push your body to new levels, but it also confirms that women do, in fact, belong in the weight room lifting heavy weight.

The Question Again: Should You Add Weight Training?

I will raise my question again: should Judy repeat her routine this year, or should she incorporate heavy resistance training into her program for different results? Sure doing 4 miles a day may get Judy to her ultimate weight-loss goal, but how much of her weight loss will be due to actual fat loss instead of muscle loss? Typically when cardio is a large portion of the workout routine, you tend to lose muscle, whereas when resistance training makes up a large portion of the workout routine, you tend to gain muscle. Remember, the more muscle in the body, the higher the metabolism, and the higher the rate of caloric burn—and the more weight you lose.

Like what you've just read? Click here to subscribe to our blog!

This blog was written by Darius Felix, Health Fitness Specialist. For more on the NIFS bloggers, click here.


Topics: cardio weight loss calories weightlifting women toning

Get a Grip on It: Four Powerlifting Grips

Alex-grip.jpg
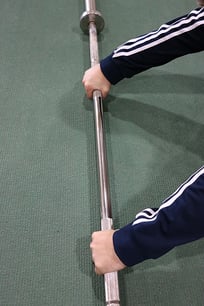
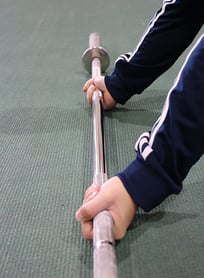
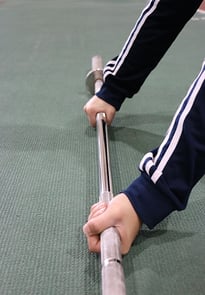
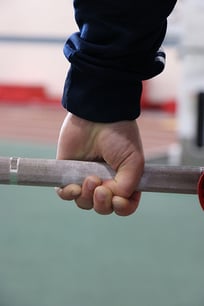
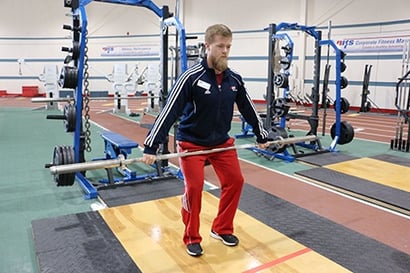
One of the most important (and sometimes overlooked) pieces of the resistance training puzzle could be right in the palm of your hands. Have you ever thought about the way you hold onto an Olympic or powerlifting bar? For some, the answer may be no. You may be worried more about other techniques, such as posture or breathing. For others, the answer may be yes. The effort you put into how you grip the bar may be your key to success in lifts such as the snatch, deadlift, and clean, among many other resistance exercises.

But how should you grip the bar? Are you sure that the grip you are currently using is the most ideal for that lift? Maybe a switch of grips is what you’re looking for to break through your current plateau.

Here is a breakdown of four grips and different ways that they can be used in the gym for exercises or other technique purposes.

1. Pronated (or Overhand) Gripovergrip.jpg

The pronated grip is generally the most common grip used during resistance training. You place the hand over the bar, dumbbell, or kettlebell with your knuckles up. Your thumb can either be wrapped around the bar (closed grip) or not wrapped around the bar (open or false grip). I would not recommend the open grip because you do not have full control of the bar. The closed grip allows the thumb to prevent the possibility of the bar slipping from the hands, especially during exercises where the weight is held above the body (for example, during pressing movements).

When to use a pronated grip: You can use a closed-pronated grip for pretty much every lift that you perform in the gym. I would recommend this for many of the pressing movements and for stability during the squat.

  • Bench press
  • Shoulder press
  • Barbell squat
  • Basically anything

2. Supinated (or Underhand) Gripunder.jpg

The supinated grip is the exact opposite of the pronated grip. The hands are placed underneath the bar so the knuckles aim backward or toward the floor. I generally only categorize the “closed” variation of the supinated grip versus the open/closed options in grip #1. The thumb being wrapped around the bar allows for maximum grip throughout any lift you are performing. I utilize this grip during many of my pulling movements.

When to use a supinated grip: You can use a closed-supinated grip as a variation for many of the main vertical and horizontal pulling movements.

  • Row
  • Inverted row
  • Chin-ups
  • Bent-over row
  • Lat pulldown

3. Alternated Gripalternate.jpg

The alternated grip is a combination of the preceding two grips. In the alternated grip, one hand is pronated and one hand is supinated. It is common for grip strength to be a limiting factor in your ability to lift heavy weight, especially when performing a pronated grip. The bar tends to roll out of the hands very easily, especially during maximal-effort lifts. The alternated grip places the hands in a more favorable position to prevent the rolling or slipping of the bar from the hands. This is also a useful grip to use when you are spotting someone, especially on the bench press.

When to use an alternated grip: You can use this grip for deadlift variations as well as spotting.

  • Traditional/Sumo Deadlifts
  • Spotting

4. Hook Grip hook.jpg

The hook grip is a nontraditional grip that can sometimes be difficult to master, but could yield great results in terms of the lifts you use it for. It is similar to a pronated grip, but the thumb is placed underneath the middle and index fingers. The benefits of this grip are similar to those of the alternated grip. It prevents the bar from rolling out of the hands because of the placement of the thumb and fingers. This makes it an ideal grip for heavy and explosive movements like the clean and snatch.

I recently finished a new certification course called the CWPC or Certified Weightlifting Performance Coach. This certification is based on two Olympic lifts, the snatch and the clean and jerk. I gained a lot of great information through that course, but one key piece of information that I took away to implement into my own training program was the use of the hook grip. I had previously used a closed-pronated grip for both the clean and snatch, but have switched to the hook grip over the past five weeks. I can definitely see improvement in my ability to grip the bar, but there was definitely a bit of a learning curve.

My main issue was the comfort of the grip itself. It was definitely not pleasant through the first couple of weeks; however, the last couple have been some of the best weeks that I have ever had in Olympic lifting. I feel like I have more control of the bar in my hands, and now I do not have to worry about the bar flying out my hands when the weight becomes challenging. If you can get past the discomfort through your first few training sessions, it will be well worth the switch.

When to use a hook grip: You can use this grip for just about any exercise, similar to the pronated grip.

  • Clean and Jerk
  • Snatch
  • Pullups
  • Deadlift

***

When choosing a grip, go with what makes sense to you. For many exercises, you have a variety to choose from. This just adds more options to your training regimen. By simply switching the grip, you are essentially switching up the exercise as well. Play around with them and see which one feels best!

For more on how to improve your grip strength, see this post.

Source: Baechle, T. R., Earle, R.W. (2008) Essentials of strength training and conditioning (pp. 326-327). Chicago, Illinois. National Strength and Conditioning Association.

Like what you've just read? Click here to subscribe to our blog!

This blog was written by Alex Soller, Health Fitness Instructor. Click here for more information about the NIFS bloggers.

Topics: NIFS weightlifting powerlifting grip strength grip