<img height="1" width="1" style="display:none" src="https://www.facebook.com/tr?id=424649934352787&amp;ev=PageView&amp;noscript=1">

NIFS Healthy Living Blog

Meal Planning for Kids

GettyImages-526785155The kids and grandkids are home! With them being home, this means you are having to provide breakfasts and lunches. For those that relied on schools to provide these meals, this can be a stressor added to the day. Maybe your kids received meals for free or at a reduced price. Maybe you are being expected to work from home, all while attempting to help your kids through e-learning and cook them lunch. There are an abundance of reasons as to why this may be tough. You are not alone. We are in this together- as a community. We will get through this.

First, find some time to plan. Kids are used to having a structured plan during their school day- anything short of this will lead to stressed and irrational children (which makes your life harder). Make sure this plan includes when the kids will wake up, have breakfast, start school, get an hour of activity/play time, eat lunch, and conclude their school day. Knowing their schedule will help you prepare your schedule. Consider having your lunch break at the same time as theirs.

Second, plan for lunches and work with a "cycle menu." This means you determine 4-5 different lunches, then schedule one per day. Once you go through all 4-5, cycle back through them. This offers the kids variety but makes the planning, storage, and preparation easier on your part. To make it even easier, have the same meals they are having. There is no need for you to take time to prepare various foods.

Last, stick to the plan. Remember- you are in charge of WHAT and WHEN the kids eat; the kids are in charge of how much they wish to eat at a given meal.

Kid Meal Ideas

  1. Turkey + cheddar roll-up, frozen berries, yogurt, and trail mix.
  2. Hummus (can easily make homemade from canned chickpeas), pita bread, grape tomatoes, carrots, and grapes.
  3. Cheese quesadilla (made with whole grain tortillas), guacamole, salsa, strawberries.
  4. Broccoli mac and cheese (made with whole grain, chickpea, or lentil pasta), orange.
  5. Grilled cheese and low-sodium tomato soup.
  6. Homemade pizza on whole grain thin crust served with steamed veggie of choice.
  7. Tuna or chicken salad served on whole wheat crackers or bread, apple slices, carrots.
  8. Peanut butter and jelly (tip: make own “jelly” with smashed berries to reduce sugar) on whole grain bread, celery sticks, yogurt

Like what you've just read? Click here to subscribe to our blog!

If you have any other questions or concerns, please feel free to contact our Registered Dietitian, Sabrina Goshen by e-mail at SGoshen@nifs.org.

Topics: nutrition kids menu planning

Nutrition Tips During COVID-19

GettyImages-11629356151. Stock up on nutritious foods from all food groups.
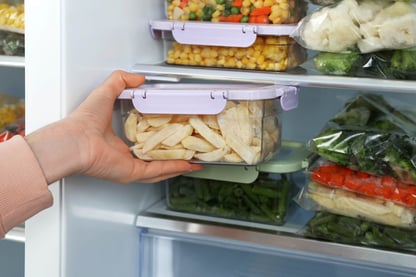
Think shelf-stable or frozen foods. Shelf-stable, nutrient-packed options include whole grain rice, chickpea- or lentil-made pastas, tuna, beans, nuts, legumes, protein pancake mixes, oats, nut butter, protein bars, low-sodium canned vegetables, and canned fruit in water. Frozen foods include pre-frozen bags of fruits, vegetables, and Greek-yogurt bars. Fresh options that can be frozen include sliced bananas, chicken, turkey, beef, seafood, bread, and tortillas. Eggs are also a great fresh option that keep well in the fridge for 3 weeks.

2. Fuel your body by eating regular, nutritious meals and snacks.
This will help to meet your caloric, vitamin, and mineral needs.

3. Stay hydrated
Drinking at least half your weight in ounces. If you have a fever, you will want to drink much more.

4. Have a menu plan
In case you do become quarantined or are socially distancing yourself, the plan should include enough daily meals and snacks to meet each family member’s caloric needs for 4-6 weeks. When planning those meals, try to incorporate all food groups into each day (vegetables, fruits, grains, dairy, and protein) and plan each portion size. Here is an example for 1 person:

  • Breakfast: ½ cup oats with ½ cup berries (use frozen), 2 tbsp peanut
    butter, and 1 tbsp chia seed
  • Snack: 1 granola bar with 1 hard-boiled egg
  • Lunch: Stir fry (use low-sodium canned vegetables or frozen vegetables,
    brown rice, and canned or frozen meat of choice)
  • Snack: 1 peanut butter and jelly sandwich (freeze bread, then unfreeze
    a loaf for each week) with 1 serving baked chips.
  • Dinner: ¾ cup chickpea pasta served with ¼ cup tomato sauce, 1 cup
    steamed vegetables (use frozen vegetables or fresh vegetables with a
    longer fridge life), and ¼ cup cheese (freeze shredded cheese then
    unfreeze as needed)
  • Dessert: 1 frozen yogurt bar

5. Seek community resources as needed. Many communities are coming together to help people obtain food. For Indy and surrounding communities, visit https://www.indy.gov/activity/covid-19-food-support , for food support initiatives.

Like what you've just read? Click here to subscribe to our blog!

If you have any other questions or concerns, please feel free to contact our Registered Dietitian, Sabrina Goshen by e-mail at SGoshen@nifs.org.

Topics: nutrition meal planning viruses

My 7-Day Experiment with Hot/Cold Contrast Showers for Recovery

GettyImages-533891978Nowadays, it seems that many people are trying to find that next great gadget to help put them over the top. Whether it’s the fitness world, life at home, or the day-to-day grind at the office, people seem to be peddling some kind of shortcut or cheat code to help aid performance in some way, shape, or form. I know I can’t go a day without scrolling through Instagram and seeing an ad for some new, expensive toy guaranteed to solve whatever problem I seem to be having that day.

While sometimes it can be tempting to explore those avenues, I usually tend to stay the course and preach the basics when it comes to performance and recovery. Have I slept 8 hours? Have I eaten whole foods? Did I have a sip of water that day, or was it an IV of caffeine instead? Despite all this, recently I found myself continuing to run across the concept of cold showers, or contrast showers, and how they can be used to aid recovery.

I saw articles about athletes like LeBron James using them for recovery. I read articles from the Journal of Strength and Conditioning examining their benefits, both physically and psychologically. I saw them pop-up as topics on a few podcasts that I listen to frequently. So finally I decided, “Why not? I’m going to do a 7-day experiment on myself and give these contrast showers a try!”

What Is a Contrast Shower and How Can It Help?

First, a little background. A contrast shower alternates between bouts of hot and cold water for a total time of anywhere between five and ten minutes. Some of the purported benefits of this cold thermogenesis include the following:

  • Improves blood flow and nitric oxide delivery, especially within the brain.
  • Reduces systemic inflammation.
  • Supports the connection between the brain and the digestive system by strengthening vagal tone.
  • Improves appetite regulation.
  • Improves insulin sensitivity.
  • Improves mood, focus, and attention.

What Happened When I Tried It

In my case, I chose the 10 seconds of hot, 20 seconds of cold version. I alternated between these 30-second segments 10 times for a total of five minutes. Here’s the breakdown of what ensued:

Day 1

I was terrified. I was starting my early morning with a cold shower. However, I cheated a bit and started with 30 seconds of lukewarm water before flipping it straight to hypothermia-inducing temperatures. And it took my breath away when I finally did. I used my arms as a shield. I think I actually screamed at one point (haha). Once I was through two or three cycles, though, it was a lot less shocking. Still not fun, but definitely more manageable.

Day 2

The first two or three rounds were still brutal. My breathing accelerated and I’m pretty sure I was making weird noises too. By round four, I started turning around, 360 degrees, during the cold portion. It helped a bit, purely from a distraction standpoint. The last two rounds I stood stock-still, focusing on my breathing. When I got out, and even 5, 10, and 15 minutes afterward, my mind felt very clear. I felt a little more energized. But maybe that was because I was grateful it was over!

Day 3

This time I rocked it out at the end of my day. Similar to the first two days, the first two rounds were a struggle. However, finding two really good songs to jam to was extremely helpful. I didn’t have to focus as much on how many rounds were left; instead, I just waited for the songs to end. Also, dancing in the shower, albeit somewhat risky, was a heck of a good distraction!

Day 4

I’m probably losing it by day 4, because I was actually looking forward to it today! I liked the clarity it seemed to bring. I liked the way I felt physically afterward. And as alluded to before, picking a killer playlist is key!

Day 5

I almost ditched my 7-day experiment today. Mentally, I was not feeling up to it. But afterward, I’m glad I stuck with it because I felt very refreshed. I could stand under the cold water while staying still and not screaming, even on round one!

Day 6

Today I focused on making sure some of the more temperature-sensitive areas, like the top of the head, underarm, and chest, were hit throughout. This was quite the curveball! That take-your-breath-away temperature hit me like a tidal wave. I was so alert afterward, though, that I almost forgot to make my morning cup of coffee. I was wired and ready to go at 4am!

Day 7

Mama I made it! I went into this one hoping to alleviate some soreness I had from a workout the preceding day. Afterward I still had some stiffness, but it was markedly different. This was at the end of my day, and transitioning from the contrast shower to holding a warm cup of tea and reading a book was incredibly relaxing. While I was alert, I wasn’t amped up. I felt refreshed and focused. And it sure didn’t stop me from falling asleep the second my head hit the pillow about an hour later.

Final Thoughts

By the end of the seven-day experiment, I was oddly “hooked” on the whole contrast shower concept. Although this is anecdotal evidence, I felt calm, focused, and alert after each shower. I noticed small improvements in self-reported soreness as well. And if nothing else, it was a heck of a wake-up call at 4am before work!

It remains to be seen just how much cold thermogenesis can aid in recovery post-exercise, as the current research (and here) is equivocal. But as with many recovery methods, there is something to be said for the perceived improvements in soreness or pain management. In other words, if you think that it’s working for you, then it will. If you think that it’s a waste, then it probably is.

As of today though, I’m currently riding a 17-day streak of contrast showers! Stay cool, everybody!

Like what you've just read? Click here to subscribe to our blog!

This blog was written by Lauren Zakrajsek, NIFS Health Fitness Instructor, Personal Trainer, and Internship Coordinator. To learn more about the NIFS bloggers, click here.

Topics: recovery contrast showers inflammation blood flow mood cold thermogenesis

Vitamin C: How Much and Which Sources Are Best for Boosting Immunity?

GettyImages-993119894During cold and flu season, we try to do all we can to prevent illness or speed up how fast we recover from illness. One such strategy many employ is the use of Vitamin C for a natural remedy. Several products are marketed as immune system boosters because they contain large amounts of Vitamin C. Do these products really work? We set out to investigate!

What Vitamin C Can Do for You

Vitamin C, also called ascorbic acid, is not made by our bodies. We must take in this vitamin in our diet. It is needed for not only immune function but also for these uses:

  • Form collagen (skin, tendons, ligaments, and blood vessels),
  • Repair and maintain bones and teeth
  • Heal wounds and form scar tissue
  • Aid in iron absorption

It can also help prevent cancer as an antioxidant by blocking damage that we are exposed to from air pollution, cigarettes, and UV rays from the sun.

Vitamin C deficiency is extremely rare today, but in the mid-1700s scurvy in sailors was very prevalent. Those at risk of low vitamin C intake are smokers, those with medical conditions that affect absorption (cancer cachexia), and individuals with little variety in their diets.

How Much Vitamin C Do You Need?

The recommended Dietary Allowance for men is 90 milligrams per day and 75 milligrams per day for women. Fruits and veggies are the best source of vitamin C—especially citrus fruits. It can be destroyed by heat, so cooking slightly reduces your intake. However, most of our best sources of vitamin C are consumed raw naturally, and we usually do not have to worry about this. To get a better idea of how to meet your daily requirement with food, here are the vitamin C contents of some common fruits and vegetables that are good sources:

  • Red bell pepper (½ cup, raw): 95mg
  • Orange, 1 medium: 70mg
  • Green bell pepper, ½ cup raw: 60mg
  • Broccoli, ½ cup cooked: 51mg
  • Cantaloupe, ½ cup: 29mg

In short, you can skip the megadoses of Vitamin C at the pharmacy.

Can Vitamin C Treat or Prevent the Common Cold?

In the 1970s, research was released that suggested Vitamin C could successfully treat or prevent the common cold. Several studies since then have been inconsistent and have resulted in some confusion and controversy. To date, the most compelling evidence comes from a 2007 study that showed preventative treatment in the general population did not affect cold duration or symptom severity. However, in the trials involving marathon runners, skiers, and soldiers exposed to extreme physical exercise or cold environments daily as well as the elderly and smokers, there could be somewhat of a beneficial effect. It was concluded that taking Vitamin C after the onset of illness did not appear to be beneficial. Furthermore, at doses above 400mg, Vitamin C is excreted in the urine. A daily dose in the 1000–2000mg range can cause upset stomach and diarrhea.

If you want the benefits of Vitamin C, it is best to consume the recommended Dietary Allowance daily, before the start of symptoms. Ideally, you will get Vitamin C from your food instead of a supplement; you will also get several other important nutrients in addition to your Vitamin C. Remember to make half of your plate fruits and veggies at every meal or blend up a quick smoothie for an easy on-the-go snack, slice up peppers and dip in hummus, or ask for extra veggies on that sandwich, pizza, or salad.

Like what you've just read? Click here to subscribe to our blog!

This blog was written by Lindsey Hehman, MA, RD, CD. To learn more about the NIFS bloggers, click here.


Topics: nutrition healthy eating immunity vitamins supplements fruits and vegetables viruses Vitamin C

Do’s and Don’ts in the Gym: Videos from NIFS Fitness Instructors

March is typically a make-or-break month for many folks as it relates to reaching their health and wellness goals for the new year. The resolutions are losing steam, weather tends to sway fitness decision-making, and focus begins to shift a bit away from what brought them to the gym in the first place. My message to many at this time of year is to continue to WIN EACH DAY! By that I mean have more checks in the win column than in the loss column. It’s natural to slump a little—we haven’t seen the sun in a month, for crying out loud. But continue to focus on doing those things that constitute WINS and limit those things that would be considered a LOSS.

NIFS Instructors Share Their Observations in the Gym

This is also a great time of year to hit a few reminders of what you should and should not do in the gym I asked the experts (the highly trained NIFS instructors): What are some things you see gym-goers do that needs immediate attention and correction? Along with a few of my own, here is what the team had to report on the common things we see in the gym that you should and should not do.

Screen Shot 2020-03-09 at 4.37.04 PM

Tony: Control the Weights

  • Not controlling the weight of an exercise throughout the entire ROM.
  • Dropping the weight unsafely.
  • Holding on and hunching over a climb mill.
  • Standing the wrong direction in a squat rack.

Lauren: Deadlift

  • Tuck the chin in neutral spine
  • Use clips for safety

Thomas: Bicep Curl

  • The emphasis on bicep curl contraction is more pronounced when we isolate the muscle.  this can be done by avoiding movement and momentum from arm swinging by pressing the elbows toward your sides
  • Sometimes, more weight does not make the exercise better, but better movement patterns can make the exercise more effective and safer
  • An easy way to also accomplish this would be to press your back against the wall and perform the exercise

Ashley: Proper Plank

  • Hips in the air/not a flat back
  • Proper way is flat back, hips level, core tight

Tinisi: Proper Lunge

  • Keep your upper body straight, with your shoulders back and relaxed and look straight ahead
  • lower your hips until both knees are bent at about a 90-degree angle
  • Core tight

Keep Striving for Wins and Contributing to Your Fitness Community

We covered a great deal of information here—pretty important stuff for both proper technique and fitness community etiquette. As I covered in my post Culture Club: How to Be a Strong Member of a Fitness Community, we are all in this together! And a community of support and positive energy is a place we can all thrive in, and must all contribute to. I know that some of the new year perspective may have lost a little sparkle, but you are still on the right track. Just remember, have more WINS than LOSSES and you will continue to improve!

Like what you've just read? Click here to subscribe to our blog!

This blog was written by Tony Maloney, ACSM Certified Exercise Physiologist and Fitness Center Manager. To find out more about the NIFS bloggers, click here.

Topics: fitness center resolutions workouts nifs staff videos new year's ettiquette fitness community technique instructors

Three Drills to Develop Athletic Agility

GettyImages-871413050Agility drills basically represent an obstacle. Athletes who can respond faster to starts, stops, and change of direction earlier than the obstacle will have a practical advantage on the playing field. This blog highlights three of my favorite agility drills that can be built into your team’s conditioning routines. The benefits of these runs, jumps, and cuts include increases in reactionary speed, coordination, footwork, and body awareness. Athletes need to be able to change direction rapidly under control without decreases in speed.

You will need a good strength base before doing any high-intensity agility drills. These three drills are great for giving athletes the ability to keep their eyes on the play while knowing what is around them. Adding teammates to the mix always makes it fun and competitive.

Enjoy the drills!

Screen Shot 2020-03-03 at 2.54.12 PMDrill 1: Offense/Defense—Partner Reaction Acceleration Tag

Setup: Cones are spaced 10 yards apart with a middle cone at the halfway point.

Number of Athletes: 2
Athlete 1: Offense (starts the drill); Athlete 2: Defense (reacts and chases)

Execution: Both athletes start on the ground head to head on the baseline. Athlete 1 starts the drill and is allowed two fakes before they must stand, turn, and sprint 10 yards. Athlete 2 reacts and chases Athlete 1 once they stand and turn and has 10 yards to catch and tag Athlete 1 in a sprint fashion.

Screen Shot 2020-03-03 at 2.54.22 PMDrill 2: Cat & Mouse—5-5 Shuttle Reaction Tag

Setup: Cones are spaced 10 yards apart with a middle cone at the halfway point.

Number of Athletes: 2
Athlete 1: Offense; Athlete 2: Defense
Athletes will face each on opposite sides 10 yards apart.

Execution: At the start of a whistle or cue, both athletes sprint a 5-yard shuttle 5–5.

Athlete 1 then tries to sprint past the midline as fast as possible before Athlete 2 tags him before passing the midline after they both do a 5-yard shuttle.

After the 5-yard shuttle, Athlete 1 can juke/cut, etc. to get to the midline to fake out Athlete 2 before being tagged. Athletes switch between offense and defense.

Screen Shot 2020-03-03 at 2.54.44 PMDrill 3: Shuttle Runs—Reaction 5-5-10 Shuttle

Setup: Cones are spaced 0, 5, and 10 yards apart.
Another set of cones is 5 yards apart on the baseline.

Number of Athletes: 3–4
Athlete 1: Shuttles (drill start); Athletes 2–4: Reactionary

Execution: At start of a whistle or cue, Athlete 1, facing the baseline, begins shuffling between the 5-yard cones. Athletes 2–4 stand facing the other way on the baseline waiting to react to Athlete 1. Athlete 1 can shuffle back and forth for a total of two times. However, within the two shuffle attempts, Athlete 1 can turn and sprint whenever. Athletes 2–4 must respond to Athlete 1 and turn and sprint. After Athlete 1 initiates the sprint shuttle, all athletes are now in a race to sprint a 5–5–10-yard shuttle.

Like what you've just read? Click here to subscribe to our blog!

This blog was written by Michael Blume, MS, SCCC; Athletic Performance Coach. To learn more about the NIFS bloggers, click here.

Topics: team training sports speed athletic performance drills agility coordination proprioception footwork

Intermittent Fasting for Weight Loss: Does It Work?

GettyImages-1059024598Losing weight is regularly ranked as one people's top New Year’s resolution. That’s probably why everyone and their mother is on a diet of some sort. One that is trending, and probably one you have heard about, is intermittent fasting. Intermittent fasting has been around for quite some time but has gained popularity over the years. The question is: is intermittent fasting really effective for weight loss? Yes and no. Confused? Let’s dig in.

What Is Intermittent Fasting?

Intermittent fasting (IF) is an eating pattern that focuses on meal timing by cycling fasting and nonfasting periods. The eating pattern specifies timing of intake versus quality of food. Three popular methods of IF include the following:

  • The 16/8 method
  • Eat–Stop–Eat or Alternate-day fasting
  • The 5:2 diet

The 16/8 is the most common and entails 16 hours of fasting followed by an 8-hour eating window.

The Evidence of the Effects of Fasting

Several studies have explored the effect of intermittent fasting on weight loss. A 2019 study observed 332 overweight and obese adults. They compared weight loss and weight maintenance across three groups; week-on-week-off caloric restriction (a common IF method), continuous caloric restriction (the traditional daily calorie deficit), and the 5:2 IF method. Mean weight and fat loss at 12 months were similar across the three groups, and all groups saw significant weight loss.

Another study supported these results. Alternate-day fasting did produce significant weight loss, as did the control group who followed the traditional daily caloric deficit. A systematic review also showed that intermittent fasting (ranging from 3–12 months) produced weight loss as long as participants maintained a caloric deficit.

A common theme among all these weight-loss studies is that all groups, both intermittent fasting groups and traditional calorie-restrictive groups, maintained some type of caloric deficit, meaning they were burning more calories than they were eating (calories in < calories out/burned). So, it wasn’t intermittent fasting that produced the weight loss; it was the caloric deficit. Granted, intermittent fasting was a way some could sustain the caloric deficit. However, others reported more pronounced feelings of hunger when following IF, and some studies had significantly higher dropout rates in the IF groups due to people struggling to follow the method.

The Bottom Line

Weight loss requires a caloric deficit to work successfully. The method in which one obtains this caloric deficit and maintains the caloric deficit will vary. One method, such as IF, may work for one person and not work for another. No weight-loss intervention, IF included, is a one-size-fits-all.

If you are one who naturally fasts (for example, you don’t eat breakfast) or one who needs structure, intermittent fasting may be a solid approach to meeting your caloric deficit. If you are one who binges after a fast or struggles to make it through a fast, intermittent fasting is not for you. Stick with the traditional caloric-deficit approach.

Finding the Weight-Loss Method That Works for You

The biggest thing that goes wrong, at least for weight loss, is failing to make a sustainable plan—one that produces lifestyle changes. If the method for weight loss you are trying is not working for you and is something you can’t stick with, it’s time for a change. If you’re struggling to find your sustainable lifestyle approach, consider seeing a Registered Dietitian.

Like what you've just read? Click here to subscribe to our blog!

This blog was written by Sabrina Goshen, NIFS Registered Dietitian. To learn more about the NIFS bloggers, click here.

Topics: nutrition weight loss calories registered dietitian intermittent fasting fasting

Pump Up the Produce Power in Winter Meals

GettyImages-485131020-1We’ve all been here before: When it seems the long, gray winter will never end and you make one more pot of hearty vegetable soup or another casserole; or when the lackluster tomatoes and almost pinkish-white strawberries just aren’t cutting it. It’s time to get creative!

As a Hoosier native myself, I long for the tastes of summer more often than not, especially this time of year. What are some ways to get more variety into your diet in late winter? Look no further: we’ve got some ideas to tide you over until you can get your hands on some summertime Indiana-grown treasures!

Breakfast

It’s smoothie time! Smoothies are fantastic because they are nutritional powerhouses, can disguise fruits and vegetables that you might be on the fence about, and never require a recipe. To keep it simple, use frozen-fruit mixtures and rinse out your blender as soon as you are done to avoid having to scrub off dried-on fruit fibers later.

A basic guide on where to start: Combine 1 cup of frozen fruit with about ¾ cup liquid (I personally love vanilla-flavored soy milk). Optional add-ins could include a handful of kale or spinach (what better way to hide those greens than a sweet smoothie?), a spoonful or two or chia seed or ground flaxseed, a little peanut butter or almond butter, rolled oats, or even a banana to add a little extra creaminess. Top with a drizzle of honey or a little granola.

Lunch

A light and citrusy dressing is a refreshing way to beat the winter blues! A favorite dressing in my house is this orange tahini dressing. It tastes delicious on any leafy green, so if you aren’t a fan of kale, just top your spinach or romaine lettuce with it instead. Whisk together the following ingredients in a bowl:

2–3 tablespoons orange juice (fresh-squeezed preferred)

2½ tablespoons tahini

2 tablespoons apple-cider vinegar

1 tablespoon maple syrup

1 tablespoon olive oil

2 teaspoons orange zest

Salt and pepper to taste

Massage dressing into kale and top with chopped apple, grapefruit (peeled and sliced), and pepitas or nuts of your choice (walnuts are my go-to).

Dinner

I’m not sure about you, but if something requires a recipe, there’s a big chance I might never get around to making a dish—we all have our reasons, right? Roasted cauliflower and chickpea tacos are one entrée that requires no real recipe to follow. Trust me, it would be really hard to mess this one up, even if you consider yourself a novice in the kitchen!

  1. Toss chickpeas (from a can!) and chopped cauliflower on a baking sheet with a little olive oil and a variety of spices like chili powder, cumin, garlic powder, onion powder, and salt.
  2. Roast in the oven at 400 degrees until chickpeas are crisp and cauliflower is tender (about 30 minutes).
  3. Take a corn tortilla and place cauliflower and chickpeas on top. Top with chopped cabbage, jalapeño (if you like spice!), avocado/guacamole, and cilantro. Drizzle with lime juice. Sour cream and cheese are optional.

This recipe will deliver that healthy and refreshing dinner entrée you’ve been longing for since Thanksgiving!

Eat in Season and Use Frozen Fruits and Vegetables

Some things to keep in mind:

  • Use these in-season veggies to avoid breaking the bank—broccoli, cauliflower, cabbage, parsnips, kale, potatoes, sweet potato, butternut squash, and Brussels sprouts.
  • Use in-season citrus fruits like lemons, oranges, clementines, and tangerines.
  • Frozen fruits and vegetables are an absolute must! They are more nutrient-dense than their produce section counterparts because they are picked and frozen when they are at peak ripeness.

Like what you've just read? Click here to subscribe to our blog!

This blog was written by Lindsey Hehman, MA, RD, CD. To learn more about the NIFS bloggers, click here.

Topics: healthy eating lunch breakfast winter fruits and vegetables seasonal eating produce

Just Hanging Out for Shoulder Health and Pain Relief

GettyImages-172901773How many times have you looked around a room full of people and seen nearly everyone buried in their phones? Their shoulders are slumped forward and their head is hung low. Or maybe you’re at work, and everyone’s busy composing emails with that same forward head position? Chances are, it won’t be long before you notice this posture elsewhere, and it can wreak havoc when it comes to the health of your shoulders.

Although it varies from year to year, research has found that the prevalence of reported chronic shoulder pain in the United States ranges anywhere from 23% in 18–24-year-olds to just over 50% in those 55 to 64 years old. This can be the result of a variety of factors such as previous acute injury, musculoskeletal imbalances, or dysfunctional movement patterns and compensations that over time accumulate to cause pain.

What Does the Good Doctor Say?

Dr. John M. Kirsch is a practicing orthopedic surgeon with over 30 years of experience in treating patients with wide-ranging issues when it comes to the shoulder girdle. He is the author of Shoulder Pain? The Solution & Prevention, in which he details exercise and rehabilitative exercise protocols to help alleviate or eliminate shoulder pain. He found that in 90% of his patient population who were expected to have shoulder surgery, prescribing one movement as an alternative actually eliminated their pain altogether. And this movement is the brachial dead hang.

What Is a Brachial Dead Hang?

A brachial hang describes a vertical hanging pattern from a fixed point. Think back to when you were a kid on the playground. We climbed up and down structures and swung from the monkey bars during recess. This was routine. This hanging movement acts to positively change the structure of the shoulder girdle itself. Evolutionarily speaking, we were literally built to hang; it goes hand in hand with our physiology. However, when we spend years and years hunched over, gravity, along with lifestyle changes, makes it easier for the shoulder to be chronically stuck in an anterior, rolled-forward position. This can not only exacerbate any underlying shoulder injury, but can also cause dysfunction of its own, leading to potential impingements and pain.

The act of hanging works to reverse this shackled pattern that arises over time. It also aids in spinal decompression, encouraging appropriate space between the ribs, and allowing for more effective breathing mechanics as well.

How Do You Build Hanging into Your Routine?

If you’ve never hung from a pull-up bar before, the goal is to start small and gradually work your way up to supporting your full body weight. Specifically, start with a box underneath you so that you will have your feet touching the ground. Gradually let your body weight carry you down while keeping your feet on the ground, and support as much of your weight on the bar as you can tolerate. Hold this position for 10 seconds, resting for as long as needed, before trying another 10-second hang.

Dr. Kirsch has recommended hanging for up to 1.5 minutes per day, in whatever increments you can tolerate. This could be bouts of 10, 15, or 30 seconds depending on your grip strength. So the next time you’re in the gym or passing your local park, try giving a dead hang a shot. It could help quiet down some of those cranky shoulders.

Like what you've just read? Click here to subscribe to our blog!

This blog was written by Lauren Zakrajsek, NIFS Health Fitness Instructor, Personal Trainer, and Internship Coordinator. To learn more about the NIFS bloggers, click here.

Topics: shoulders stretching pain exercises posture spine

Fitness Equipment Tools to Try in 2020: ViPR

It’s 2020, a new year filled with new ambitions for health, wellness, and performance. This is the time of year when we make deals with ourselves to try something new, get back to something we’ve stopped, and declare that this year is the year!

If you have followed my posts from the beginning, I feel a certain way about resolutions and waiting for a new year to make positive changes. For a review on my feelings toward a practice that typically results in failure, read Resolutions Redefined, one of my first pieces on the topic. But I want to help you try something new in the new year to help further your fitness quest. Let’s take a look at a tool that you might not have used or even seen before.

Vitality Performance Reconditioning (ViPR)

First on the list is the ViPR. Besides having a pretty cool name, the ViPR is a do-it-all piece of equipment that will make you what folks over at ViPR refer to as “farm boy” strong. Inspired by those farm kids who move with loads in their daily life, the ViPR combines task-specific movements and resistance training to add a multitude of dimensions to a fitness program. Living with energy and vigor (Vitality) to help build Performance and regain function for life, sport, and recreation is what the name ViPR stands for and pushes to achieve. Life is an athletic event, so it only makes sense that one should train for the event, train like an athlete, or in the case of the ViPR, like a farm boy.

Screen Shot 2020-02-17 at 4.09.57 PM
Movements with the ViPR Fitness Equipment

Ready to add the ViPR to your toolbox of fitness awesomeness? Here are a few of my favorite movements to help get you started:

  • Rocket Squats
  • Single Hinge with reach
  • Lunge to uppercut
  • Shovel
  • Rot. Fwd./Rev Lunge Combo
  • Lat Lunge to C&P w. Lat Step
  • Ice Skater with push
  • Lateral Shuffle Flip
  • Flip Squat

These movements barely scratch the surface of all the dimensions and patterns that can be challenged using the ViPR. You now know enough to give the ViPR a try, but for more information on how to add it to your program, schedule a session with one of our talented and highly trained NIFS instructors and take those first crucial steps in trying something new the right way!

Like what you've just read? Click here to subscribe to our blog!

This blog was written by Tony Maloney, ACSM Certified Exercise Physiologist and Fitness Center Manager. To find out more about the NIFS bloggers, click here.

Topics: equipment resolutions resistance exercises videos fitness equipment