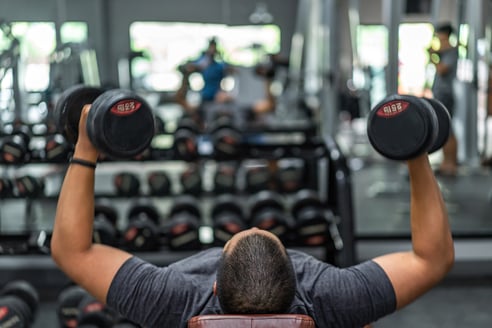
<img height="1" width="1" style="display:none" src="https://www.facebook.com/tr?id=424649934352787&amp;ev=PageView&amp;noscript=1">

NIFS Healthy Living Blog

Shiny Penny! How Band Distraction Can Improve Your Mobility

Pigeon Stretch-1
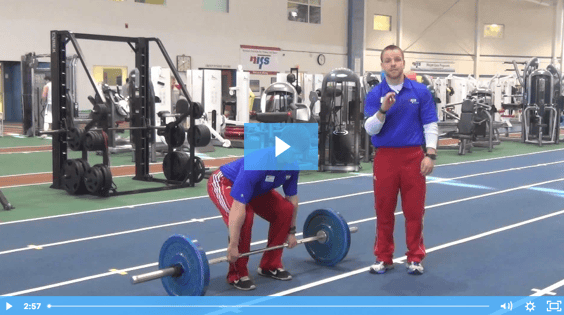
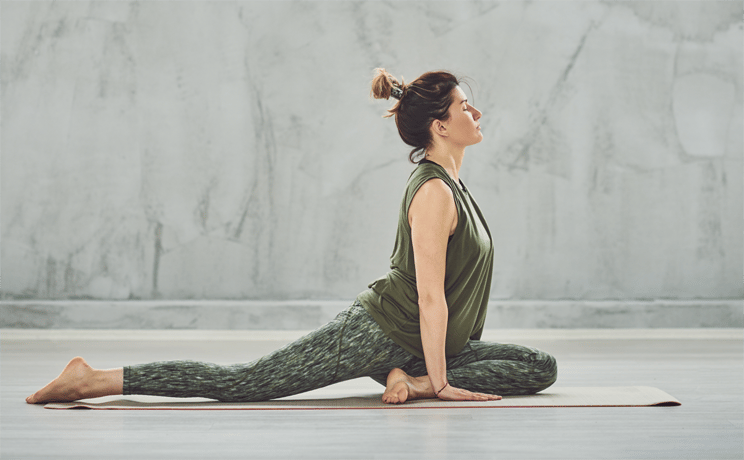
Whether you’re a competitive athlete, a weekend warrior, or the casual gym-goer, addressing mobility concerns can go a long way toward performance enhancement and injury prevention. If a joint is unable to move through a complete range of motion unloaded, then it’s going to be “bad news bears” when it comes to putting that same joint under any external load. Eventually, limited mobility could lead to muscular imbalances and compensation patterns, which could ultimately lead to the onset of injury. In other words, you can’t look to build strength on top of dysfunction.

How Band Distraction Works

There are numerous ways to tackle mobility, and it’s a heck of a lot more than just lying on a mat, hitting some static stretches for 10 minutes, and calling it a day. One such technique, band or joint distraction, involves using resistance bands to specifically isolate and improve the way bones glide over each other within a joint. This is accomplished by separating the articulating surfaces to allow for synovial fluid (the body’s homemade version of WD-40) to fill the joint and allow for less friction and (hopefully) increased motion. In other words, it creates “space” inside the joint complex. Band distraction can be used with nearly any joint in the body; however, the usual suspects are typically the ankle, hip, and shoulder.

Examples of Mobility Drills Using Band Distraction

Screen Shot 2021-01-07 at 12.35.58 PMHere are a few specific examples of band-distracted mobility drills:

  1. World’s Greatest Stretch
  2. Pigeon Stretch
  3. Half-Kneeling Ankle
  4. Shoulder Girdle (2 versions)

Important Tips

A few things to keep in mind when utilizing band distraction on a joint:

  • Be sure to anchor the resistance band to an immovable post, squat rack, etc.
  • Position matters! Be sure the band is placed over the correct structures, usually the crux of the joint or as close to it as possible.
  • This is one piece of the mobility puzzle. Pair this technique with soft-tissue work (foam rolling, trigger-point therapy, etc.) as well as a thorough dynamic warmup to encourage adequate blood flow and maximize readiness.
  • You don’t need to stretch each area for an eternity. Try 30 seconds to start on each structure.

Like what you've just read? Click here to subscribe to our blog!

This blog was written by Lauren Zakrajsek, NIFS Health Fitness Instructor, Personal Trainer, and Internship Coordinator. To learn more about the NIFS bloggers, click here.

Topics: shoulders injury prevention resistance exercises mobility joints hip mobility ankle mobility exercise bands band distraction

Plyometric Building Blocks: Creative Movements and Injury Prevention

GettyImages-601905120
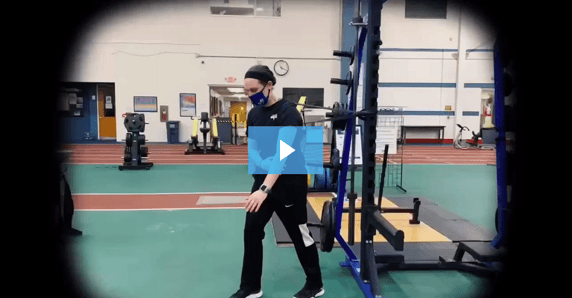
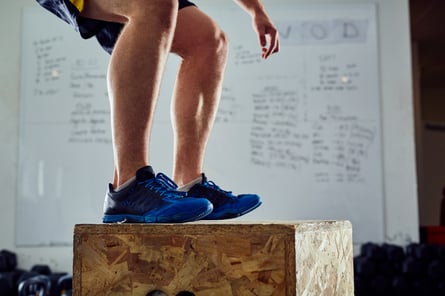
As an athlete there is no substitute for the ability to produce power and be explosive during your sport. From competitive weightlifters and NFL-caliber football players to distance runners, producing (and absorbing) high impacts is crucial for succeeding in your sport as well as staying healthy throughout your competition season. Are you incorporating any of these exercises into your current program?

Creative Movements

Finding plyometric, or more simply “plyo” exercises, has become relatively easy. They have become one of the staples of social media and other internet posts because of their ability to morph into unique movements that will get many likes and retweets. Many performance coaches are looking to become the first person to introduce a movement or show a variation that no one has seen, and plyo exercises allow for a lot of creativity to fit a certain sport or activity.

But should you choose a movement you have never seen and implement it into your program? My answer? It depends. The movement may benefit you in some way, but you must also ask yourself whether it is training a specific area that you are targeting and whether the movement itself is safe. Plyo exercises are meant to be very explosive. They are designed to tap into the high potential of the motor units of the muscle fiber, which are essentially the driving forces from the brain to the muscle. The goal is to reach these high levels of effort (85–100%) during repeated bouts, with the goal of the body adapting to those high levels with an increased recruitment of those high-level motor units. The more we express their abilities, the easier it becomes for us to do, leading to more power.

Injury Prevention in Plyometrics

Now you have to ask yourself a question: Can you perform a movement at full effort while being safe? If you are unsure, here are a few building blocks to consider when choosing a movement.

The Landing

Whenever I teach lower-body plyo movements, the first thing we learn is the landing. Regardless of the sport, landing on the ground always presents a potential risk due to the heavy forces that are coming down. Always be aware of your knees and make sure they are always stable when your feet hit the ground. Avoiding an inward collapse of the knees is a great place to start by making sure your hips are engaged, which will increase the stabilization of the knees.

A good place to start is a simple Box Drop drill. Step up onto a box that is about 12–18 inches high. Step off and land on the ground with flat feet, knees outward with a slight forward lean of the chest. This will start the healthy promotion of safe and soft landings.

Effort

I touched on this above, but effort is a nonnegotiable variable during plyometric movements. Your body and muscles have to have a reason to increase their power-producing capabilities. If you approach a plyo exercise with low effort or the “going through the motions” mindset, it will be a waste of time. For example, say you have a maximal broad jump of 10 feet. During training, the ideal distance you would jump might be around 8+ feet depending on the number of repetitions you are going for. Do you think that jumping to 5 feet during your training sets would tax your body to make improvements on that maximal 10-foot jump? Unlikely. Train with high effort and energy and you will be rewarded.

Simplicity

My final building block is to not overcomplicate things. It is so easy to get caught up in doing an exercise because it looks similar to movements you might perform on the field or court, but my advice is to step back and ask yourself whether there is more thinking involved during the movement, or are you allowed to focus on one aspect and give all you have for the sets and reps you are going for. If a plyo exercise you find has 3, 4, 5, or more aspects, “paralysis by analysis” will definitely kick in. Choose movements that do not require a lot of thinking and allow you to attack every rep.

BE POWERFUL!

Like what you've just read? Click here to subscribe to our blog!

This blog was written by Alex Soller, Athletic Performance Coach and NIFS trainer. To find out more about the NIFS bloggers, click here.

Topics: injury prevention plyometric sports student athletes athletic performance team sports

Early Sport Specialization Is Detrimental to Kids’ Health

GettyImages-155601842Recently I heard someone say something along the lines of, “That sixth-grade basketball player is ranked #1 in the country.” That got me thinking: How in the world are we ranking sixth-graders? They haven’t even gone through puberty yet!

Early sport specialization basically refers to putting a child into one sport before puberty and keeping them in that one specific sport their whole childhood and adolescent life. Parents think that if their child is focused on one sport, they have a higher chance of getting an athletic collegiate scholarship and possibly going pro at their respective sport. This is the furthest thing from the truth. Early sport specialization is actually detrimental to young children physiologically, psychologically, and fundamentally.

Children Should Learn a Variety of Sports

Children should be exposed to as many sports as possible as they grow up because this allows them to learn different skills that they might not learn if they are focused on only one sport. If a child focuses on the skills required to play baseball or tennis, that child will not master the physical literacy that every athlete should have. Physical literacy is the basic sport and movement skills required for sports that include agility, balance, coordination, and speed (Brenner, 2016).

Variety Will Help with Injury Prevention and Avoiding Burnout

Being a strength coach and personal trainer, a lot of parents ask me to train their child from as early as 10 years old because they think their child is the next LeBron James or Usain Bolt. What I have found out is that those kids typically can’t perform a simple movement like a skip or jumping jack. It actually is sad to see kids struggle with basic movements like this. Allowing kids to play sports for fun is the best way to keep them from burning out or getting seriously hurt before they reach puberty.

Let Kids Play to Have Fun

At the end of the day, we need to allow kids to be kids and play to have fun. Putting too much pressure on kids takes away from their experience and they begin to get scared of failing or not being good enough. They need to learn to fail in certain situations when it comes to athletics or they will not know how to deal with it on their own. Parents and coaches need to work together to eliminate the concept of trying to get their kid to be a professional athlete because chances are it won’t happen. Allow them to enjoy their young years without the pressure.

Like what you've just read? Click here to subscribe to our blog!

This blog was written by Pedro Mendez, CSCS, FMS, Health/Fitness Instructor and Strength Coach at NIFS. To learn more about the NIFS bloggers, click here.

Topics: injury prevention kids sports professional athlete football student athletes basketball early sport specialization team sports baseball parent

Shouldering the Load: Safe Alternatives to the Overhead Press Pattern

_68R6419In my experience over the years working with folks from all walks of life to help improve their strength, mobility, performance, and overall fitness I have found that so many suffer from immobility in two major joints: the ankle and the shoulder, which is the focus of this piece. Lifestyle, occupation, inactivity, and overtraining are all culprits robbing so many of healthy range of motion in the shoulder and shoulder girdle.

Throughout the history of fitness and muscle, one of the sexiest exercises is the overhead press (OHP). The overhead press is used as an assessment of one’s strength, it’s involved in the popular Olympic lifts and many activities of daily living, and it feels pretty darn good to lift something heavy up over your head. With so many variations that can develop strength and stability in the upper body, the overhead press can be a phenomenal tool in a training toolbox.

Questions to Ask Yourself

There are many benefits to the overhead press exercise, but what if you suffer from immobility in the shoulder or have suffered an injury that has made the vertical press pattern difficult or painful? There are some options for you that can keep you safe while reaping the many benefits of the vertical press movement pattern. Before we get to those, however, I’ll ask a couple of questions.

What are your desired fitness outcomes and goals?

“If you think it, INK IT!” is a practice I learned long ago from a great coach, and for years I have been insisting clients write down what they hope to accomplish along their fitness journey. If you don’t know where you want to go, it will be difficult to formulate the map to get you there. Take the time to reflect, develop, and write your fitness goals before starting any fitness program.

How will the overhead press exercise help you get there?

Pretty straightforward question: how will the overhead press exercise help get you to where you want to go? Depending on your goals, the OHP may play a major role, or it might play a minor role in your success.

How do you know whether you should be including the overhead press in your training?

Once you have established your fitness outcomes and how the overhead press can assist in obtaining those outcomes, it is important to determine whether the overhead press is a safe exercise to include in your training. Your best first step is to complete a Functional Movement Screen (FMS) that will provide some crucial information to your fitness programming. First and foremost, the FMS, specifically the Shoulder Mobility Screen, will determine whether there is pain involved with the overhead position. If there is pain, you will need to see a medical professional to tackle that before anything else should happen.

A score of 1 on the Shoulder Mobility Screen signifies that, among other things, you should exclude overhead pressing from your training until the pattern is cleaned up and you are no longer scoring a 1 on the screen. A score of 2 or 3 means the vertical pressing motion can be included in your training safely. Schedule your FMS with one of NIFS instructors today to ensure you are able and safe to include the overhead press exercise in your programming.

Overhead/Vertical Press Options

Once you have your screen from your NIFS certified pro, you now know where you stand to shoulder the load. If you are cleared to press overhead, I say have at it and press on! But if you are directed to stay away from strict overhead pressing, here are a few options that can provide many of the same benefits from the overhead press while working in a safer shoulder space.

  • Landmine Press: 1/2K and Standing
  • Landmine Arc press: 1/2K and standing
  • Incline DB press: SA and double arm
  • Jammer Press

Screen Shot 2020-10-01 at 11.52.08 AM

Shoulder health, strength, and stability are so important in training and, more importantly, everyday living. The vertical press options here are great ways to continue to bulletproof your shoulders, and the best first step is to get screened and take care of your shoulders prior to heavy loading. One simple and highly effective way to tackle shoulder health is to add the “dead hang” into your training program. Learn more in Lauren’s recent post covering this effective drill. Stay shoulder safe!

Like what you've just read? Click here to subscribe to our blog!

This blog was written by Tony Maloney, ACSM Certified Exercise Physiologist and Health/Fitness Instructor. To find out more about the NIFS bloggers, click here

Topics: shoulders injury prevention muscles weight lifting strength exercises videos mobility upper body stability overhead press shoulder mobility

Returning to Play and Activity Safely After Quarantine

GettyImages-1014940186The uncertainty of the last few months has taken a toll both mentally and physically on everyone. Many people did not have access to gyms and instead did at-home bodyweight workouts or virtual workouts—or did nothing at all. As time has passed, we are now returning to gyms and everyday normal lives. Returning to play and activity must be done in a strategic way. Going all out upon return can lead to many detrimental effects on the body. Making sure to take proper steps back into working out is vital to your body and your overall health. Sleep paired with hydration and a balanced diet will aid in the process of coming back stronger and more efficient. Taking a slow approach will also allow your body to get acclimated much more easily and quickly.

Safely Returning to Activities

You should return to play and activity with moderation. Jumping right back into the gym 5-6 times a week will lead to overtraining and other soft-tissue injuries. Trying to max out upon return after not lifting heavy weights is another challenge that will lead to injury or worse. Gradually getting back into the swing of things is the way to go, and will lead to the safest and most effective return.

Starting with bodyweight exercises and lighter weight is a great way to return. Focusing on form and taking the time to relearn movement patterns is another safe, effective tool to use. This is a great time to identify other imbalances you might have neglected before, or things that were brought about by the pandemic. Giving you the best possible options will not only help with longevity, but will also help with overall quality of life. 

There Is No Rush to the Finish Line

During lockdown, your focus should have been on trying to maintain a healthy, balanced diet and staying as physically active as you possibly could. I know times were hard and days were long, but it shouldn’t have derailed all the hard work you put in before the pandemic hit. That is why it is essential to take proper steps to gradually get back and acclimated to the weight room. Continue to set goals. Keep them within reason. There is no rush in achieving them. Staying healthy and creating longevity is the name of the game.

If your numbers are way down since the pandemic, trust that the process will lead you right back where you were and beyond. Find alternatives and alternative exercises that will gradually get you back into the swing of things. For example, if you love the squat, find other squat variations that will keep you healthy as you gradually work your way back to heavy squatting. Goblet squats are a great alternative. Cyclist squats are another great tool for developing the quadriceps. Utilize the TRX; it is a great functional piece that will aid in your return to play and activity.

Enjoy Being Back Outdoors and at the Gym

Staying healthy during this time is the ultimate goal. Doing it safely and properly is the way to go. Utilize your trainers and dietitians to help you on your journey. Never hesitate to ask professionals for advice on returning to the gym. We love seeing you back as much as you love being back. Continuing to practice safe and effective training methods with proper sleep and nutrition will make for a great rest of the year!

Like what you've just read? Click here to subscribe to our blog!

This blog was written by Jason Quarles, IUPUI Athletic Performance Coach. To learn more about the NIFS bloggers, click here.

Topics: exercise at home injury prevention weight lifting overtraining bodyweight quarantine covid-19 lockdown

5 Tips for a Safe Return to Fitness After Quarantine

GettyImages-1134331738Do you remember the last time you went on an extended vacation, came back home, jumped into the gym and your favorite class and thought you could pick right back up where you left off? You might remember feeling like you were not going to make it through the class and were so sore for days on end. And that was just after a vacation consisting of a long rest, relaxation, and food freedom. Just think what you may encounter once you return to your favorite class or training group after two to three months of quarantine.

Now if you have been able to keep up your training intensity during this time, that’s awesome, and what I’m talking about might not apply to you. But I would argue that most of us, even with the best intentions, might not have been exercising at the same intensity in which we left our favorite facility. And if you jump back in too fast, at too furious of an intensity, you could find yourself with far worse than a case of sore muscles—and maybe even losing your lunch during class.

As you make your way back into your gym and classes, here are five helpful tips that will aid in keeping you safe and free from injury so you don’t get knocked out for another couple of months.

Reset Your Mindset

I think the most important step in getting back to your previous fitness level is being okay with not being at your previous fitness level. There is no room for negative self-talk because your deadlift isn’t Instagram-worthy right now, or running a mile is now incredibly challenging when it was once a warm-up. Think short-term adjustment at the beginning as you get your legs back underneath you. Find the little victories and be proud of them as you continue to ramp back up to previous intensities.

Start Slow and Add Gradually

Stave off injuries or worse by starting slow and adding intensity progressively throughout the first 8–10 sessions back. Starting off too heavy or too fast can lead to physical injuries as well as emotional setbacks. Build some confidence every session, and you will be back to your prime self in no time, safely! 

Do an RPE System Check

Do a frequent body system check using Rate of Perceived Exertion (RPE) scale. The Borg Scale is a rating chart from 6–20 of how hard you feel yourself working at any one given task. There is a modified version that is a simple 0–10 rating system. Either one correlates well with your heart rate and can provide a quick and reliable audit of how your body is reacting to exercise. If you feel like you are barely moving, you may be at a 6 or 7 (1,2); or if you feel like if you keep up the current intensity you may lose that lunch I mentioned earlier, you may be at an 18–20 (8–10). It’s quick and easy, does not require equipment, and can provide an accurate intensity level check. Do frequent system checks throughout your workout, and if you feel you are pushing to the higher numbers of that scale, you may want to back it down and gradually work up to that intensity level.

Warm Up/Prep for Movement

Take the time to properly warm up and prepare yourself for the work at hand. This message is not new, and should always be practiced, but even more so now that you may have had a lengthy layoff. Consider this as part of your workout and you are more likely to complete it every time; don’t treat it as an option that is nice to do if you have the time. Make time! Foam rolling and soft tissue techniques, dynamic warm-up drills, and stability work should all be completed before jumping into a training session or your favorite class. Five to seven minutes can save you months in rehabbing an injury that could have been avoided.

Hydrate and Recover

Same as above, not a new message but a super-important one these days! Start hydrating now if you have been lacking in that area. Don’t wait until midway through a training session to start fluid intake. If you are following the rule of thumb and ingesting half your body weight in ounces of water daily, you are in a great position. Just like your warm-up, take the time to cool down and perform recovery drills post workout. These will help with soreness and increase mobility while slowing down your mind to focus on the victories you just grabbed in the workout. Slow down the systems and reward yourself for a job well done!

***

We were confident that this day would come when we could get back to our gyms, groups, and classes and get moving like we did before everything changed. Now that it is here, please take the proper steps in protecting yourself against injury or even worse. It may take some time to get back to where you once were, but it will be well worth it!

Like what you've just read? Click here to subscribe to our blog!

This blog was written by Tony Maloney, ACSM Certified Exercise Physiologist and Fitness Center Manager. To find out more about the NIFS bloggers, click here. 

Topics: injury prevention hydration recovery warming up mindset quarantine

Go from Sore to SOAR! Preventing Soreness and Injury in Your Workouts

GettyImages-1072667146A common nuisance to almost all fitness enthusiasts is the overall lethargic feeling you get from being extremely sore due to a challenging workout. Sometimes this is a deterrent to those looking to develop a consistent workout pattern, and can be especially bothersome if you haven't experienced this phenomenon before.

Does being sore mean that you should take more time off from fitness to recover, or would your time be better used if you could minimize soreness through workout planning and management? Beneath all of the reasons to either work out or stay home is your desire to see results. So this blog looks at ways in which you can shorten your down time due to soreness and eventually soar to new heights with your workout programming.

Pre-Workout Rituals to Minimize Soreness

We all have been sore from working out at some point. Being able to get back to the gym and work out again is key to not only keeping on track for goals, but also to set important habits. Excuses for not being at the gym can vary and many may be valid, but being sore from a previous workout is becoming less and less common because of our pre-workout rituals, which now include, but are not limited to, the following:

  • FMS corrective exercises (prescribed by a NIFS Health Fitness Specialist)
  • Foam rolling
  • Dynamic warmups (think about track stretches)
  • Even the whirlpool and sauna

With proper usage, these tools are designed to make you not only better at all aspects of fitness, but also safer as you grow into your workout. At NIFS, one of our focuses is on being an all-around fitness center, which includes these aspects. Getting screened with the Functional Movement Screen and talking to a NIFS staff member about your goals is one step toward a better overall experience at the gym.

Planning Your Workout Program for Injury Prevention

Another area to consider is your workout program. Would your weekly times and days allow for a six-day workout split (for example, Monday is chest day, Tuesday is legs, etc.), or would another path that includes total-body workouts make more sense? The answer depends on several things, including your personal goals, your workout experience, previous injuries, and workout frequency allotted. What you want to steer away from is overtraining a specific muscle to the point where it potentially can become injured. This would be more likely if you were to max out on squats six days per week for the next month.

How to plan this program isn't a road you have to travel alone because NIFS offers workout plans (included with membership) to those looking to take their fitness to the next level. Set up a time to meet with a staff member to get started right away.

Take Advantage of Information and Resources from NIFS

In today's world of technology, information is now readily available at your fingertips. You might do an internet search for a TRX exercise and find tens of thousands of websites and videos. NIFS has you covered here, too, as a resource to help you become more engaged in fitness. Posting weekly, the NIFS social media team has not only videos, but also great blogs regarding how to effectively work out, but also how to recover from a tough exercise. If meeting a trainer is a little intimidating, social media such as Instagram and Facebook can be a great way to not only learn, but also get to know NIFS staff who are here to help you.

Now that you have some ideas to help you on your fitness path, there's only one thing left to do: get back to the gym. Meet with a NIFS staff member to set up your complimentary assessments (BOD POD, Fit3D, and FMS). Set up a workout plan that is based on YOUR goals, that makes sense for the amount of time you have to work out, and is centered on your starting point. Expect accountability, encouragement, and growth. Come to NIFS and SOAR!

Like what you've just read? Click here to subscribe to our blog!

This blog was written by Thomas Livengood, NIFS Health Fitness Instructor and Personal Trainer. To read more about the other NIFS bloggers, click here.

Topics: Thomas' Corner workouts injury prevention personal training BODPOD warmups assessments fit3d functional movement screen soreness social media

The Functional Movement Screen Exercises in Depth

Screen Shot 2021-09-27 at 1.55.13 PMIn my last blog I briefly described the importance of the Functional Movement Screen to determine where one should begin with their workout program. The score that an individual receives determines whether they are ready for certain movements. In this blog I will go more in depth about the actual purpose of each test of the FMS, what the scores mean, and the reliability of the FMS.

The Purpose of the FMS

The FMS was created to measure motor control of movement patterns, quickly identify pain or limitations that need to be addressed, and to set a baseline for movement competency within the body. Being able to determine asymmetries in the body will help the tester figure out which movement has the greatest deficiency and which movement needs the most help. The FMS consists of seven movement patterns that are performed without warmup. The reason is that we want to see what a person’s movement capacity is at its natural state.

FMS-logo

The Exercises That Are Part of the FMS

Here is more detail on each of the exercises that are part of this screening:

  • Deep Squat: This test shows us the most about how a person moves. The reason is that it allows us to see total extremity mobility, postural control, and pelvic and core stability. If you think about it, everyone at some time in the day performs a squat, whether that is sitting down, playing sports, picking up something off the ground, and so on. When the dowel is overhead, this requires mobility and stability of the shoulders, and the pelvis must provide stability and control while performing the squatting motion.
  • Screen Shot 2019-10-08 at 11.56.10 AM

    Hurdle Step: This test demonstrates how well someone is able to walk (locomotion) as well as accelerate. The hurdle step is a great assessment to determine any kind of compensation the body performs while you take a step forward. This movement also lets us know how well a person is able to stabilize and control oneself while in a single-leg stance. If pelvic and core control is lacking with this, the person will not be able to stabilize themselves properly and will most likely begin to shift too much or lose alignment.
  • Inline Lunge: This test helps demonstrate the ability that one has to decelerate. This is important because we as humans need to be able to decelerate every day, whether that be in sports or just daily living activities. It also allows the tester to observe the rotational and lateral movement capacity of someone. Pelvic and core control and stability is extremely important to be able to perform this movement properly. Since this test requires the person to be in a split stance, the tester can also see how well a person is able to get into hip, knee, and ankle flexion when lunging down and determine whether there is a mobility or stability issue.
  • Shoulder Mobility: This test helps show the relationship between the scapular-thoracic region, thoracic spine, and rib cage. A person with good thoracic extension typically does well on this test. One side should demonstrate internal rotation and extension and adduction, and the other side should demonstrate external rotation, flexion, and abduction.
  • Active Straight-Leg Raise: This test helps demonstrate many things, even though it might seem very basic. With the leg that is coming up, we typically want to see a good range of hip flexion. On the leg that stays down, we typically look for how good the range of hip extension is. Another variable that I like to look at is how well their core stability is. If they are not able to keep their back flat on the floor, this lets me know that the person is not able to own that position and needs help with core stability.
  • Trunk Stability Push-up: This test often gets mistaken as being an assessment for upper-body strength. This is not the case, though. The actual purpose of this assessment is to measure the stability of the core. If the spine or hips move during the push-up movement, this is usually an indication of other muscles compensating for the lack of core stability.
  • Rotary Stability: This tests for rotary stability in multiple planes. Core, pelvis, and shoulder girdle stability are what is being assessed. This also allows us to measure the ability of a person to crawl. Being able to demonstrate proper weight shift in the transverse plane and also coordination during the stabilization and mobility of this movement will help determine whether a person is ready for more complex movements.

FMS Scoring

I will keep this section short and sweet and explain the basic fundamental purpose of the scoring and what each number means. The FMS scoring ranges from 0–3, so there are 4 possible scores that a person can get. A 0 indicates that there was pain during the movement. A score of 1 usually indicates that the person was not able to complete the full movement properly or was not able to get into the correct position to execute the movement. A score of 2 indicates that the person was able to complete the movement but had to compensate somehow to actually execute it. A score of 3 indicates the movement is optimal and no compensations were detected.

Reliability of the Test

Many research studies have been done to determine the reliability of the FMS in recent years. The main findings that have been discovered are that the FMS can accurately identify people with a higher chance of an injury. The three groups at a higher risk are professional football players, male marine officer candidates, and female collegiate basketball, soccer, and volleyball players.

People always ask me what score determines an elevated risk for injury on the FMS. What most studies suggest is that a score of 14 or lower gives a person a 1.5 times higher risk for injury than a person who gets a score higher than 14. This does not mean that if you score lower than a 14, you should be frightened; again, most studies done are with a specific population (stated above). More studies are needed on the general population, but what is certain is that the FMS is a great tool for personal trainers, athletic trainers, physical therapists, and strength and conditioning coaches to use on their populations to get a better understanding of how well a person moves.

If you are interested in completing an FMS screening at NIFS, click here for more information.

Like what you've just read? Click here to subscribe to our blog!

This blog was written by Pedro Mendez, MS, CSCS, and Health Fitness Instructor.

Topics: NIFS injury prevention pain exercises functional movement assessments movement functional movement screen

Ankle Mobility: Lower-Leg Stretches to Improve ROM and Decrease Injury

GettyImages-867056016-1Whether you are a seasoned workout veteran or the new face in the gym, there’s no denying that lower-leg pain can be a huge deterrent for exercise (and day-to-day life, for that matter). Some pains are dictated by the range of motion in the ankle. Due to several factors including previous injuries and wear and tear, physiological problems from the various shoes people wear, and the types of exercises people punish their bodies with, we see individuals every day who have a hard time performing some of the more basic exercises such as squats and deadlifting.

To hopefully achieve a better, safer exercise with less pain, it’s helpful to incorporate ankle mobility warmups into your routine and to be conscious of testing and retesting range of motion to monitor your progress. Here I cover some tests that are useful for checking your ankle mobility and some warmup stretches to get you heading in the right direction.

Testing Ankle Mobility

For testing and retesting your ankle mobility, NIFS uses a test that is included in the Fundamental Capacity Screen simply referred to as the Ankle Clearing Screen. What we want to see is whether your ankle mobility is capable and safe to perform a specific movement pattern. If not, we need to strategize ways to improve ROM and decrease chances for injury.

Dr. John Rusin describes a test you can do at home in which you stand, facing a wall, with your foot four inches away from the edge of the wall. While keeping your heel on the ground, try to touch your knee to the wall. It’s not as easy as it might seem, but being able to touch your knee to the wall is a sign of a healthy, mobile ankle. If you can’t do it and you want to improve, we have some work to do!

Stretches for Ankle Mobility

There are many stretches for ankle mobility that can help boost your ability. Starting with a simple ankle stretch at the wall, begin by pressing against the wall, keeping your heels flat on the floor. The more your body gets used to this movement, the farther you will be able to move your feet back (as long as your feet are flat on the ground). Holding for several seconds on each side, try to do this stretch daily or as often as you like to help get the ball rolling.

A similar way to stretch the ankle would be a self-stretch from a half-kneeling position. This is a simple yet effective movement that improves your flexibility over time. While keeping your foot flat, rock forward until you feel a stretch, then return to the starting position. Move your foot farther away from your body or closer to your body for a couple nice change-ups to the routine.

Lastly, if you were interested only in the exercise aspect and can’t find time to stretch, you can still do a squat pattern. The TRX Deep Squat is a good beginner squat that will help reestablish ankle mobility and train your body to work through the entire squat range of motion. Even sitting in the squat position feels good and helps the body get used to the pattern. Without weight to affect the body positioning, you will find this to be lower impact and a great jump off into doing traditional squats with great form.

Get Help from NIFS

Ankle mobility is where everything in the whole kinetic chain starts. If you have poor ankle mobility, chances are you aren’t going to be able to do the squats or hip hinge patterns effectively, which our bodies need to get stronger. This ripple effect passes all the way to the upper half of the body.

If you want more information or would like help improving your ankle mobility, please reach out to NIFS and one of our Health Fitness Specialists will help guide you in the right direction. Fundamental Capacity Screens are complimentary. Check with a NIFS staff member to see whether this type of testing is right for you.

As always, muscleheads evolve and rejoice!

Like what you've just read? Click here to subscribe to our blog!

This blog was written by Thomas Livengood, NIFS Health Fitness Instructor and Personal Trainer. To read more about the other NIFS bloggers, click here.

Topics: Thomas' Corner injury prevention range of motion pain mobility assessments stretches ankle mobility lower leg

Happy Playmore: 5 Movement Tips to Stay on the Golf Course Longer

GettyImages-961002976It’s finally that time of year again—time to hit the links and chase a little ball all over a well-manicured green space with the hopes of golf immortality. If you are like me, you have a love/hate relationship with the sport of golf, but I look forward to my weekly round with friends to take on challenging courses and ultimately myself.

All levels of golfers are continually looking for ways to improve something in their game and to get out there more and more to test their skills. But are you taking the necessary steps to make sure you are able to lace up the spikes, strap on the glove, and swing a club anywhere from 70 to 100 times in a 3- to 4-hour span? We can plan practice like crazy on the short game, driver, and flat-stick, but if you can’t move well, or if you have an injury, you won’t be booking that tee time.

As an avid golfer myself, and an aging one at that, I have found some ways to ensure I can enjoy the game that frustrates me so much at times but provides aspects you just can’t get anywhere else. That’s why we play. Here are some tips to help you play longer and, ultimately, better.

Get Screened

Do you know whether you are moving well? Do you know whether you have some mobility issues in key joints for the golf swing, or imbalances? If you do, are you performing specific strategies to help correct and enhance any movement problems you may have? You wouldn’t expect a Corvette to drive at a high performance level if it had square tires, would you? But often we golfers expect to play in the 70s with glaring movement issues and become rather frustrated when we do not. See a certified pro, like all the coaches at NIFS, and get an FMS (Functional Movement Screen) completed to see if there are any movement deficiencies that could be holding you back on the course. You will receive an in-depth report of how you are moving and a bunch of strategies to help make your movement better. Our coaches take the approach of Gray Cook: that when you move well, you will move often; and in this case, moving better means more golf.

Emphasize Mobility

If you want to hit the ball farther, and more often, you have to emphasize mobility exercises and drills in your fitness routine when you are not playing, especially mobility of the thoracic spine. The rotation of the golf swing comes mainly from your ability to “turn” through the T-spine, or upper back area. The larger the turn, the greater the potential swing speed you can create, which can lead to bigger drives and adding yards to all of your clubs. You will receive drills from your coach after completing your FMS, and you can also read more on the importance of T-spine mobility from experts like Greg Rose and others at the Titleist Performance Institute. In most if not all athletic environments (life being one of those), it truly has to start with mobility. The more mobility you have, the more potential you can unleash.

Train the Frontal and Transverse Plane

Working in a fitness facility I witness on a daily basis a lack of training emphasis on the frontal and transverse planes of motion. We are a pretty straightforward kind of fitness planet, and not in a good way. And many times I field questions about an injury that happened on the golf course from individuals who have never trained outside of walking in a straight line, or straight presses and pulls. They are confused that they move explosively in a plane of motion they never train and somehow get hurt. The golf swing happens in the frontal and transverse planes of motion, so you need to train with movements that challenge you in those planes. Countless exercises and drills can get you out of the sagittal plane (forward and back), and prepare and load your body to take on a big swing as well as provide the endurance to perform many swings. Here are a few of the classics:

Warm Up Properly

This really should go without saying, yet I have to: WARM UP BEFORE YOU PLAY! Racing to the course, pulling the bag out of the trunk, stepping to the first tee, and hitting the big dog after a few practice swings is a sure-fire way to at best play poorly, and at worst suffer a big injury that takes you out for the season. Take the time to show up a little earlier and warm-up properly. As I typically do, I reference the experts. I learned this quick and effective warmup from Jason Glass that I use every time. If you don’t dig this one, that’s fine; just do something to prepare your body to perform for that 3- to 4-hour round of golf.

RICE After the Round

If you don’t know by now, RICE stands for Rest, Ice, Compression, and Elevation. You don’t have to suffer a trauma to enlist and perform this concept. Ice can go a long way in the recovery process, and that is the goal here, to recover quickly and get back on the course. You don’t think the pros finish up, go get some dinner, and hit the rack, do you? No way! They recover properly so they can swing well every time they step on the course. Take time to perform a light stretch after a round, jump in the hot tub, or ice down sore muscles after you are done enjoying this great sport. It will get you back out quicker and you will be playing longer.

Like what you've just read? Click here to subscribe to our blog!

This blog was written by Tony Maloney, ACSM Certified Exercise Physiologist and Fitness Center Manager. To find out more about the NIFS bloggers, click here.

Topics: NIFS injury prevention golf recovery mobility movement functional movement screen