 I regularly try to attend the Perform Better 3-Day Functional Training Summit (last one was 2019 in Providence Rhode Island), where the leaders of the fitness world converge to drop a whole bunch of knowledge and inspiration on fitness pros. I have been attending this, what Alex refers to as a “Fitness Concert,”every year since I started at NIFS. It is something I really look forward to yearly, and is a great experience of learning, refocus, and reenergizing.
Attitude: A Missing Puzzle Piece
But this year I left with a different feeling than in the past. I felt that I had been missing a very important piece of the success puzzle for so long, and it had nothing to do with movement. It was probably the most powerful of everything I took away from the “concert.” Most years I cultivate new ways to challenge the body through movement and methods of training, as well as grab a few great ideas about how to help people see what their true self is truly capable of. But not this year. Now don’t get me wrong, those topics were presented, and I enjoyed hearing those concepts, but they did not create the biggest impact for me this time around. The biggest idea that created the most impact for me was that MINDSET matters the most in fitness (and really anything you want to accomplish).
Brian Grasso was the presenter who really changed the way I think about creating change, and really blew my mind (pun intended) by revealing that life’s problems are mainly due to a “software” (the mind) problem, not a “hardware” (you) problem. I am a huge believer that things happen for a reason, and me choosing to see Brian’s presentation that day in Chicago was on purpose. In a previous post I wrote about an experience attending Wanderlust and the impact the concept of mindfulness had on me, and no more than a month later I was sitting listening to Brian talk about why mindset matters the most in anything we wish to be successful in, or to create change.
“Life’s problems are mainly due to a “software” (the mind) problem, not a “hardware” (you) problem.”
My Top 5 Takeaways from the Perform Better Presentation
Brian presented so much in a short amount of time—far more than I could do justice to in a single post. But here are my top 5 takeaways from his life-changing presentation.
Mindset is not motivation. Mindset is understanding YOU and how you see and interpret the world, and how you fit into it. Motivation, or motivational speeches and activities, tends to be short-lived with a crash at the end. This cycle is similar to illicit drug use; it provides an intense high followed by an equal low. This will result in two things: the want for more of that feeling, and the feeling of failure. Brian gave the perfect example by presenting the question, “Why are Tony Robbins motivational speaking engagements always sold out?” He provides that emotional response, making people feel great, but eventually that high goes away and people are left to their original problems, and feel the need to go back and get more motivation without focusing on the main issue: a negative mindset.
The unconscious mind drives your life: Our unconscious mind drives our lives and shapes our world. It serves as our software for our behaviors. Our software can be shaped by the sequence of the unconscious which is:
Influence Perceptions Belief System Expectation
(we incur) (we carry) (we accept) (we hold)
These are some pretty powerful drivers for our behavior; knowing what is driving the behavior allows us to really change a lifestyle that needs help. Our software (unconscious) can be classified as either fixed or dynamic. Fixed is thinking what you see is the absolute truth; this mindset is usually negative. A dynamic mindset is “rewriting” the unconscious and seeing yourself in other ways. Another great example Brian provided to drive home this point was this: when you purchased your new iPod, you didn’t find your favorite music on it when you pulled it from the box. You had to download the songs you wanted. Your unconscious, so to speak, works the same way; if you don’t like the song that is replaying in your head, CHANGE THE SONG!
Perceptions that we carry don’t have to be our story. Brian said something that really spoke to me: “We talk to ourselves like we would not let anyone in the world talk to us.” Simply, our negative self-talk is so, well, negative, and that it can be so hurtful that we couldn’t imagine anyone talking to someone like that. But we do it to ourselves every day. This negative self-talk stems from the perceptions we carry about ourselves, others, and life in general. These perceptions can hold us back from making real change. Brian described the story of circus elephants and how they are tethered to a post by a rope tied around one of their four legs. At a very young age, a much smaller rope is used to tie them, which is strong enough to keep them there. As the elephant ages, trainers would use the same size rope, even though the elephant could easily break through it. But they don’t…why? Because the elephant is conditioned to believe that the tiny little rope is strong enough to hold him back. Do you see how strong perceptions of ourselves can be, and how mindset is the key to unlocking potential?
Conscious vs. unconscious. So the unconscious mind is considered the driver and where behavior is created through impulse. It is believed that the unconscious mind already knows the right answer, and the only job of the conscious mind is to make the unconscious story true. Conscious choices create behavior through action, and this is where most of today’s self-help strategies engage, at the conscious level. But if most decisions are already made, and the story of YOU happens in the unconscious mind, these strategies will be unsuccessful. “We concentrate on amending physical behaviors without recognition of the drivers behind them,” Brian said. I equate this idea with something I feel I know a great deal about, movement. If you have a bad movement pattern (negative mindset), and you load that movement pattern (self-help at the conscious level), you will simply reinforce that bad movement pattern (negative mindset). On this point, Brian shared a quote from Clinical Psychologist Dr. Sophie Henschaw; she states, “The reason positive affirmations don’t work is that they target the conscious level of your mind, but not the unconscious. If what you are trying to affirm is incongruent with a deeply held negative belief, then all that results is an inner struggle.” Pretty powerful statement considering we as a society have become so reliant on the development of goals and daily affirmations as strategies for success. But if we take time to consider that the deeper portion of our mind is what is really driving our behavior, it only makes sense that, for sustainable change, the focus is on the unconscious and strategies that deal directly with that level of the mind.
“Our negative self-talk is so, well, negative, and it can be so hurtful that we couldn’t imagine anyone talking to someone like that.”
It’s a story, plain and simple: Mindset, as stated above, is understanding YOU and your story. Your story is developed through that sequence of the unconscious (influences-perceptions-belief system-expectation), and awareness of that sequence is a powerful first step. Because here is the thing: you can change your story. It doesn’t have to be fixed! You don’t have to respond to influences with negative actions or thoughts. You do not have to carry those influences that do not lead you down a positive path. And if your belief system is based on principles and not personality and environment, it will be more apt to deal with the changing world around you.
Bottom line is, if you want to change your life, update your software and change your story. I leave you with another impactful quote that Brian shared with the group:
“Who looks outside, dreams; who looks inside, awakes.”
—Carl Jung

This blog was written by Tony Maloney, ACSM Certified Exercise Physiologist and Fitness Center Manager. To find out more about the NIFS bloggers, click here.
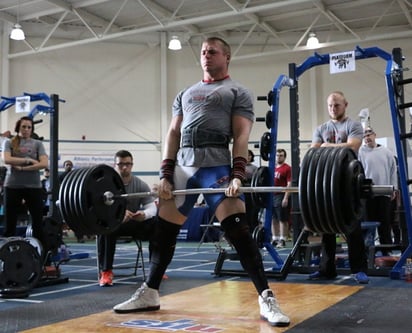 There are numerous different products on the market now that are supposed to help improve your strength training. From lifting belts to Mark Bell’s patented Slingshot, there is more gear available now than ever. For a novice lifter, the multitude of available products will probably just leave your head spinning. What is actually helpful and what is just a moneymaker? Here is my take on some of the most popular products out there.
 Greetings, NIFS friends. We have passed the midway point in the calendar year 2016, and I hope that you have been successful in meeting some of your yearly goals as well as making new ones. During this time of year, we find outdoor and recreational exercise more readily available and appealing, understandably, and because of this, there is time for the occasional spare moment for yours truly to ponder (by ponder, I mean BLOG!).
  Next up on the minimal gear with max results list is truly one of my favorites, the


 Okay, so the title is a bit misleading. You shouldn’t really strive to be the worst at what you do. What I mean by that title is to put yourself in situations where you are consistently surrounded by people who are better than you. If you are too afraid to associate with those who are clearly more skilled, more talented, and harder working than you are, how will you ever figure out why they are better than you in the first place and find motivation and attitude to improve?
 It’s that time of year again…back to school! This means busy evenings or early mornings getting lunches packed for the kids.
 What Is Functional Training?
 Summertime is in full swing, and whether you are a competitive or recreational athlete, changes are definitely happening to your normal schedule. For high school and collegiate athletes, more time is spent at home and for general fitness enthusiasts, more options are available to you to fulfill your exercise quota (in other words,
  For many who enjoy the summer months for different