<img height="1" width="1" style="display:none" src="https://www.facebook.com/tr?id=424649934352787&amp;ev=PageView&amp;noscript=1">

NIFS Healthy Living Blog

Alex Soller

Recent Posts by Alex Soller:

How to Build Training Programs for Competitive Athletes (Part 2)

In part 1 of this blog, I explained training periodization, and talked about the first two macrocycles: off-season and pre-season. Now I’ll talk about the remaining macrocycles: in-season and post-season.

In-Season

ThinkstockPhotos-100324402.jpgOnce the competitive season begins, scheduling time to get in to lift is a lot more difficult due to the practices, games, and travel that are happening. To me, in-season lifting is sometimes undervalued in the competitive/athletic world because of the fact that the primary focus is to win games or matches, not lift weights. However, I believe that this is one of the most important (if not the most important) times during the year because of what lifting can do for the athlete throughout the competitive season and into the off-season.

The goal of in-season lifting is simple: maintain what you have built in the off/pre-season and make sure that no muscular imbalances develop. This is not a time to try and increase your squat or bench by 50 pounds. It is a time to make sure that your body stays healthy and you are able to preserve the muscle, strength, and power that you have built throughout your season. Doing this will not only keep you healthier for your sport, but will also set you up for better long-term development during the subsequent off-season. Think about it: If you lose the vast majority of strength, power, and muscle mass you’ve built over the in-season, you are basically starting at square one when the season is over. If you are able to preserve 85% of that strength and power, you are starting further along than you were the year before, which allows you to make bigger gains.

Recommendation:

Training Frequency: 2 days per week
Mode: Medium Sport Specificity
Volume: Low

Post-Season

When your competitive season comes to a close, there should be some time to relax and recover from it. Take time and reflect on how you performed and what you could have done to be better in different aspects of your activity. Start creating a plan on how to improve those things once your training ramps up again.

As for training during this period, it should still happen. Your body is still recovering, but you want to make sure you do not totally fall off the map by not doing any type of exercise or physical activity. This is a perfect time to play or participate in some other sports or change up your weightlifting routine. You basically have free reign on your choices under one circumstance: get away from your actual sport/complete lifting routine.

This macrocycle does not last long, but it is an important one. You have been competing for months and want to avoid being burnt out on the sport you love, so getting away will be good. Do something different; just be active. After 3 to 4 weeks of light activity, you can begin your off-season program and start the quest to better yourself for the next competitive season.

Recommendation:

Training Frequency: 2 to 4 days per week (light activity)
Mode: Low Sport Specificity
Volume: Low-Medium

***

Overall, there is no exact science that is going to work perfectly every time when you are building your own training programs. You will always need to make tweaks, even to the best programs around. This blog provides the framework for developing a solid program, but the devil is in the details. You want to make sure that you have everything planned out as you progress through the competitive season. Some things may not go as planned, but that is okay. The ultimate goal is to make you the best athlete you can be in the sport or activity you are doing!

Like what you've just read? Click here to subscribe to our blog!

This blog was written by Alex Soller, NIFS Athletic Performance Coach. To find out more about the NIFS bloggers click here.

Topics: NIFS mini marathon training weightlifting competition post-season programs off-season athletes athletic performance

How to Build Training Programs for Competitive Athletes (Part 1)

ThinkstockPhotos-dv484081.jpgWhen putting together a program for anyone, client or athlete, you always want to have an idea when you would like to peak, or be at your best throughout that calendar year. For Mini-Marathon runners, May is the time to be at your best. For football players, you want to be firing on all cylinders when August rolls around. The structure of your training should be based around when your season is going to begin, to make sure your body is prepared to last the duration of the competitive months. Regardless of when you are competing, your training should never remain totally the same throughout the whole year.

This concept of training periodization has been around forever. It was developed by a physiologist named Leo Matveyev around the 1960s. By definition, periodization is a preplanned, systematic variation in training specificity, intensity, and volume organized in periods or cycles within an overall program (see Essentials of Strength Training and Conditioning). Periodization can build the general framework of how you might want to structure your workout programs through your training year.

For our sake, I am going to refer to these periods or cycles as macrocycles. Macrocycles are the biggest of the divisions of training timeframes throughout your competitive year. They can be filtered down to smaller variations (mesocycles—smaller, microcycles—smallest), but we will stick to the biggest ones for now. This will allow you to get a general idea about the main goals for each macrocycle.

There are four macrocycles that will be divided up throughout the year. These are the following:

  • Off-Season
  • Pre-Season
  • In-Season
  • Post-Season

In this blog, I talk about the first two macrocycles. In my next blog I will talk about the final two.

Off-Season

The off-season is always one of the best times of the year to train. This is a time when you can focus on building strength but also implement some training modes that you might not use during the other phases of development (for example, flipping tires, boxing, swimming, and so on). I also like to use this time to assess the success of the programs I have used over the past year to see what helped improve aspects of my teams and what did not (FMS testing, strength/power testing, energy system testing).

A lot of teams and individuals spend a fair amount of time in this macrocycle (12-16 weeks). Although your competitive season is a long time away, slacking during this phase could set you behind in the goals you want to achieve. Practices are usually very short or nonexistent, which leaves plenty of time for you to hit the weights to get your body ready.

Recommendation:

Training Frequency: 4 to 6 days per week
Mode: Moderate Sport Specificity
Volume: High

Pre-Season

The pre-season begins what is considered crunch time when it comes to preparedness in the weight room and on the playing field. The season is right around the corner, and the next 8 to 12 weeks will fly by. You will be competing before you know it.

During this macrocycle, training becomes a lot more sport specific than in the preceding cycle. The goal is to get the body ready for the exact situations and stressors that you will encounter during competition. As a strength and conditioning coach, I want to prepare the athletes’ bodies with exercises that will mimic and enhance their actions on the field. Examples include working on lower-body power with football players, increasing aerobic endurance with soccer athletes, or enhancing rotational power with golfers.

All in all, you just need to be on the field or court playing in order to get ready for the season. However, the smaller the learning curve the athlete has from off-season to pre-season conditioning, the better. Too much stress too soon (as for athletes who do no training over summer break) can lead to overuse injuries from ramping up the activity levels too fast. Remember to take into account the fact that you are training more for your sport at this time, so do not overdo it in the weight room. Make sure you have adequate recovery time in order to get the most out of your previous months of training.

Recommendation:

Training Frequency: 3 to 5 days per week (depending on practice time/schedule)
Mode: High Sport Specificity
Volume: Medium-High

In part 2 of this blog, I’ll go through the other two macrocycles: in-season and post-season.

Like what you've just read? Click here to subscribe to our blog!

This blog was written by Alex Soller, NIFS Athletic Performance Coach. To find out more about the NIFS bloggers click here.


Topics: mini marathon training weightlifting programs athletes

Caddy Smack Deuce: More Fitness Tips to Improve Your Golf Game

It is finally time! If you are like me, that “itch” to get back out onto the golf course may be starting to emerge. You check your weather app at least four or five times a day to see if the conditions for the upcoming weekend are going to be suitable playing (no wind/rain = good for me).

GettyImages-497545811_webMost of us might have been lucky to get out and play a handful of times over the winter, but some might be picking up a club for the first time in almost five months or more when that first tee time rolls around. Regardless of how many times you have played in recent months, everyone can benefit from improving golf-specific fitness areas before the full-fledged season begins.

About a year or so ago, I wrote a blog called “Caddy Smack” (hence “Caddy Smack Deuce”). Caddy Smack was designed to give you a few starting points on how you can increase one very important aspect of the golf swing, rotational power. Rotational power is a very important force-generating factor and may help you gain a few extra yards off of the tee. But as most of you probably know, there is MUCH more to the golf swing than just power. Follow along as I go over five of the most important fitness areas to improve that can have a direct impact on your swing.

Ankle Mobility

All great golf swings start from the ground up. How the feet are positioned and the movement (or lack thereof) can change a smooth swing into one that looks like a rusted teeter-totter. Lack of mobility throughout the ankles can constrict your range of motion and can also prevent you from using the ground as a force-generating tool.

What can you do to improve it? Do Wall Ankle Mobility Drills: 2 to 3 sets of 10 repetitions per leg

Hip Mobility

As Chubbs from the movie Happy Gilmore once said, “It’s all in the hips.” Well, I’m here to tell you that Chubbs wasn’t lying. A solid portion of the movement that occurs in the swing can be attributed to your ability to achieve a full range of motion within your hips. If you have been around the game long enough, you know the term “hip turn.” This does not happen with poor mobility.

What can you do to improve it? Do Supine Bridge Leg Circles: 2 sets of 5 reps (clockwise and counterclockwise) per leg

Rotational Power

If you have read this blog’s big brother, you know that rotational power plays an important role in your swing. My belief is that if you become more powerful, you will not have to swing as hard in order for the ball to fly the same distance, thus minimizing mis-hits due to being out of control. Essentially, you are generating the same amount of force (or possibly greater) without feeling like you are doing anything different. Seems like a win-win to me.

What (else) can you do to improve it? Perform Standing Rotational Shot Put: 2 to 3 sets of 5 to 8 reps per side

Shoulder Mobility

I know you have done it, watching the slow-mo of one of the tour players’ swings, being enamored by their ability to draw the club back so far (Phil Mickelson goes way past parallel to the shoulders). The next time you hit the driving range, you try to mimic that exact takeaway and the shot is a proverbial dumpster fire. I’ve done it too. You wonder to yourself, “How do they do that”?

Well, for most of them, their swings have been forged since they exited the womb. That feeling is natural to them. But one factor in which they may have a slight advantage over you may be shoulder mobility, or the ability for the shoulder to move freely and under control throughout the range of motion without the sense of constriction. There is no way that you will be able to recreate a backswing of such length if you cannot perform similar tasks without the golf club in your hands.

What can you do to improve it? Standing (or seated) Wall Slides: 2 sets of 10 reps

Single-Leg Stability

My final important aspect to aim to improve for your golf swing is single-leg (SL) stability. SL stability combines other factors that I mentioned previously (such as ankle/hip mobility), but for some individuals, it’s just something that needs to be practiced. After you make contact with the ball in your swing, there is a transfer of weight to your lead foot, which causes that hip turn and allows you to hold the finish pose. Although both feet are still in contact with the ground, the lead leg is providing the majority of the support.

When is the last time you balanced on one leg for 30 seconds? What about balancing for 30 seconds with your eyes closed? What about balancing with your eyes closed, juggling flaming bowling pins, while eating sushi (okay, maybe I’m kidding). That is a good place to start. Feel what it is like to stand without using anything but that plant foot. Do it on both sides. After you have mastered the balance, you can add more elements.

What can you do to improve it? Do Single Leg Balance with Tennis Ball Bounce (against wall): 3 sets of 20 per leg

The golf swing is as unique and complex as any movement that I have ever analyzed. There are so many factors that could make or break your success; however, many of those factors are modifiable. I hope that this spring, summer, and fall golfing seasons are the best you’ve ever had!

Now, watch me hit a ball over the White River bridge!

Golf blog 2

This blog was written by Alex Soller, NIFS Athletic Performance Coach. To find out more about the NIFS bloggers click here.

Like what you've just read? Click here to subscribe to our blog!

Topics: fitness nifs staff balance flexibility exercises golf golf swing mobility functional movement

Are You Glute-n Free? The Importance of Exercises for Glutes

Gluten intolerance and celiac recently has become a very popular nutritional topic. Gluten is a protein found in grains, including wheat and rye. Digestive issues, joint pain, and headaches are a few of the health issues that may occur if you have this intolerance and eat foods that contain gluten. Many individuals adopt a gluten-free lifestyle, which could lead to positive changes when paired with exercise and overall health.

But what if I told you there was a certain lifestyle that would have an opposite effect on your life? This is also characterized as gluten-free, but has nothing to do with food. This “Glute-n Free” lifestyle may be holding you back from achieving many exercise or physical activity goals, or could lead to simple lifestyle issues, such as dealing with nagging lower back pain.

Gluten = Bad, Glutes = Good!ThinkstockPhotos-200069245-001new-1.jpg

This Glute-n free trend I’m referring to is minimal or absence of gluteal exercises during your workout programs. The gluteus maximus is the largest muscle in the body. It is essential in just about every physical activity and is the central core muscle. You could consider this muscle to be the body’s powerhouse. Along with glute max, you have other gluteal muscles with various responsibilities, like hip stability. You will use these muscles in just about every activity that you do. From swinging a golf club to picking up a box off the ground, the glutes are vital.

Glute strength is important no matter what at point you are in your life. You could be an elite athlete looking to improve your broad jump, or a grandparent wanting to be able to pick up your grandchild while playing. Regardless of your goal, the strength of these muscles should be a main focus in your training program. One of the main movement patterns that these muscles help produce is known as the “hip hinge” movement pattern. Some fitness examples of this movement include the kettlebell swing, deadlift, and RDL.

Success in these exercises, or this movement pattern in general, relies heavily on your body’s ability to maintain good form under load, which is much easier when the muscles are up for the task. If muscles do not have the capabilities to withstand these forces, many issues could arise, commonly in the form of lower back pain.

The Functional Importance of the Glutes

This example does not stop in the gym, either. If you are at home and try to pick up a couch while rearranging furniture, the same rules apply. If your body (a big part of which being the glutes) is not strong enough to deadlift the couch, how did you get it up in the air? The simplest answer is that you were able to compensate from some other area (lower back) to hoist the couch up and move it. If strength levels were adequate to lift it, my guess would be you would not be feeling any pain.

On the opposite end of the spectrum, you could be a Division I linebacker who is looking to become more powerful while tackling. Tackling requires an enormous amount of power from the hip hinge position that allows one to deliver the biggest strike possible to the ball carrier. If I told you I would make you a stronger tackle with a few modifications to a training program, would you do it? I’d hope so. 

Top 5 Glute ExercisesGlute-n Free

So now that I’ve given my spiel about why training the glutes is important, here are my top 5 glute exercises that will help you develop a backside that Sir Mix-a-Lot would be proud of. These exercises start with the most basic and end with the most advanced.

  • Single-Leg Glute Bridge
  • Lateral Band Walks
  • Cable Pull-Through
  • Barbell Hip Press
  • Deadlift


This blog was written by Alex Soller, NIFS Athletic Performance Coach. To find out more about the NIFS bloggers click here.


Like what you've just read? Click here to subscribe to our blog!.

Topics: functional training muscles weightlifting stretching exercises glutes

Five Powerlifting Pieces to the Power Clean Puzzle

Olympic (Oly, ah-LEE) and powerlifting have become increasingly popular over recent years and will continue to grow, considering their application to functional training and athletic movement.

deadlift-2new.jpg
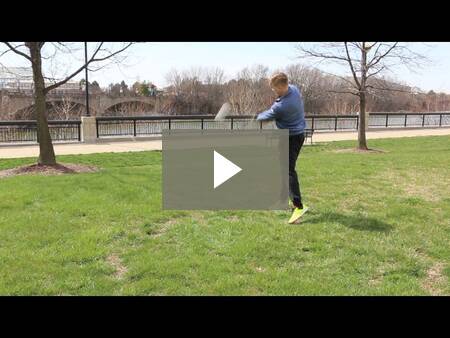
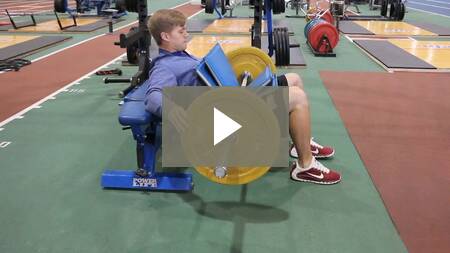
Whether you have particpated in our Powerlifting Competition or interested in joining,  I’m going to give you a solid progression that will allow you to develop a strong power clean with proper technique. The following movements can be a starting point for beginners or experienced lifters looking to get a fresh perspective on their current programs.

When I venture into any Olympic or powerlifting movements with a client or athlete, the most important factor is that their body be able to perform the movement that I am asking them to do. I get a good idea of this by using the Functional Movement Screening (FMS) and a few lower-intensity exercises (kettlebell swing, goblet squat, ground-based plyometrics, etc.) that utilize similar movement patterns to those that the Oly or powerlifts entail. If an individual is not able to perform these movements correctly or their FMS score contraindicates their participation in them, I would focus on other areas in order to better prepare that individual for these lifts. Once I believe someone is fully capable of performing the lifts (in this case with regard to the power clean progression), I could start them on the progression.

1. The Deadlift 

The first (and arguably most important, in my opinion) step in this progression would be to teach proper hip-hinge technique for a deadlift. This is the foundation of the majority of the Oly movements and needs to be perfected in order to reach the fullest potential in subsequent lifts. Learning this movement could take as little as a couple weeks, but will likely take more like 4 to 6 weeks depending on your current abilities. Take your time; it will be worth it!

Points of Emphasis:

  1. Keep your back flat.
  2. Keep the bar close to your body.
  3. Use a Hook or Pronated grip (which has a better translation to Olympic movements).
  4. Start by pulling slowly from the ground; velocity will be added later.
Recommended training time frame: 4 to 6 weeks (depending on ability level)

2. The Power Shrug

Once you have perfected the deadlift, you can implement the next movement. From the deadlift position, I usually transition to a power shrug. The power shrug is just what it sounds like, a shrug with more speed than normal. The power shrug allows for the client or athlete to feel what it is like to achieve triple extension after the deadlift. It begins with a deadlift to an RDL position (with the bar at or just below the knees). Once the RDL position is achieved, the hips are driven through to generate the upward momentum to the bar. The client simultaneously shrugs his or her shoulders toward their ears to finish the movement.

Steps to Achieve:

  1. Start with a deadlift to the RDL position.
  2. Once the RDL position is met, drive the hips through.
  3. Finish with shoulders shrugged toward the ears and on the tiptoes.
Recommended training time frame: 3 to 4 weeks

3.The Hang Pull

The next step in my progression would be to go into a hang pull. This movement is more of a “top-down” movement versus a “bottoms-up” movement when compared to the deadlift and the power shrug. The deadlift and power shrug start from the ground and move upward from there. In contrast, the hang pull starts from a standing straight up position. The ultimate goal for all of the movements will be to get to the powerful RDL position. The hang pull involves lowering the bar to the knees and then driving the hips through to generate an explosive upright rowing motion. You may integrate the shrug that you have learned in progression #2 in order to produce more of that upward drive. The movement finishes with the client coming down from their toes after the pulling motion.

Steps to Achieve:

  1. Stand up straight.
  2. Lower the bar down the legs in a hip-hinge motion.
  3. Once RDL is achieved, drive the hips through, shrug, and row.
  4. Finish on tiptoes.
Recommended training time frame: 2 to 3 weeks

4. The Hang Clean

Now the fun begins. Through the first three steps you’ve learned to properly hip hinge and how to achieve triple extension through the hips, knees, and ankles. You’ve learned to shrug and pull from steps 2 and 3. If done properly, step 4 (the Hang Clean) should be a piece of cake. The hang clean builds off of the hang pull by adding the firing of the elbows under and through the bar to achieve a front rack position with the barbell positioned across the shoulders. If you have been diligent through steps 1 to 3, this should not be an issue. The biggest problem I see with individuals in this stage would be a lack of mobility through the wrists, triceps, and shoulders. Timing is everything with these lifts, so once you know you are doing them correctly, practice, practice, practice. The less your mind has to think about any part of this movement, the more success you will see.

Steps to Achieve:

  1. Perform steps 1 to 4 for the Hang Pull.
  2. Slightly sink the hips.
  3. Pull and fire the elbows under the bar.
  4. Finish with the bar racked across the shoulders.
Recommended training time frame: 4 to 6 weeks

5. The Power Clean

You have made it this far; it’s time to seal the deal! The final progression for the power clean would be, well, the power clean. During this progression, your job will be to assemble all of the pieces of the power clean puzzle from steps 1 to 5. This movement will start with the deadlift to the RDL position, continue with a big shrug and pull, fire the elbows, and sink beneath the bar. It is essentially step #4, but we are pulling from the floor.

Sounds simple, right? Not exactly. This will introduce a whole separate challenge with regard to timing, but as always, your timing will get better with practice. Once you feel comfortable pulling from the ground and catching the bar in the upright/hips loaded position, catching into a front squat will be next (but you should perfect this first).

Steps to Achieve:

  1. Deadlift to RDL position.
  2. Drive hips through.
  3. Shrug shoulders and pull upward: get triple extension!
  4. Sink and fire elbows beneath the bar.
  5. Catch and rack the bar across the shoulders.
Recommended training time frame: 4 to 6 weeks

***

Olympic and powerlifting movements are definitely the king of the fitness world jungle. They should be done with extreme attention to detail due to the high velocities of the bars (Oly lifting) and extreme weights being used (powerlifting). That doesn’t mean you need to be a fitness expert to perform them; just learn how to do them correctly. Although these pieces to the power clean puzzle lead you in the right direction, it is always beneficial to have another set of eyes on you to make sure that everything is in working order. Realize that it takes a while for your body to adapt and grasp these movement concepts, especially if you are new to this type of lifting. Remember, be patient and a stickler on details; it will pay off in the long run!

***

NIFS 6th annual Powerlifting competition is coming in November. For more information and to get registered click here. Early Bird pricing is $45 until October 6th.

Screen Shot 2019-09-25 at 9.30.23 AM
This blog was written by Alex Soller, NIFS Athletic Performance Coach. To find out more about the NIFS bloggers click here.

Like what you've just read? Click here to subscribe to our blog!

Topics: NIFS group training NIFS programs weight lifting powerlifting functional movement assessments

The Importance of a Maintenance Phase for Athlete Training

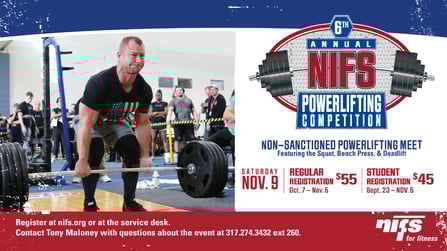
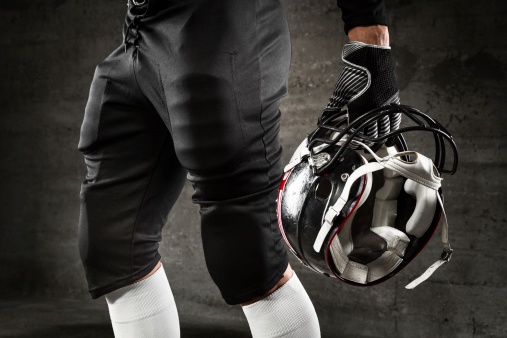
In NFL and college football, each week, a star player is hit with a sidelining injury. Possibly lost for multiple weeks, months, or at worst, the whole season. Injuries that are usually the result of bad luck or not being as physically prepared as they could have been. Hopefully your team, **knock on wood**, does not or will not have to deal with this at any point during their season. My team, my beloved Detroit Lions, look like a dumpster fire for reasons other than injuries.

The physicality of football increases every year. The players are getting bigger, faster, and stronger in training facilities across the country getting ready for that next season. Guys are always looking to take that next step during the offseason to ensure that they are a better player than they were the preceding year. Countless hours are spent in the gym and on the field trying to achieve this goal. Some training programs start the day after a season is over, whether it be after week 17 in the regular season or if your team wins the Super Bowl. It’s no secret that being a professional or collegiate athlete is a year-round commitment. 

Changing Training After the Season Begins

But what kind of training do players do after their season begins? Do they continue to train five or six days a week like they did in the offseason? Of course not. With large time commitments for practice, watching film, and simply resting, an athlete must shift their focus to making sure all of that hard work is not wasted over the course of the season. The most effective way to salvage the progress that you have made over the past five or six months is to enter a maintenance phase.

A maintenance phase is one phase or “macrocycle” (a large portion of a training year) that you should use during the start and duration of each athletic or competitive season. As mentioned before, this phase is used to preserve the strength, power, and muscle mass that was built in the many months prior to the season. 

What Does a Maintenance Phase Look Like?

Some characteristics of a maintenance phase include the following:

  • 2 (±1) workouts per week
  • 45 to 60-minute sessions
  • 2 (±1) sets per exercise. Main exercises should focus on strength, power (plyometrics, Olympic lifting, core lifts [bench, squat, deadlift]), and functional mobility.
  • Promoting overall health
As you can see, these phases don’t take much time, but could pay huge dividends throughout your season. The ultimate goal for many (if not all) sports, like the NFL, is to make the post-season. The teams that always seem to perform the best in those scenarios are the ones that are the healthiest or freshest. Continuing to lift throughout your competitive season will help you maintain the overall function of your body instead of gradually losing it throughout the season. As a wise man (Dr. Alan Mikesky) once said, “If you don’t use it, you lose it.”

Impact on Future Seasons

Don’t underestimate the importance of a maintenance phase, due to the implications that it could have on subsequent seasons. Think about this scenario:

Imagine you start training for your freshman year of college football squatting a maximum (1RM) of 315 pounds. After 4 months of preseason training, your 1RM has gone up to 365 pounds. Once the season starts, you stop lifting weights and focus on football. Three months later when the season is finished, you hit the weight room for the first time. Your 1RM squat is back to 315 pounds. Your body had no reason to keep the neural drive of the muscles because you no longer required it to. You start your offseason conditioning program and increase your squat back up to 365 pounds and exceed those numbers by squatting 380. Once your sophomore season starts, you stop lifting weights once again. At the end of the season, your 1RM squat is back to 315. 

This is a vicious cycle that never allows for any solid progression. You start from square-one every year. Now think about the same scenario with a few changes:

Imagine you start training for your freshman year of college football squatting a maximum (1RM) of 315 pounds. After 4 months of preseason training, your 1RM goes up to 365 pounds. Once the season starts, you begin an in-season maintenance phase. You lift two days per week, making sure your squat loads are significant enough to maintain your 1RM (80-95%). Three months later when the season is finished, you hit the weight room for the beginning of your offseason training program. Your 1RM squat is 355. Although you dropped 10 pounds, it is not as significant as the 50-pound loss from the previous scenario. From your offseason program, your 1RM increases from 355 to 410. Once your sophomore season starts, you begin another in-season maintenance phase. At the end of the season, your 1RM has only dropped to 405. 

***

As you can see, progression of strength (and power with other lifts) has to be maintained year round. This goes for all athletes throughout their seasons. If they want to continue to improve, they must prevent the loss. It is as important of a cycle of training as any. Without a properly structured in-season maintenance phase, you will be starting from the same place every time you start a new offseason training program.


This blog was written by Alex Soller, NIFS Athletic Performance Coach. To find out more about the NIFS bloggers click here.

Like what you've just read? Click here to subscribe to our blog!

Topics: training weightlifting strength power professional athlete muscle mass post-season athletic performance

Foundations of a Strong, Healthy Body: Strength Building

ThinkstockPhotos-475675484
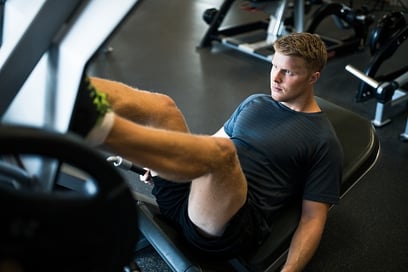
You have finally achieved your goal of adding some lean muscle mass, so what now? Where do you go next? The next step I would take would be to train your body to use those newly developed muscles to their fullest potential. This increase in strength building can come from numerous sources, some of which you may have already experienced.

Strength improvements may be developed from different types of training and at different times in programs. Many of these improvements can be obtained through two modes: neurological adaptations and increases in muscle cross-sectional area (CSA; muscle size). 

Neurological Adaptations

Neurological adaptations can be noticed only days after starting a new training program, depending on your experience with resistance training. If you have no prior experience with it, the stimulus of a few sets of different resistance exercises over one or two days might give your body enough reason to improve its strength levels. But how could the body possibly get stronger in one or two training sessions? Did your muscles get any bigger? No. Your body (the brain, specifically) is becoming more efficient at firing those muscles you have used to meet the demands you have placed on them. 

Quick improvements, like those via neurological adaptations, will not always be achievable. Your brain/body will catch up to what you are doing eventually, which is why other modes of training are important. 

Increases in CSA

Another type of strength development is to increase the muscles’ cross-sectional area, or make the muscle bigger. This can be achieved by following my previous blog, which goes over muscular hypertrophy and different variables you need to control to get it. When a muscle becomes larger, it simply has the ability to create more force than it did when it was smaller. This will definitely lead to increases in your strength levels.

If you plan to follow the structure that I have laid out for you over this series of blogs (Cardio Workouts, Muscular Endurance, and Muscle Building), you are ready for that next step. You may have put on some lean muscle mass (hypertrophy), or you may not have. Regardless, you can still take your strength training to the next level. 

Strength improvement in this sense is almost a combination of the two modes of development I stated earlier, neurological adaptations and increases in muscle CSA. You have new muscle that you have worked hard to build, but now you need to train your body to get that muscle firing at optimal levels. Your new muscle needs that neurological adaptation. 

Recommended Workouts

True strength training is time consuming, so be ready for a lot of downtime between sets. When you start your program, try 2 to 3 sets with repetitions ranging from 1 to 5 (heavy weight!) on your core lifts (bench, squat, and deadlift). Add in a few more strength exercises after the first few weeks. 

Rest periods can vary; however, you want to have at least 2 to 5 minutes between sets. This is CRUCIAL for strength development. You want to make sure you are 100% rested or very close to it. This will allow your body to perform at the highest level during each set. The more you hit this high level, the easier it will become to fire those muscles, which increases strength levels. 

Get after it!

Like what you've just read? Click here to subscribe to our blog!

This blog was written by Alex Soller, NIFS Athletic Performance Coach. To find out more about the NIFS bloggers click here.


Topics: workouts muscles strength muscle mass muscle building

Foundations of a Strong, Healthy Body: Muscle Building

ThinkstockPhotos-494559503-1Okay, so you’ve been successful in your first two phases of developing your new workout program. You have progressed in your cardiovascular exercises throughout the weeks and your muscles have been feeling more “in shape” from your high repetition, low-weight muscular endurance training. What now?

The next progression I would recommend would be to start training for muscular hypertrophy, or more simply put, muscle building. 

Getting Ripped Versus Getting Toned

Muscle building is a term that seems fantastic to some (guys) and horrific for others (ladies). Guys (depending on your age) have an affinity to building muscle on a higher level because of a little hormone called Testosterone. The higher levels in men will allow for more tissue development, while the lower levels in women will not. Training for hypertrophy in females will yield a more desirable “toned” look versus a large gain in mass.

Changing the Variables to Develop Muscle Mass

When you are training for an increase in lean muscle mass, you will need to tweak the variables that you used for muscular endurance. To recap, those variables included sets, repetitions, and rest periods. 

  • The sets you may perform can also start very low (1-2) if you are new to this type of training. As your experience increases, the amount of sets can double or even triple. 
  • The repetitions that you perform will also adjust. Instead of doing reps in the 15-20 range, they will be more in the 8-12 range. With the decrease in repetitions comes an increase in the resistance (weight) that you are using. You want to make sure that each set is performed with a weight that can be done no more than 12 times. 
  • Rest periods will also remain relatively low. 30 to 60 seconds of rest between sets is recommended. You will definitely “feel the burn” if you do it correctly.

The next blog in this series talks about how to activate your newly developed muscle tissue to increase your overall strength.

Get after it!

Like what you've just read? Click here to subscribe to our blog!

This blog was written by Alex Soller, NIFS Athletic Performance Coach. To find out more about the NIFS bloggers click here.

Topics: cardio muscles resistance endurance weightlifting muscle mass muscle building

Foundations of a Strong, Healthy Body: Muscular Endurance

ThinkstockPhotos-178630269Once you have mastered the basics of cardiovascular exercise, resistance training is the next viable option. If you have no physical limitations (like the ones shown in the Functional Movement Screen), basic resistance training may continue your improvement in building a better body. Remember, not all resistance training is created equal, and the sets, reps, and other variables will determine the result that you receive.

The first goal that I have people focus on is usually muscular endurance. Muscular endurance is the ability for your muscles to withstand a long duration of work. It is important throughout all walks of life, whether it be for preparation for a marathon or doing a day full of yard work. Your goals in everyday life determine your muscular endurance goals and the ways it can be achieved. 

There are three variables that are vital to how your body responds to all resistance training, not just training for muscular endurance. Those three are:

  1. Sets
  2. Repetitions
  3. Rest Periods

The number of sets you do during muscular endurance training may be relatively low. For someone new, 1 to 2 sets may be sufficient to see improvement. For those of a higher training level, 3 to 4 may be required. The number of repetitions you perform is the next important variable. If you want your muscles to be able to last a long time, repetitions will be high. 15 to 20 repetitions per set is usually sufficient but some individuals might increase reps above that level. The final variable is the rest period. The rest period between your sets has to be short. Less than 30 seconds is generally the accepted time but time can be whittled down to 15 seconds or less for optimal adaptations for muscular endurance.

This type of training builds that initial workload for the muscles to withstand the heavier/more intense training that could be done in the future. Below you will find an example of a lower body muscular endurance resistance training routine:

  1. Barbell Squat 3x15
  2. Kettlebell Lateral Lunge 3x10/Leg
  3. Dumbbell Step-Ups 3x10/Leg
  4. Kettlebell Swings 3x20
  5. Hamstring Curls 3x15
  6. Calf Raises 3x15

The next blog in this series will talk about the next phase of building a program, everybody’s favorite, building muscle.

Get after it!

Like what you've just read? Click here to subscribe to our blog!

This blog was written by Alex Soller, NIFS Athletic Performance Coach. To find out more about the NIFS bloggers click here.

Topics: muscles resistance endurance

Foundations of a Strong, Healthy Body: Cardio Workouts

ThinkstockPhotos-77293911Rome wasn’t built in a day, and neither is a physically fit and healthy body. The great city was built as the result of the culmination of years and years of hard work. From streets to buildings, each single brick or stone was set with a vision in mind to create the best city in the world. I’m sure many mistakes were made throughout the process; however, those mistakes were only microscopic setbacks in the overall plan.

In exercise, the same rules apply. Some programs you try may yield great results; others may fall flat. You may see success for a couple months and then plateau. Remember: it is all a part of the process. Having a strong fitness foundation sets you on the best path to success in your goals and helps minimize the fitness mistakes you make along the way.

Physically fit characteristics must be set individually. These specific traits, such as cardiovascular fitness, muscular endurance, muscular strength and power, and body mobility, are all equally important. They are the foundation of building a strong and healthy body. You must work on them to maintain or improve your current levels. The majority of individuals possess the ability to improve their current state of health throughout these fitness aspects. Whether or not they choose to address them is another story.

Cardiovascular Fitness

I start by talking about cardiovascular fitness. When it comes to starting a program, begin with the basics: running (or walking), biking, and rowing. These three modes of exercise can all be used to help build that cardiovascular base that you can improve upon continually throughout your exercise program. Although it may seem like it is very basic, all individuals need to have some sort of cardiovascular base they can work off of. Without it, your ability to get through workouts (running, lifting, etc.) will be compromised.

My Recommendation: Intermediate Skill Levels*

  • Run/Walk: 10 minutes at a moderate pace
  • Bike: 10 minutes at a constant and moderate pace
  • Row: 10 minutes, 1 minute at a fast pace, 1 minute at a slow pace

*Adjust time or intensity based on your individual skill level.

Part 2 of this blog series will focus on muscular endurance and how to structure your workouts to improve your muscles’ ability to withstand long-duration workouts.

As always, get after it!

Like what you've just read? Click here to subscribe to our blog!

This blog was written by Alex Soller, MS, CSCS, IUPUI Strength and Conditioning Coach and NIFS Trainer. To find out more about the NIFS bloggers click here.

Topics: exercise fitness cardio running walking workouts cycling