A well-implemented mobility and recovery routine is crucial for your overall health, longevity, and the sustainability of your fitness routine. These practices help prevent muscle soreness and tightness while maintaining the pliability and strength of your joints and ligaments—ultimately allowing you to keep working hard in the gym.
Mobility, flexibility, and recovery also influence long-term health. A mobile, flexible body not only enhances movement during workouts but also supports your ability to perform daily activities as you age. In addition, flexibility work supports healthy blood flow throughout the body. At NIFS, we offer several classes and services designed to help you stay mobile, flexible, and well-recovered. Read about them below and why you should incorporate them into your routine!
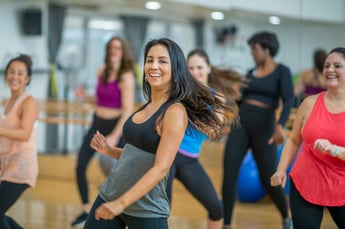
 Yoga and Stretch Classes
NIFS Yoga Levels One and Two, Fundamentals of Stretching, and CIRCL Mobility classes provide accessible ways to integrate mobility, recovery, and mindfulness into your life.
Yoga allows you to slow down your movement patterns, focus on your breath, and tune in to what your body feels in each pose. It is also a safe, low-impact form of movement that remains beneficial as we age.
Stretch classes help alleviate and prevent muscle soreness while maintaining joint and ligament health—both essential for sustaining any fitness routine long term. The static and dynamic stretching in these classes encourages mindfulness and deeper breathing.
Whether you’re a high-level athlete or simply want to move more comfortably throughout your day, adding yoga or stretch classes to your routine will support healthier joints, improved flexibility, and better muscle recovery.
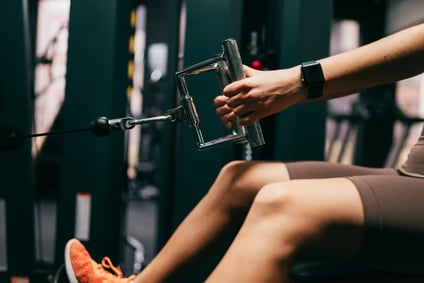
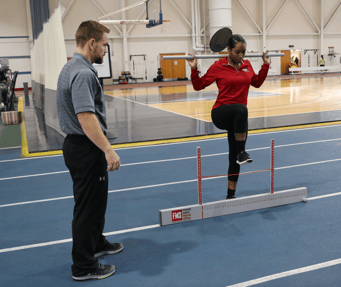
Functional Movement Screen and One-on-One Assisted Stretching
A Functional Movement Screen (FMS) can reveal muscle or joint imbalances that may be affecting your movement quality or efficiency. Identifying these imbalances early not only enhances your current exercise routine but also supports healthy movement as you age.
If you’re unsure where to begin, one-on-one assisted stretching is a great option. This personalized service benefits both the aging adult hoping to stay mobile and independent, and the marathon runner training for a new PR. Assisted stretching targets specific muscles without placing strain on your body, allowing for deeper, more effective, and mindful stretching.
Both of these services are valuable tools for any individual looking to improve performance, mobility, and overall quality of life.
A consistent routine of mobility, flexibility, and recovery is one of the most important investments you can make in your long-term health. NIFS offers a variety of classes and services to help you move better, feel better, and age well—no matter your fitness level.
It's not too late to participate in our Mindful November program! Be sure to complete each week’s prompt and grab a punch card. Attend your favorite yoga or stretch classes for a chance to win your own 60-minute assisted stretching session.
 Movement is considered one of the best forms of preventive medicine to protect our health. In a general sense, the more we move, the healthier we tend to be. Movement isn’t restricted to structured exercises. Your body doesn’t really differentiate between walking up a flight of stairs or stepping on a stair climber. The wonderful thing about physical activity is that our bodies inherently know how to recover and adapt.
 Finding time to move can be a challenge when life gets busy—but adding more physical activity into your daily routine doesn’t have to be complicated. Whether you're tied to a desk, juggling responsibilities, or managing a packed schedule, even small changes can lead to big improvements in your energy, mood, and overall health.
 In this blog series, I have discussed
 The “perfect” workout rarely happens. Every so often, you may have one of those training sessions where every block flows smoothly and programmed repetitions and sets are executed flawlessly. But for most days, there will be missed reps, you may feel more fatigued than you think you should, or the workout may not come together as you hoped it would. That is fine. Your goal should be to strive to be as close to perfect as possible, with the understanding that it may not always happen.
 The traditional bodybuilding split of working one muscle group per day might work for the dedicated, high-level competitive bodybuilder who makes their living in the gym. But for the general population only looking to shed some unwanted pounds and improve their overall health, the traditional bodybuilding split is not ideal. Working multiple muscle groups in the same session is much more ideal because it ramps up the body’s metabolism more than working a single muscle group each day. To achieve this, we train the movement, not the muscles.
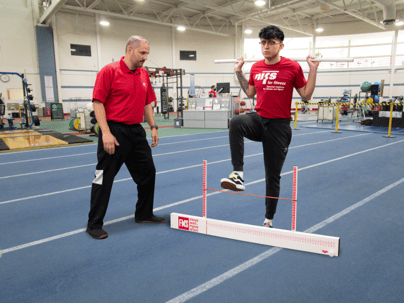

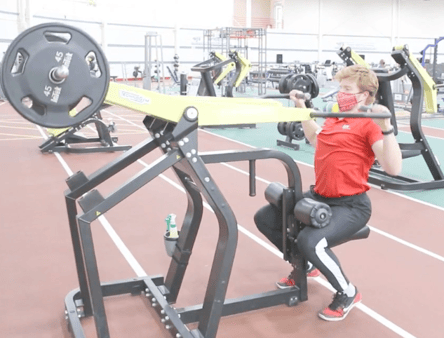
 When you begin your fitness quest and are getting started on a new program, finding exercises that are appropriate for you is key to your success. Your fitness staff at NIFS has your back! Training methods and training tools developed from years of research and practice have shown that sometimes a simple exercise done well can be quite effective.